Scheduling operations
Run the calendar day to day: reminders, the waitlist, visit policies, the calendar itself, and what to do when something looks off.
Scheduling operations
Run the calendar day to day: reminders, the waitlist, visit policies, the calendar itself, and what to do when something looks off.
Configure patient notifications and follow-up escalation
The Patient Notifications tab holds two patient-facing policies — Follow-up Reminders (when a physician asks a patient to schedule another visit) and Appointment Reminders (the standard upcoming-visit nudges). The Follow-up Reminder Policy also has a separate Care Team Escalation that can alert selected organization users if the patient still has not scheduled by the chosen date.
- Open
Admin → Scheduling → Patient Notifications. The top of the page shows the channel readiness check for email, the practice SMS sending number, and push notifications. Follow-up policy changes here are organization-wide. - Choose what anchors the follow-up cadence. Select Request date when each attempt should be a number of days after the request was created. Select Follow-up due date when the cadence should count backward or forward from the requested follow-up due date — the end of the follow-up window recorded by the physician.
- Build the patient attempt rows. For a request-date cadence, enter each attempt's day after the request. For a due-date cadence, choose days before due date, on due date, or days after due date. Set the organization-local send time and one or more channels (Inbox, SMS, Email) for every row. Keep the rows in chronological order.
- Keep a review window when needed. Minimum review window prevents the first patient outreach from sending earlier than the configured number of hours after the request is created. If a due-date offset has already passed, Hero EMR moves that attempt forward to the first eligible time instead of sending before this review window. Patient-facing sends still honor the safe contact window and channel preferences.
- Choose who receives an unscheduled-patient alert. Under Care Team Escalation, open Inbox recipients, search the organization user list, and select one or more physicians or staff members. Then schedule the alert a number of days before, on, or after the follow-up due date. Leaving the recipient list empty turns this escalation off.
- Know when the care-team alert fires. At 9:00 AM in the organization timezone on the selected date, each chosen recipient gets one direct Hero EMR inbox message only if the follow-up is still unscheduled. Hero EMR skips the alert when the patient has already booked and prevents duplicate alerts if the background check retries.
- Confirm follow-up booking defaults. Follow-up reminder links resolve the organization's office or virtual follow-up visit type name against the physician's active visit types in
Visit Config. If the minimum review window is 0 hours and the first eligible attempt includes Inbox, the patient portal request can appear immediately; SMS and email still respect their configured send time and safe-contact rules. - Set the Appointment Reminder Policy. Toggle reminders on, choose whether to bypass or respect quiet hours, and add timing offsets for each upcoming-visit reminder (for example, 7 days, 1 day, and 2 hours before).
- Save each policy.
Save Policyapplies the follow-up cadence and care-team escalation to active unscheduled follow-ups. Saving the appointment policy automatically resyncs reminders for upcoming appointments; useResync All Reminderswhen you need to force that rebuild.
Patient channels
- Email — uses the patient's email on file when the notification purpose permits.
- SMS — requires practice text delivery to be active and a sending number assigned.
- Push — available when the patient has an active device registered.
- Inbox — lands in the patient's portal inbox when portal messaging is available.
Timing and recipients
- Due-date offsets use the organization's calendar and timezone, not the browser's local timezone.
- Patient reminders respect their safe contact window and communication preferences.
- Care Team Escalation sends a direct internal inbox message only to the selected active organization users.
- Changing and saving the policy recalculates active unscheduled follow-ups.
Turn on the patient waitlist
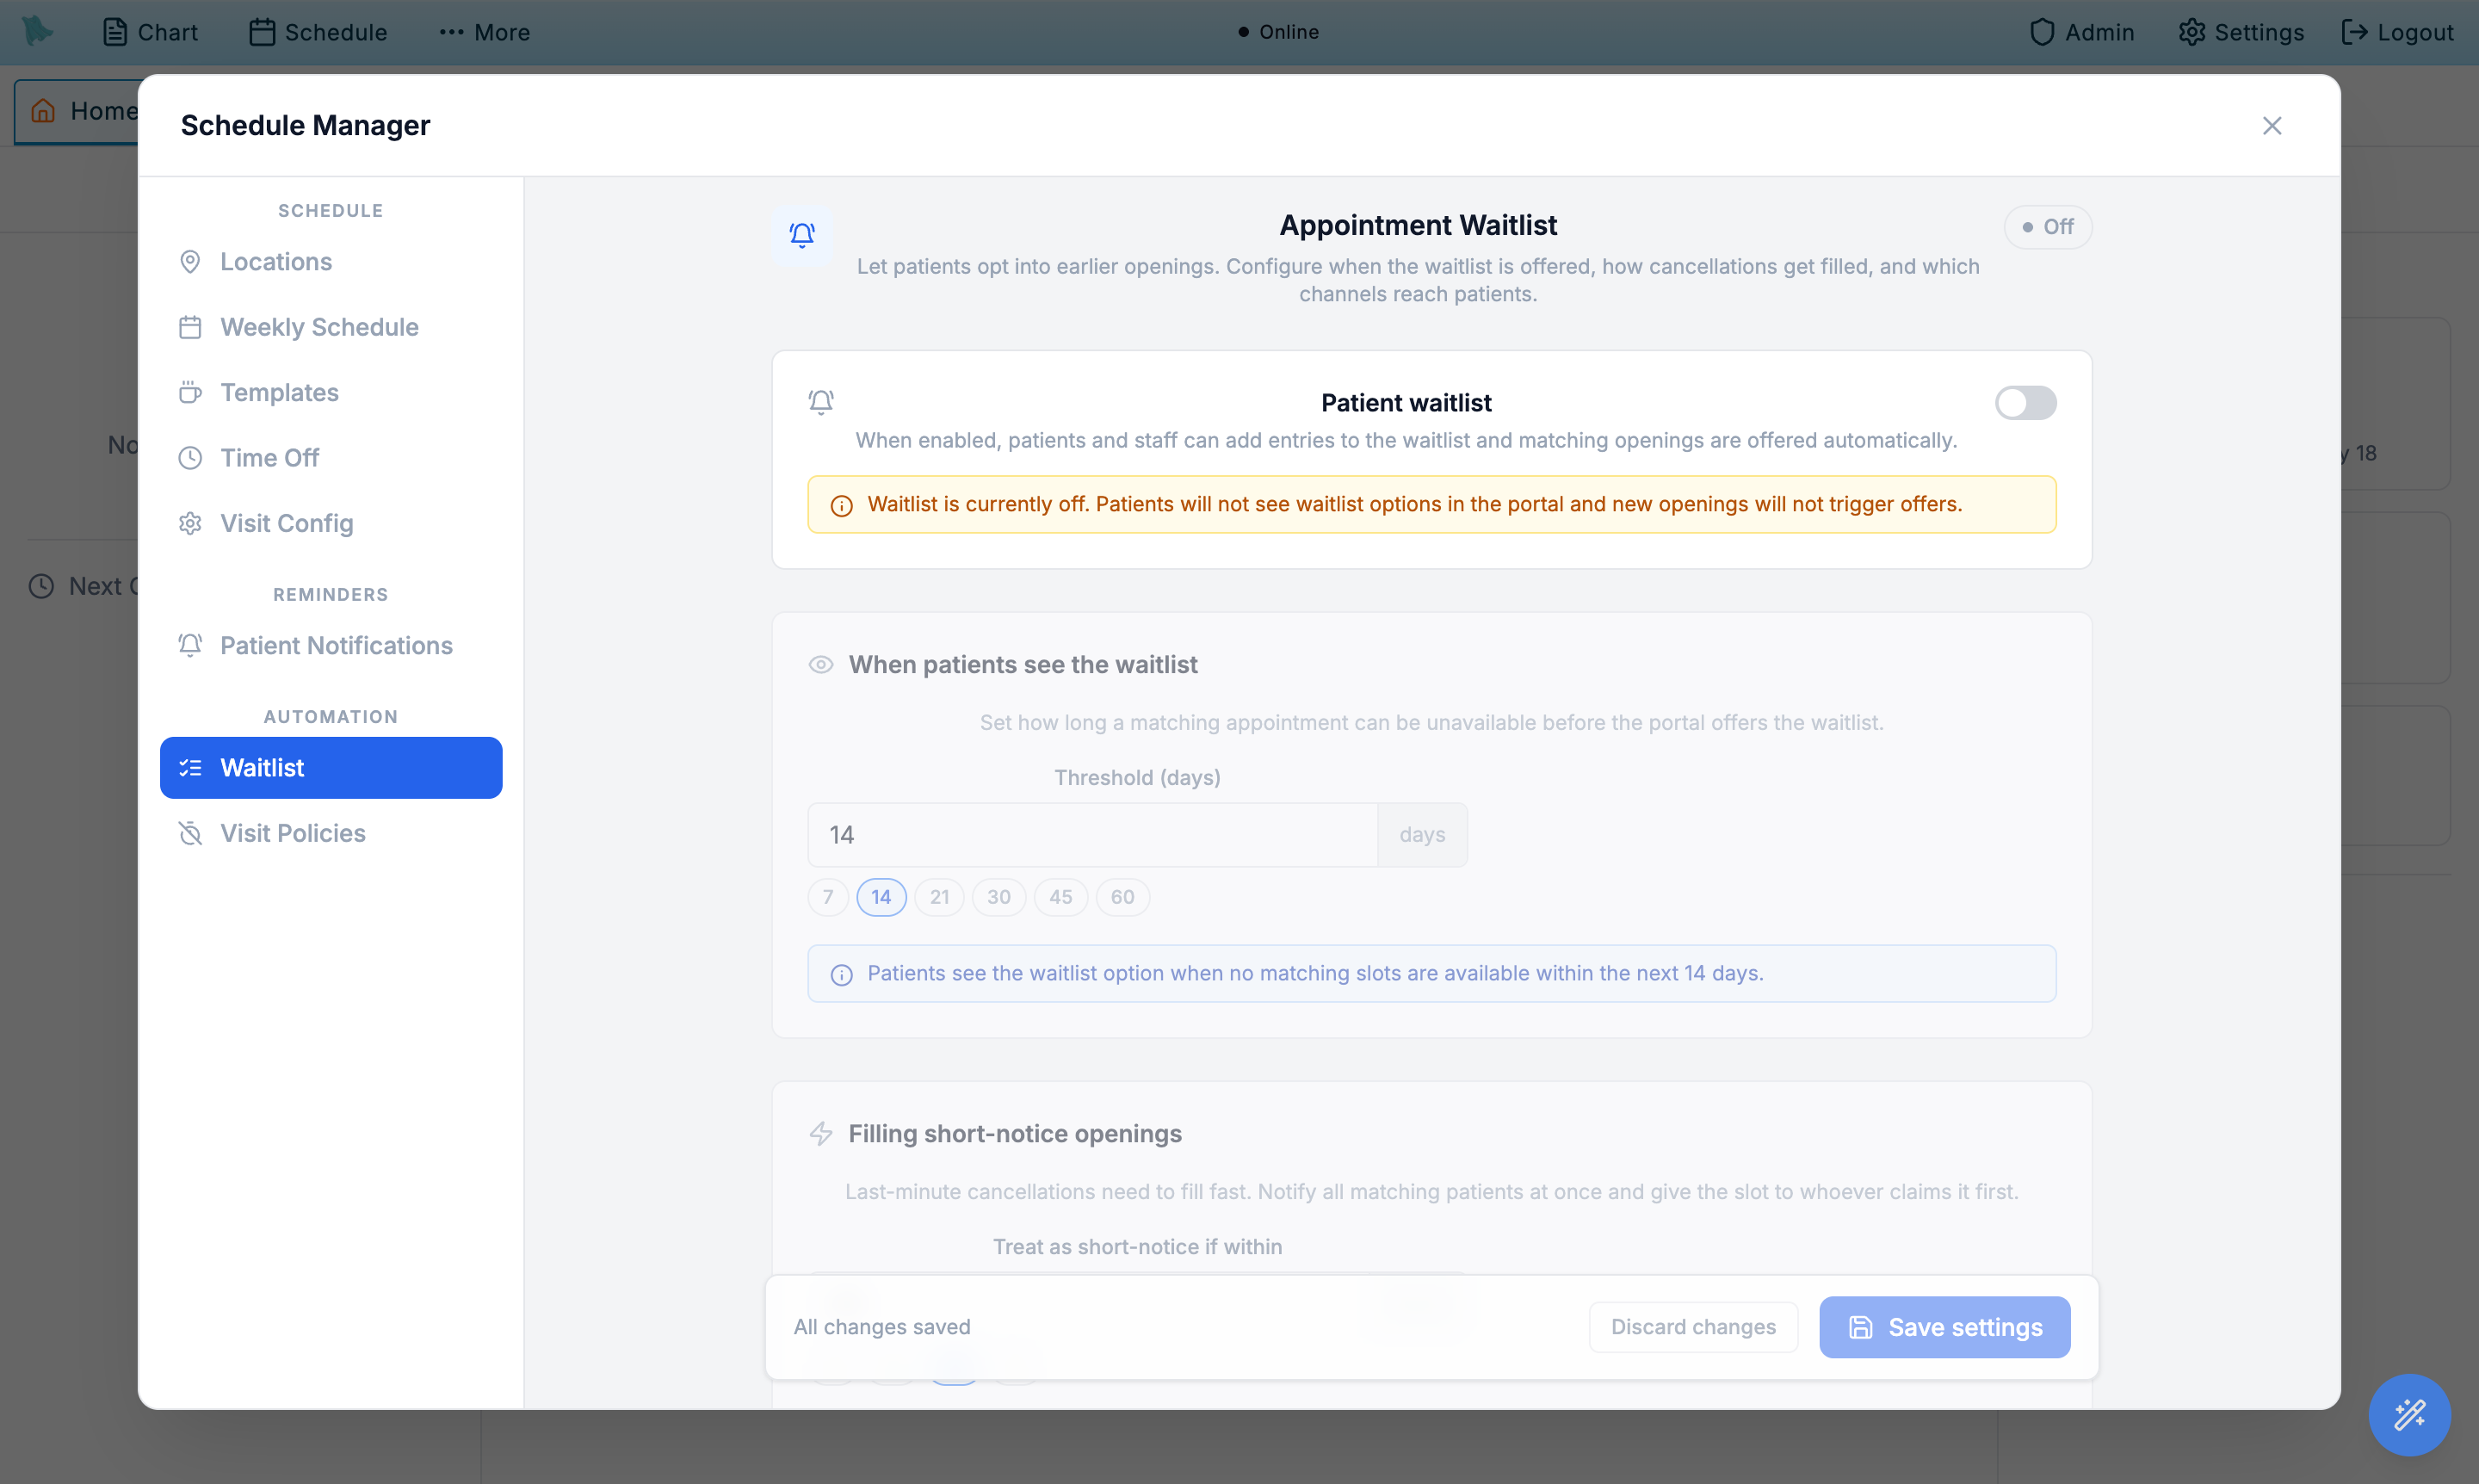
The waitlist lets patients opt into earlier openings when the calendar fills up. When a cancellation creates a slot, Hero EMR automatically reaches out to matching patients in priority order. Configure when the waitlist is offered, how short-notice cancellations are filled, and which channels are used.
- Open the
Waitlisttab. By default the waitlist is off — toggle Patient waitlist on to enable it. - Set the visibility threshold. Patients only see a waitlist option when no matching slots exist within the next N days (default 14).
- Configure short-notice fan-out. Decide when an opening counts as short-notice (default within 48 hours). Short-notice slots notify all matching patients at once — first to claim wins.
- Configure planned-opening cohorts. For longer-lead openings, set the cohort size (how many patients to notify at a time) and the wait between cohorts (default 24 hours).
- Pick notification channels. Email is best for planned openings; SMS for short-notice; push if patients have the app.
- Set the entry lifecycle. Stale entries auto-expire after N days (default 90) so the queue stays accurate.
Set visit cleanup policies
Visit policies keep the calendar tidy after the fact. Two automations are available: marking still-scheduled visits as no-shows after a grace period, and cancelling clearly stale visits that were never closed out.
- Open the
Visit Policiestab. These settings are organization-wide, so they apply to every physician. - Choose how no-shows are handled. Under No-show handling, pick
Manual(staff mark missed visits themselves — the shipped default) orAutomatic(the system flips still-"Scheduled" visits to No-Show once the grace period passes). Automatic no-shows also trigger any configured no-show billing fees. - Set the grace period. With
Automaticselected, pick aTimingpreset — 5, 10, 15, 20, 30, 45, or 60 minutes after the appointment, orCustom— and theMinutes afterfield takes anything from 5 to 60. The default is 15 minutes. The applies to chips underneath let you drop Telehealth so only in-person visits are auto-marked. - Enable Auto Cancel Stale Visits for data hygiene cleanup of forgotten or orphaned bookings. Pick how long a visit sits before it is cancelled: 24 hours, 48 hours, 72 hours (default), 1 week, or 2 weeks. Stale cancellation never applies a billing fee — use no-show handling for anything that should bill.
- Click
Save Policies.
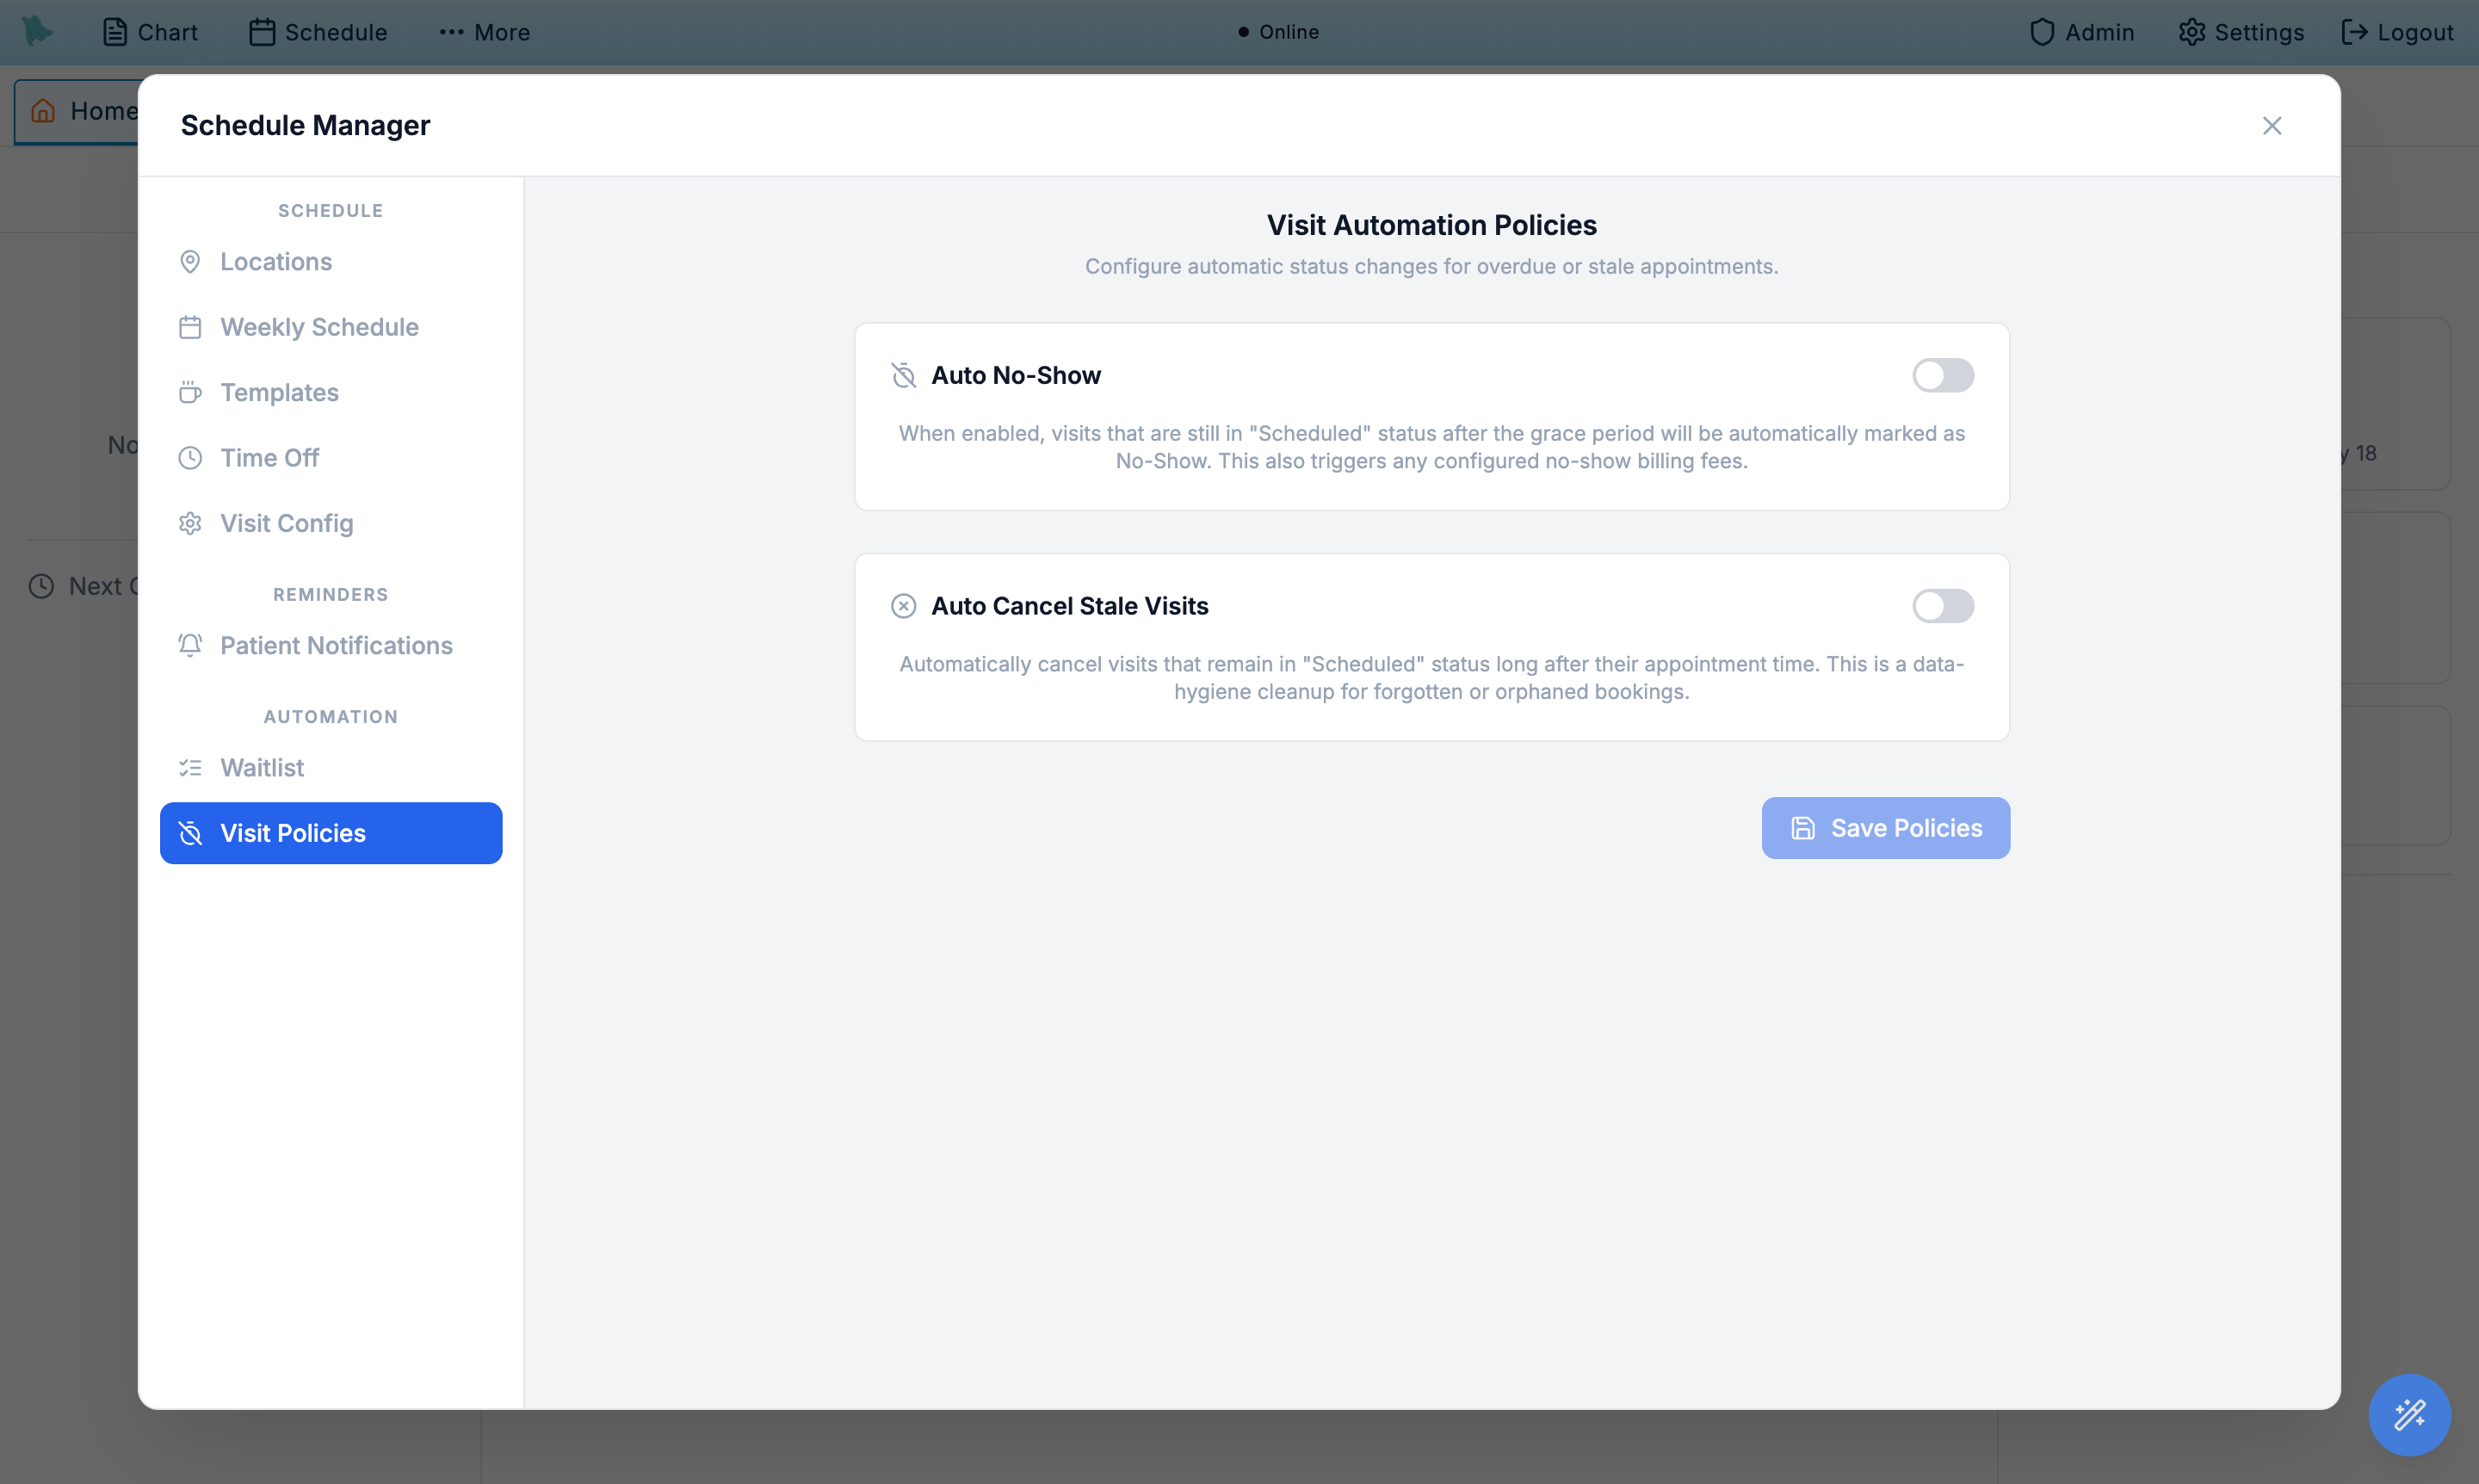
Automatic picked — the timing preset, Minutes after field, and the applies to chips only render in this mode; Manual shows the two cards alone. Auto Cancel Stale Visits below it likewise hides its interval options until you switch it on.Use the calendar
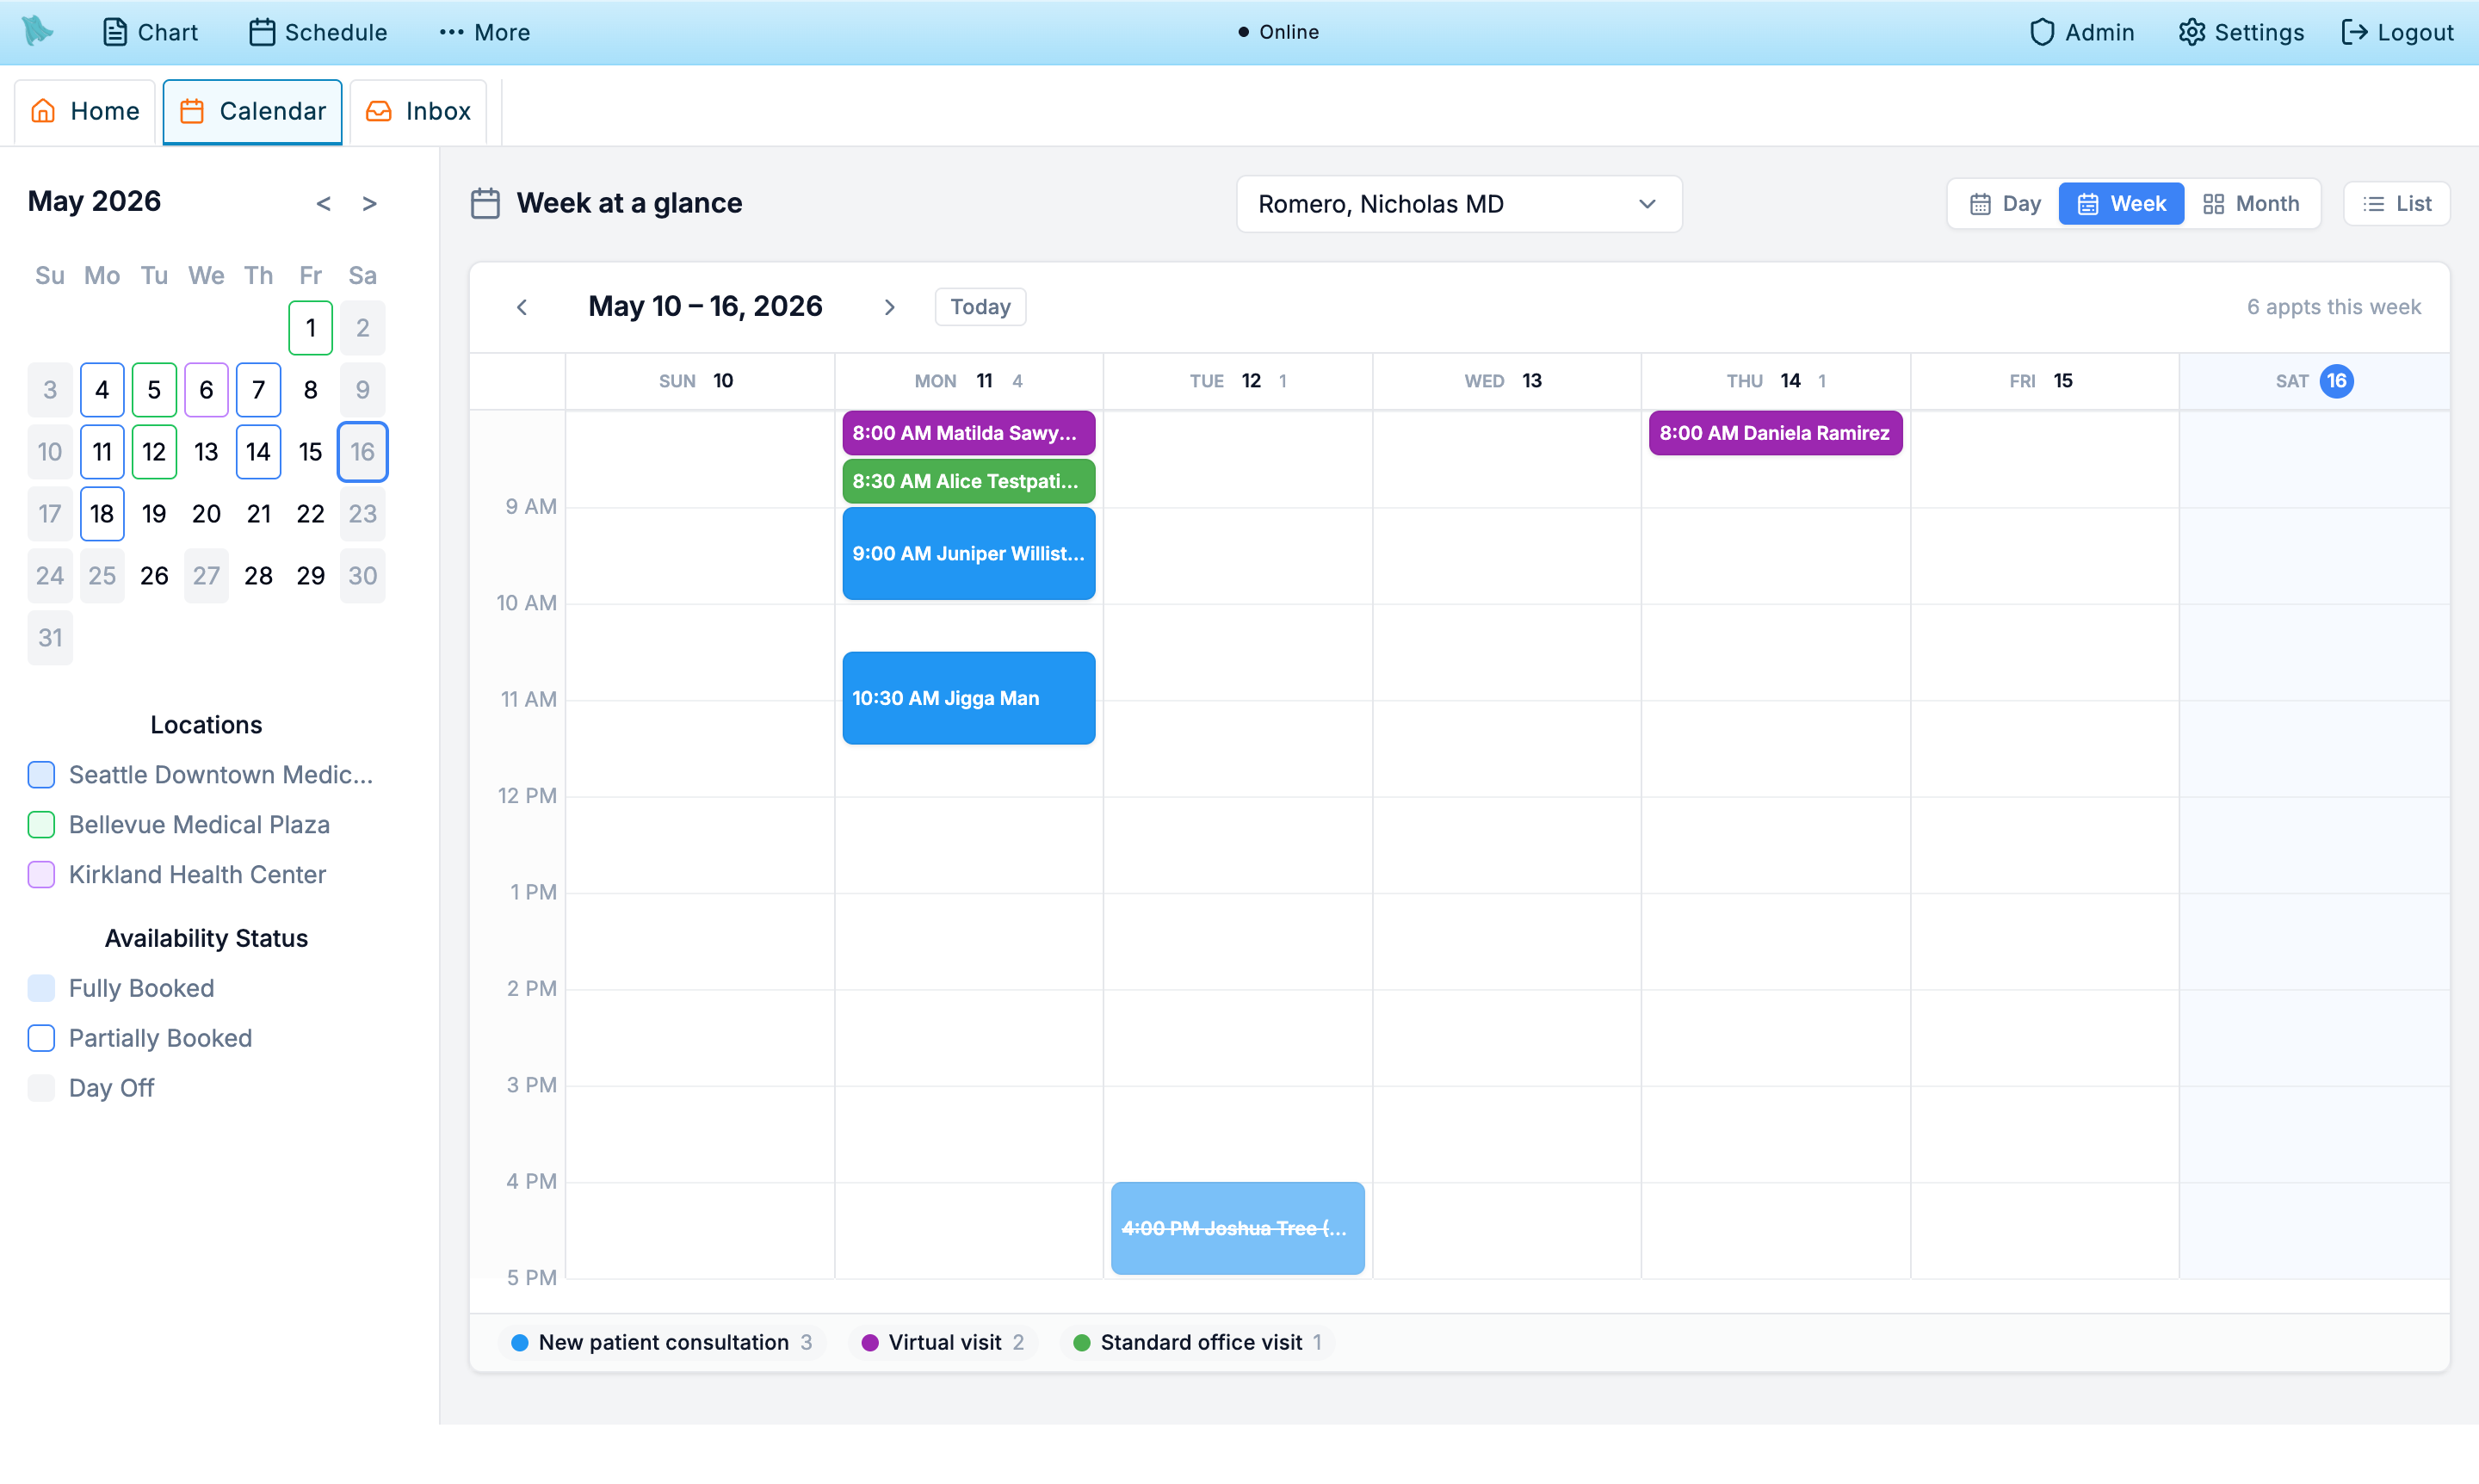
Once setup is complete, the calendar is the everyday surface. Open it from the top navigation. Each physician sees their own working hours (white), templates (colored blocks), time off (grey), and existing appointments (color matches the visit type).
Day, Team, Week, and Month views
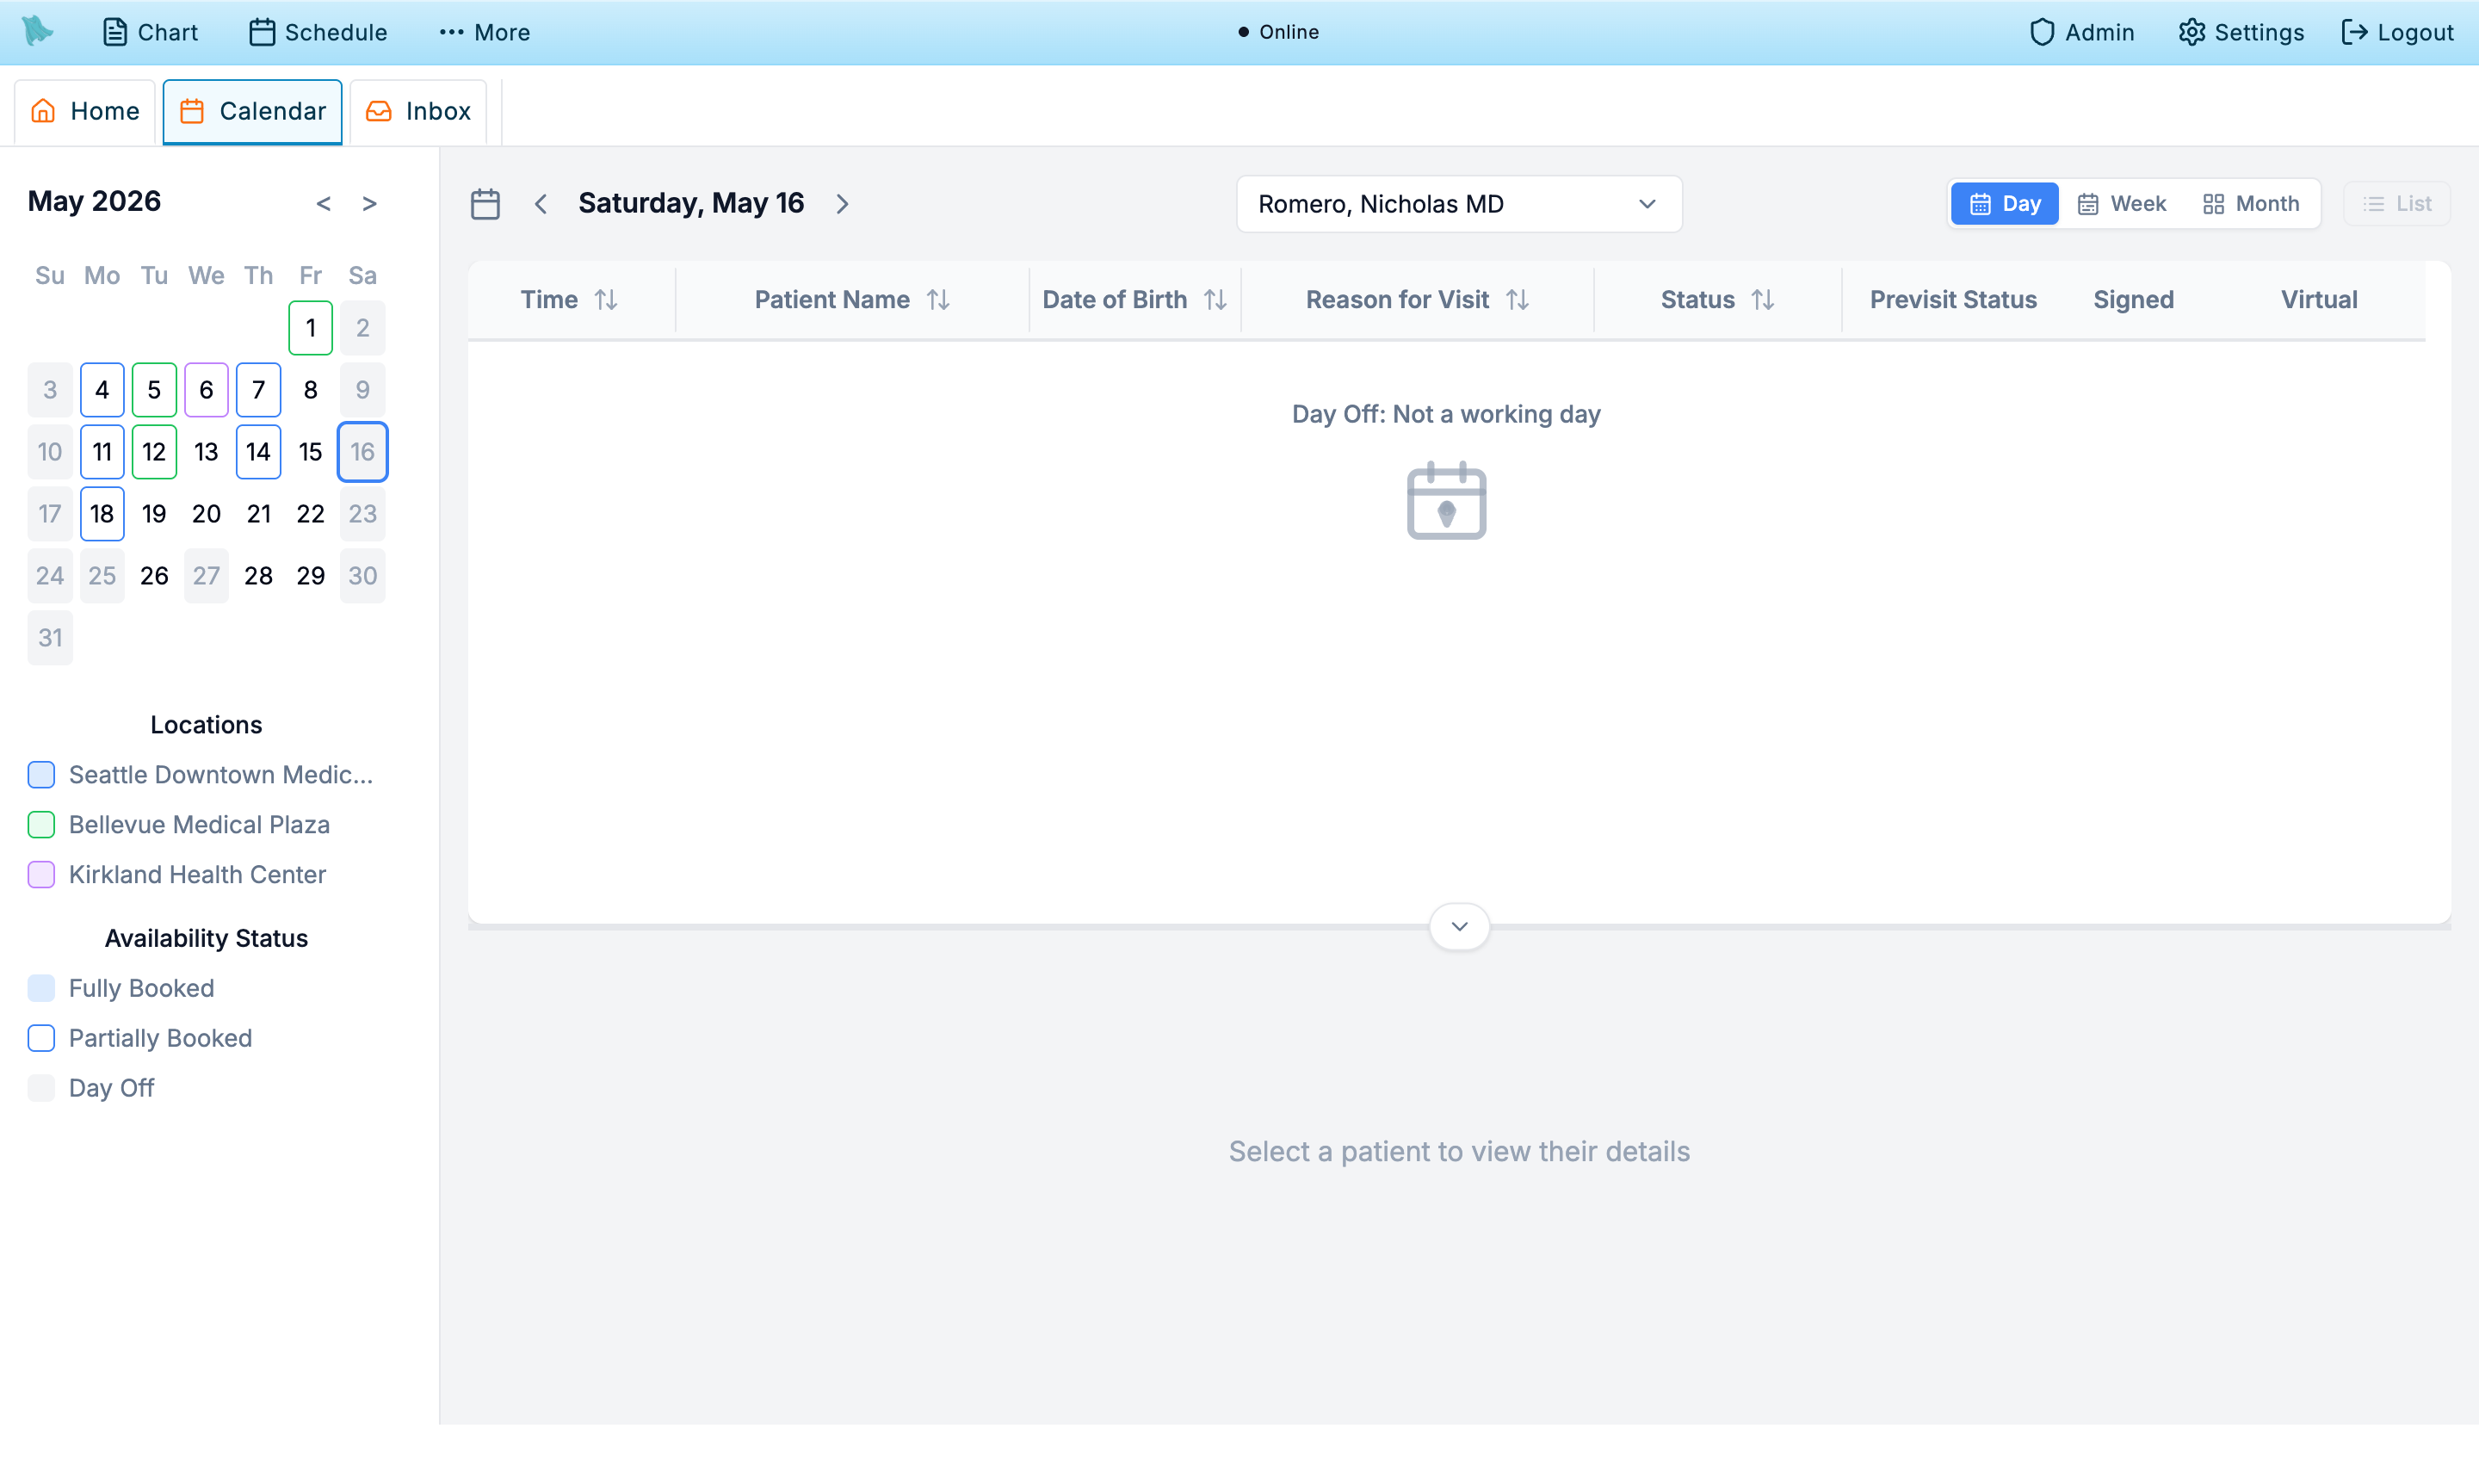
- Day view is a sortable table of the day's appointments, not a time-grid timeline. Its columns are Time, Patient Name, Date of Birth, Reason for Visit, Status, Previsit Status, Signed, and Virtual; the first five sort on click and the column widths are draggable.
- Team view puts several physicians side by side as day columns (four by default, chosen in the physician selector). When the waitlist is on, a waitlist panel opens beside the columns so you can fill an opening from the queue.
- Week view shows the seven-day grid, useful for spotting gaps and template blocks.
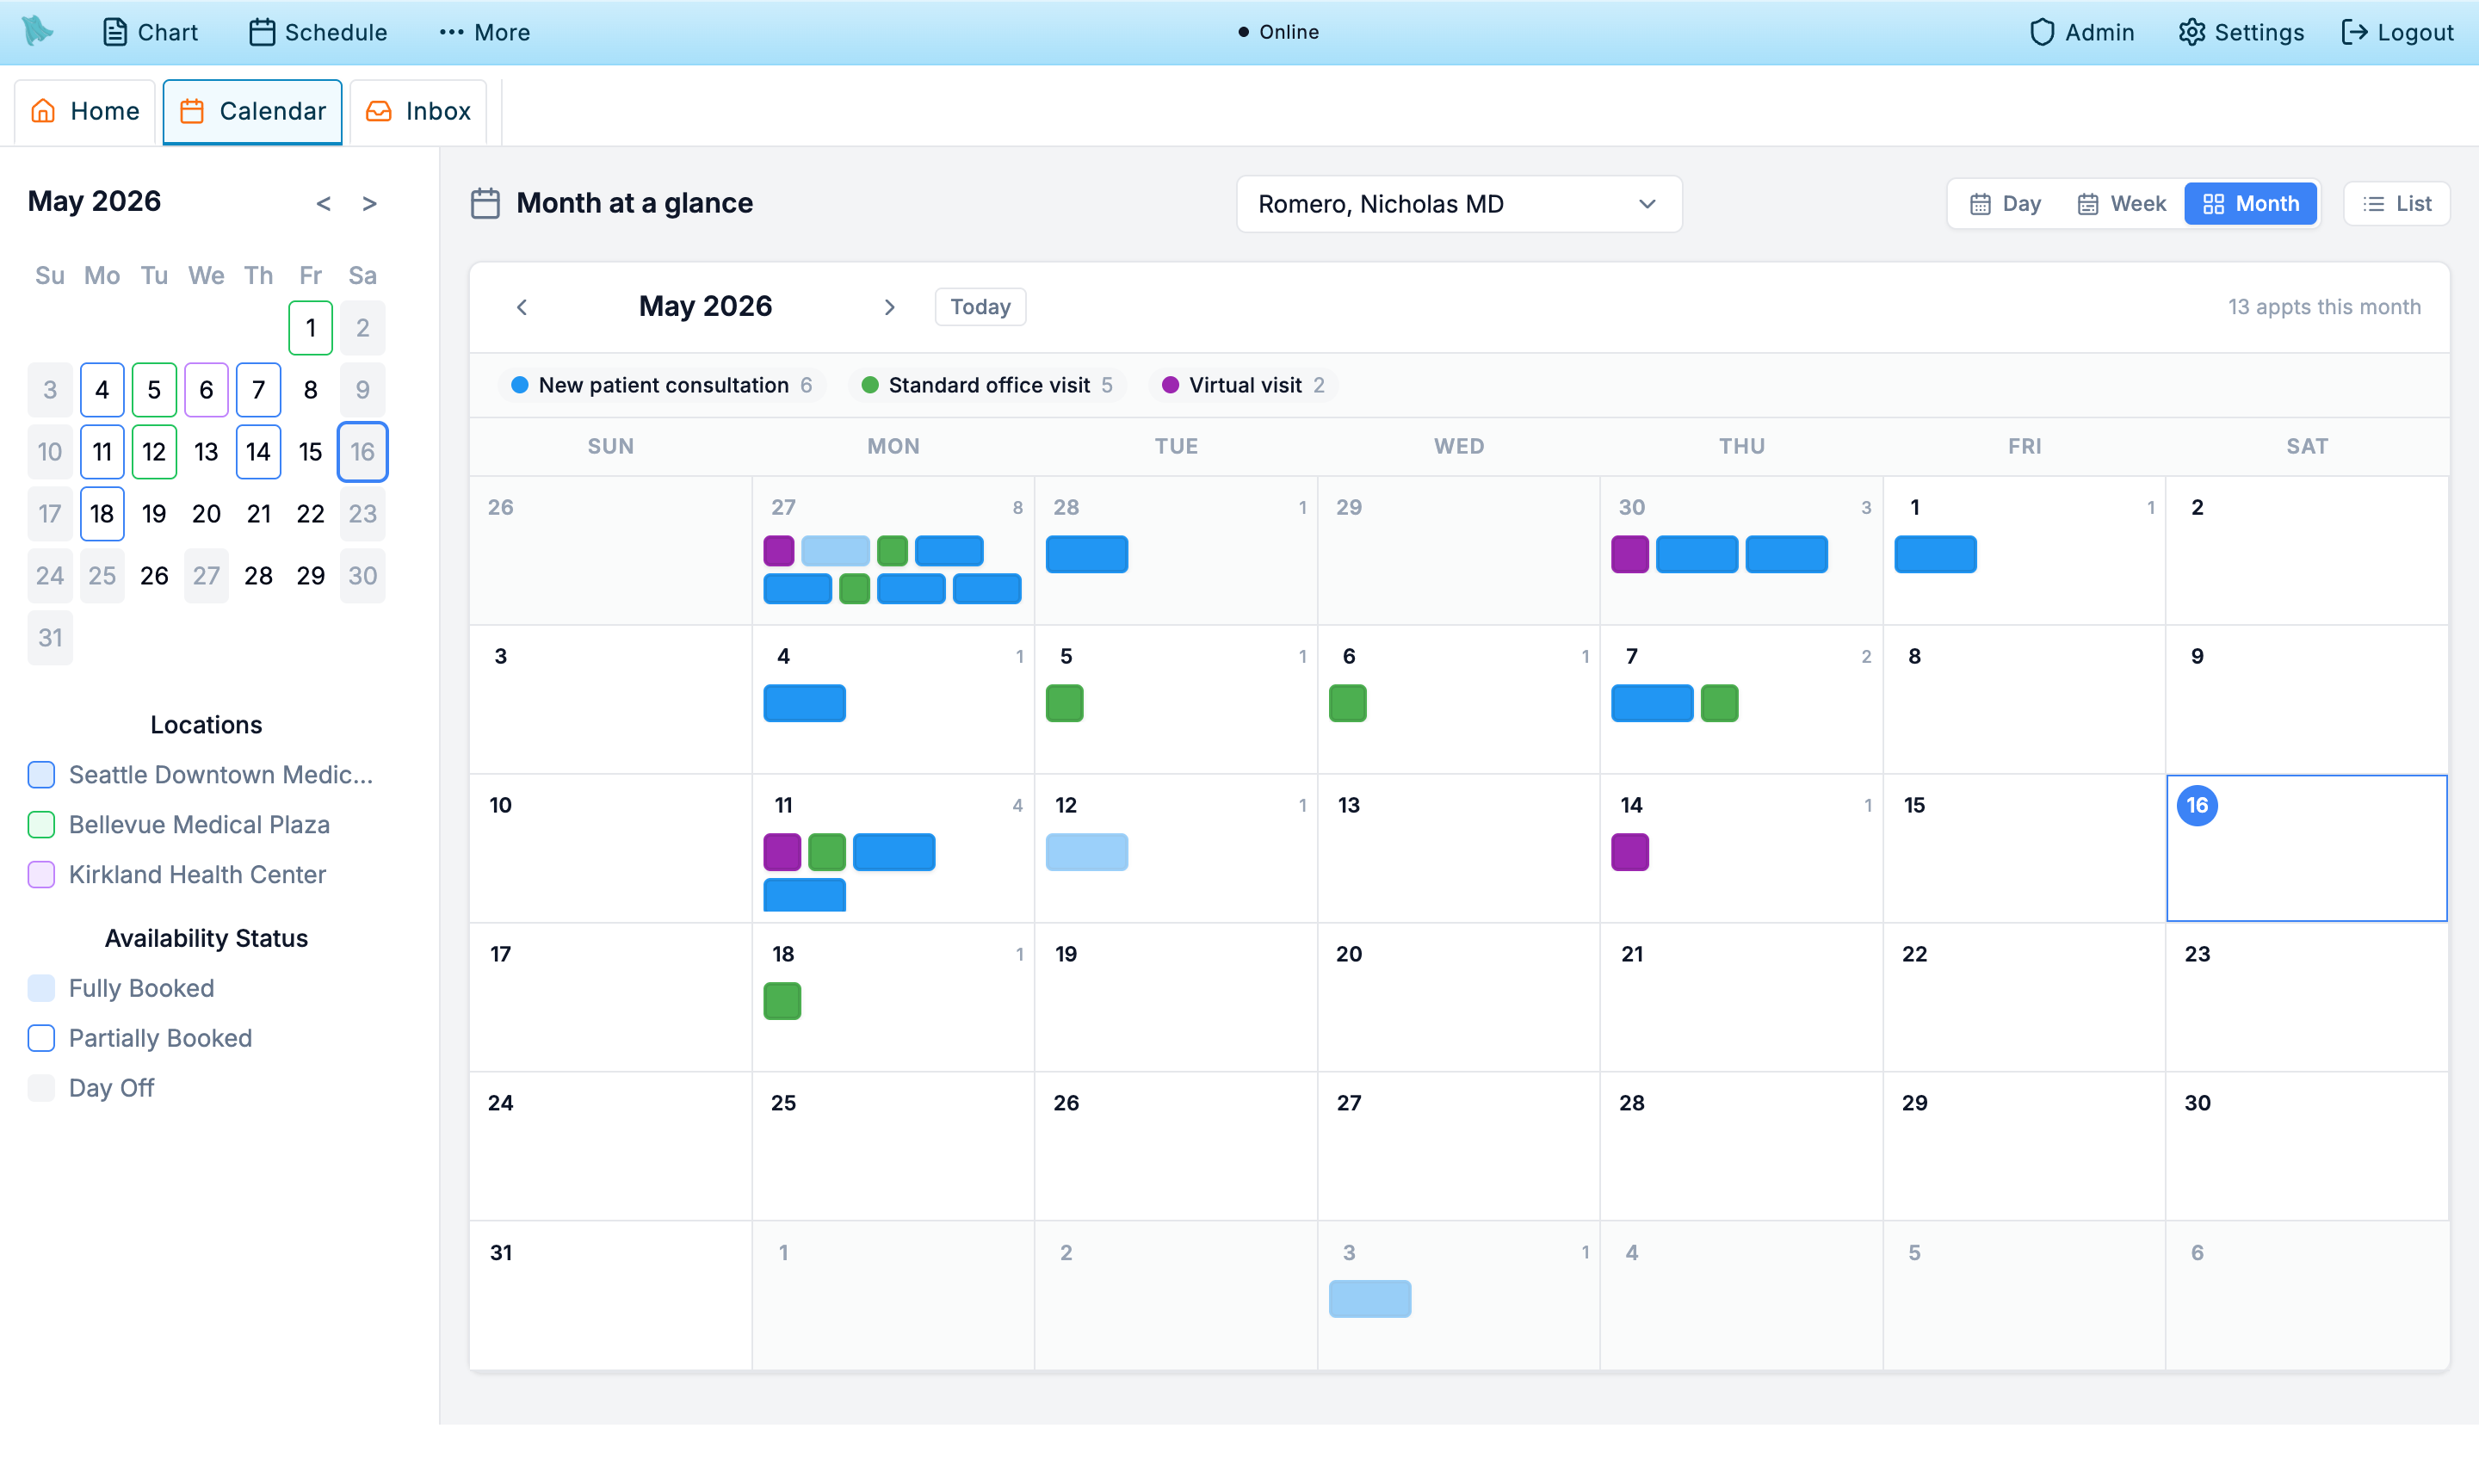
- Month view is a six-week grid where every appointment renders as a compact, duration-shaped patient box inside its day cell, colored by visit type with a visit-type legend.
The left rail and the preview pane
- Pick a physician from the top of the right pane. The calendar reloads with that physician's hours and bookings.
- Navigate with the mini month calendar in the left rail. Its day cells are colored by location and by availability, with two keys underneath: Locations (the color per clinic) and Availability Status (Fully Booked, Partially Booked, Day Off, External Calendar). The keys are legends, not filters — there is no control for hiding a location from the day's list.
- Open the patient preview to see the selected appointment's patient details without opening the chart. It is a resizable pane below the day list, shown and hidden with the
Show Preview/Hide Previewcontrol on the divider, and it exists in Day view only.
Toolbar actions
- List layout toggles the Week and Month views from the grid to a list. It is disabled in Day and Team views.
- Export schedule as CSV downloads the visible Day, Week, or Month schedule. It is not available in Team view, and it asks you to confirm first because the file contains patient information — treat it as PHI.
- Hide cancelled & no-show takes resolved visits off the calendar so only live appointments remain. Click it again to bring them back.
Common scheduling setup issues
Calendar shows nothing bookable
- Confirm a location is associated with the physician on the
Locationstab. - Confirm the day has working hours on
Weekly Schedule; non-working days never appear. - Confirm at least one visit type is marked Active and (for online booking) Available for Online Booking.
- Check
Time Off— a blanket time-off block overrides working hours for those dates. - Check for an organization holiday on that date. Holidays block the day for every physician until you click the holiday on
Time Offand confirm Work on this holiday?. - If the visit type uses
Specific windowsfor online booking, confirm those windows actually overlap the day's working hours — no overlap means no offered times. Widen the windows, or right-click the day on the calendar and useOpen Schedule…for a one-off window.
Patients aren't getting reminders
- Check the channel readiness panel — SMS requires an active sending number.
- Toggle Upcoming Appointment Reminders on; reminders are off by default.
- If reminders should have already gone out, use
Resync All Remindersto rebuild the schedule. - Patient-level preferences override the practice policy — confirm the patient has not opted out of the channel.
Follow-up request isn't in the portal inbox
- Confirm the Follow-up Reminder Policy has an attempt row with Inbox selected.
- If the initial wait is 0 hours, the inbox item appears when the request becomes eligible; SMS and email can still wait for the configured send time.
- Confirm the physician has an active in-office visit type and an active virtual visit type in
Visit Configwhose names match your organization's follow-up mapping. - If the encounter was addended, Hero EMR cancels and replaces only active, unscheduled follow-up requests.
Online booking isn't offering my visit type
- The visit type must have Available for Online Booking checked.
- The visit type's Min Notice filters out slots that are too soon.
- The visit type's Max Schedule Ahead caps how far out it appears.
- Only one visit type can be the Default Visit Type per physician; the default is what public landing pages pre-select.
Waitlist isn't matching anyone
- The master Patient waitlist toggle must be on.
- Patients only see the waitlist option in the portal when no matching slots exist within the visibility threshold (default 14 days).
- If short-notice fan-out is not firing, check the threshold — anything outside the short-notice window goes to the cohort flow instead.
- Stale entries auto-expire — confirm the patient still has an active entry on the Active waitlist entries list.
The in-office check-in kiosk
Most patients finish questionnaires, forms, and demographic updates from home — but some walk in with all of it still pending. The check-in kiosk turns any office iPad into a hand-off device: front-desk staff pick the patient from today’s arrivals, the visit is checked in on the spot, and the patient completes their remaining intake right there — questionnaires, consent signing with a finger-drawn signature, contact details, insurance (including camera card scan), and optionally medications and allergies. When they hand the tablet back, staff unlock it with a PIN, review what was completed, and finish.
-
Turn it on.
An administrator enables the kiosk under the toolbar
…menu →Kiosk. The same dialog controls whether patients can update medications & allergies from the kiosk, whether the staff review screen shows the copay due, idle-lock and session-expiry timers, and which staff unlock methods are allowed (PIN, passkey, password). -
Set up the iPad once.
On the office iPad, open your patient portal address followed by
/kioskin Safari, thenShare→Add to Home Screen. Launching from the home-screen icon runs the kiosk full-screen with no address bar. For extra lockdown, enable iOS Guided Access and triple-click the side button when handing the device over. - Sign in and work the list. Staff sign in with their work email and password (or a passkey). The kiosk shows a deliberately slim view: only today’s arrivals — time, patient, provider, and questionnaire/form readiness chips — never the full calendar. Front Desk, Medical Assistant, Nurse, and Office Manager profiles have kiosk access out of the box, and a dedicated Check-in Kiosk staff profile exists for a shared device account.
-
Hand it to the patient.
Tapping
Hand to patientchecks the visit in (the calendar showsArrivedimmediately) and switches the device into patient mode. Behind the scenes the kiosk signs the staff account out entirely — in the patient’s hands the device holds a token that can only reach that one patient’s intake items, so no amount of tapping can reach the schedule or any staff surface. - The patient works through the wizard. A step-by-step flow with no navigation: assigned questionnaires, forms & consents (signed on-screen with finger or typed signature), confirm contact details, review insurance — with the same camera card-scan used by the portal — and, if enabled, medications and allergies. If the patient walks away, the kiosk warns, then locks itself.
-
Take it back, review, finish.
When the patient taps
I’m done, the screen locks to a neutral “please return this device” page showing no patient information. Staff unlock with their kiosk PIN (set from the kiosk’sSet unlock PINbutton), a passkey, or their password, then see a review screen: what was completed, what’s still pending, everything the patient did on the device, and — if enabled — the payment due at check-in.Finish check-inreturns the kiosk to today’s list, ready for the next patient.
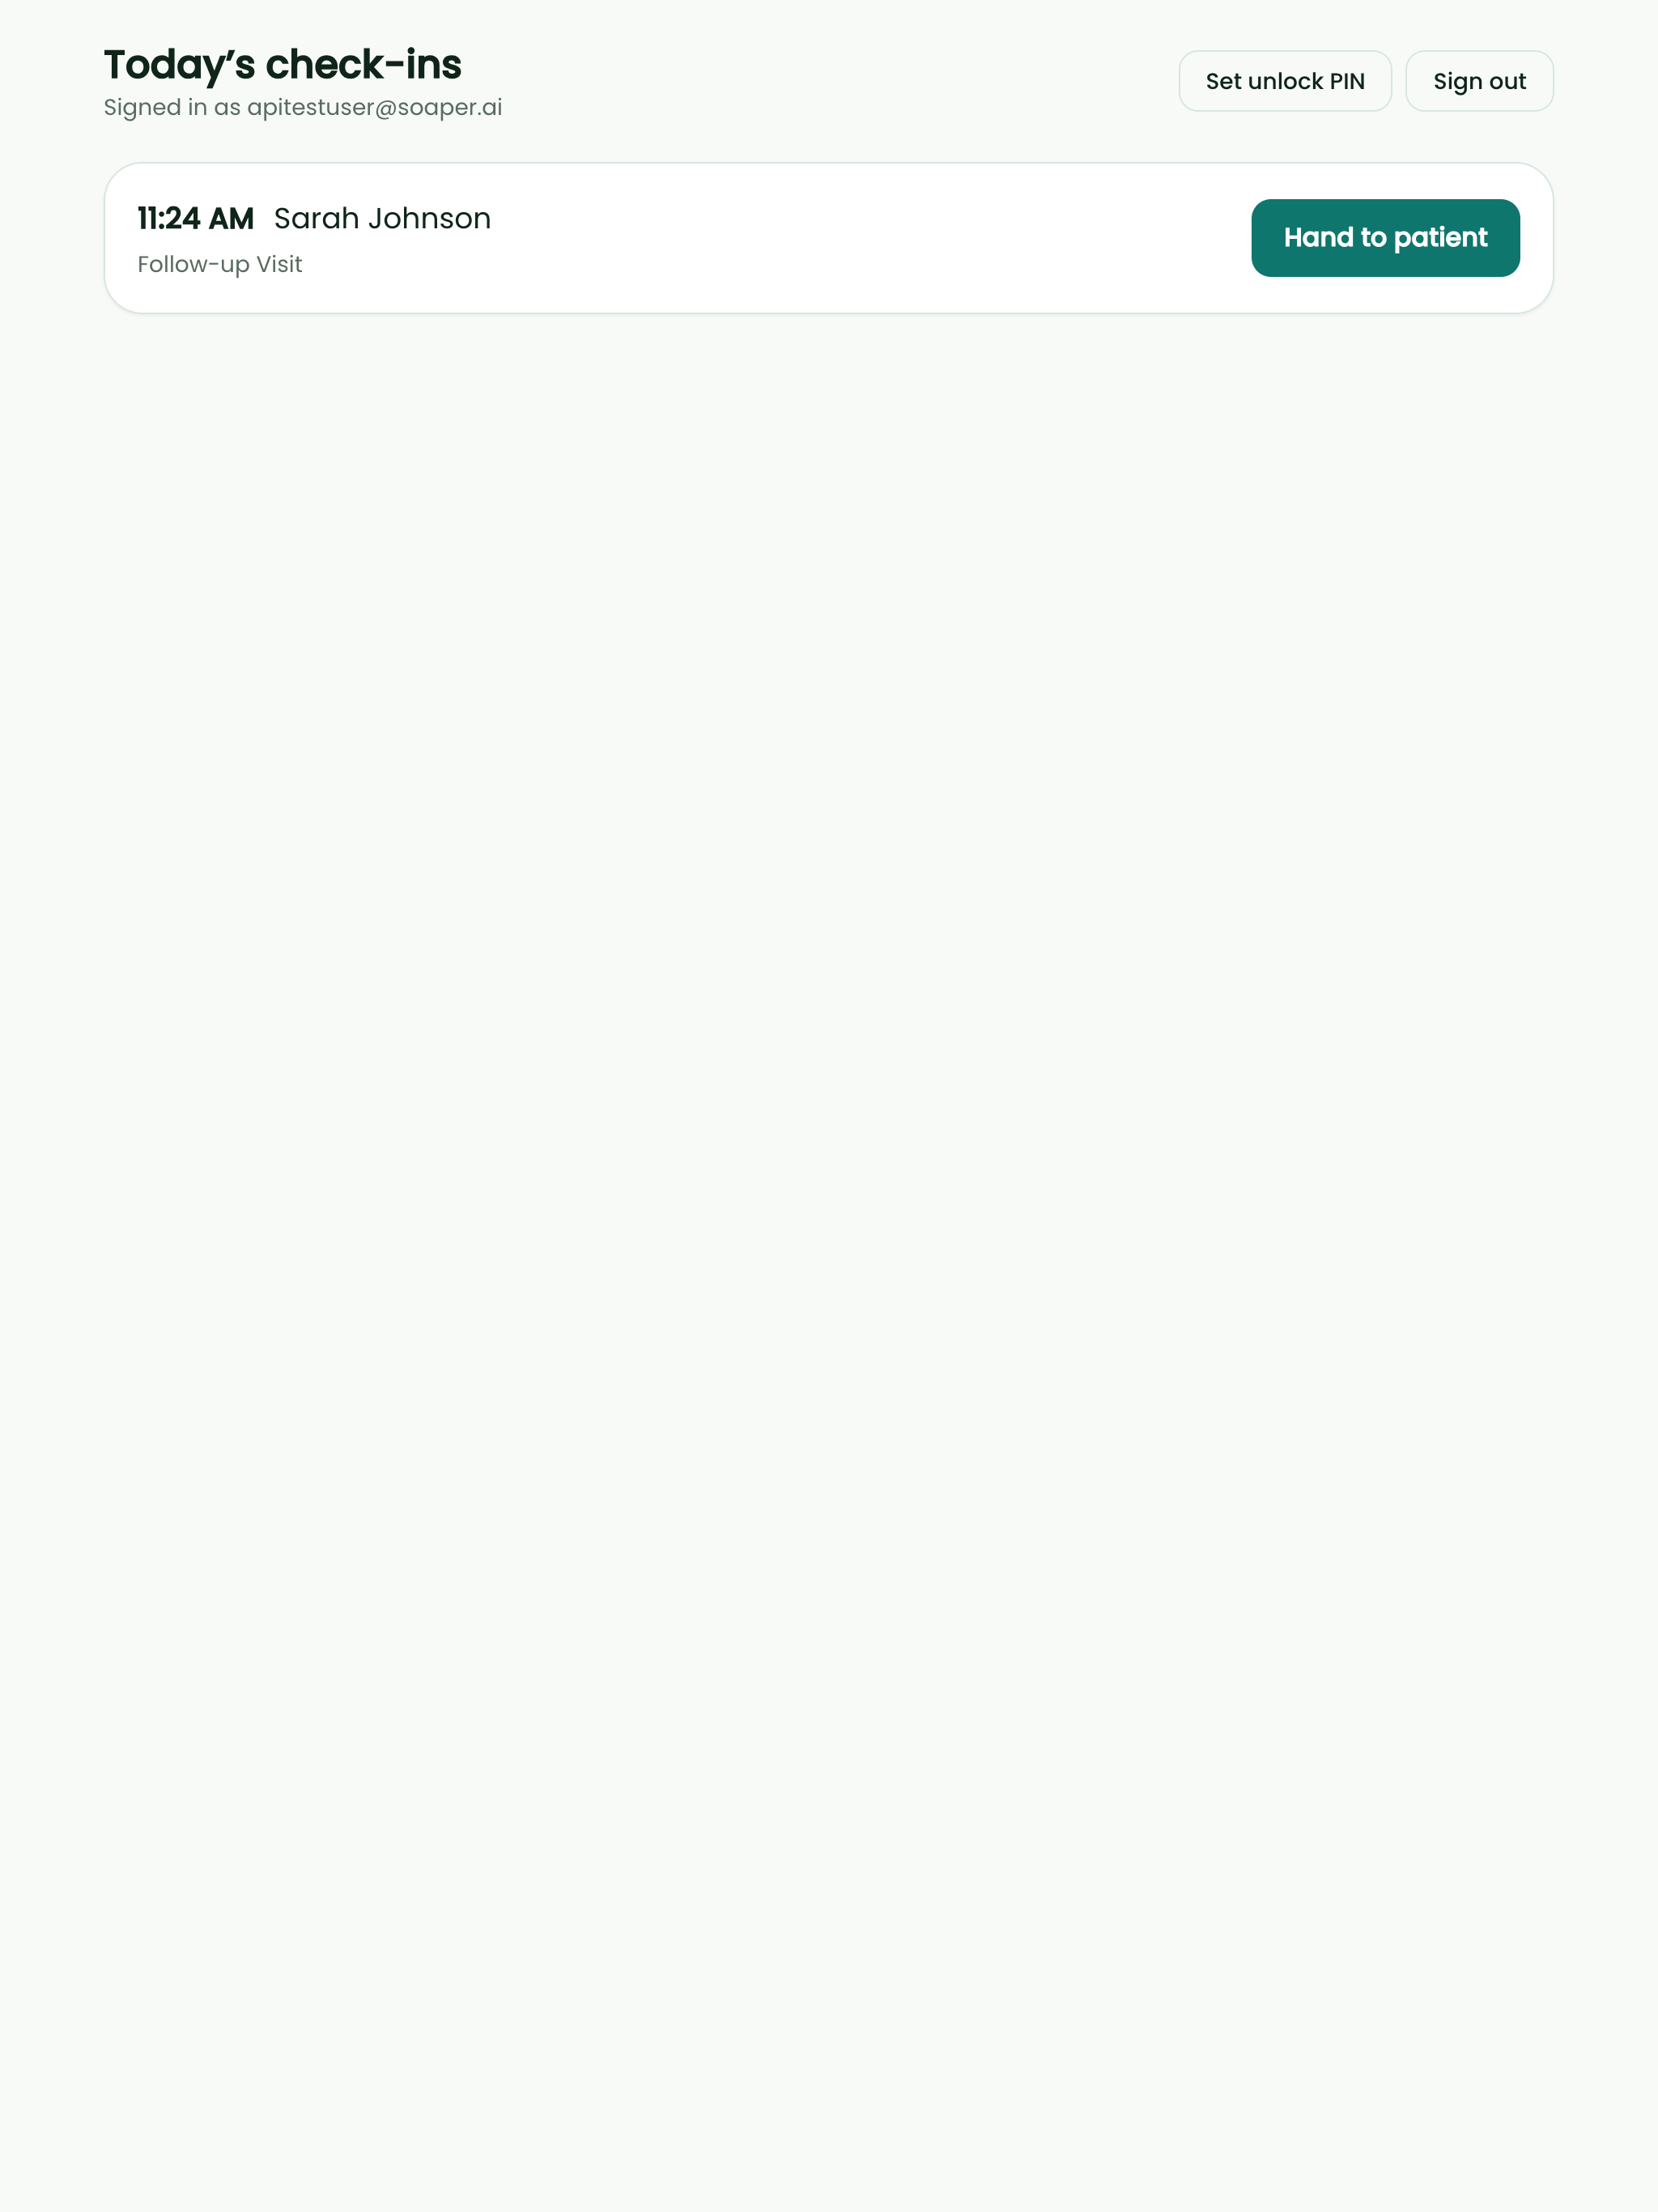
Hand to patient button per visit. The full calendar never renders here.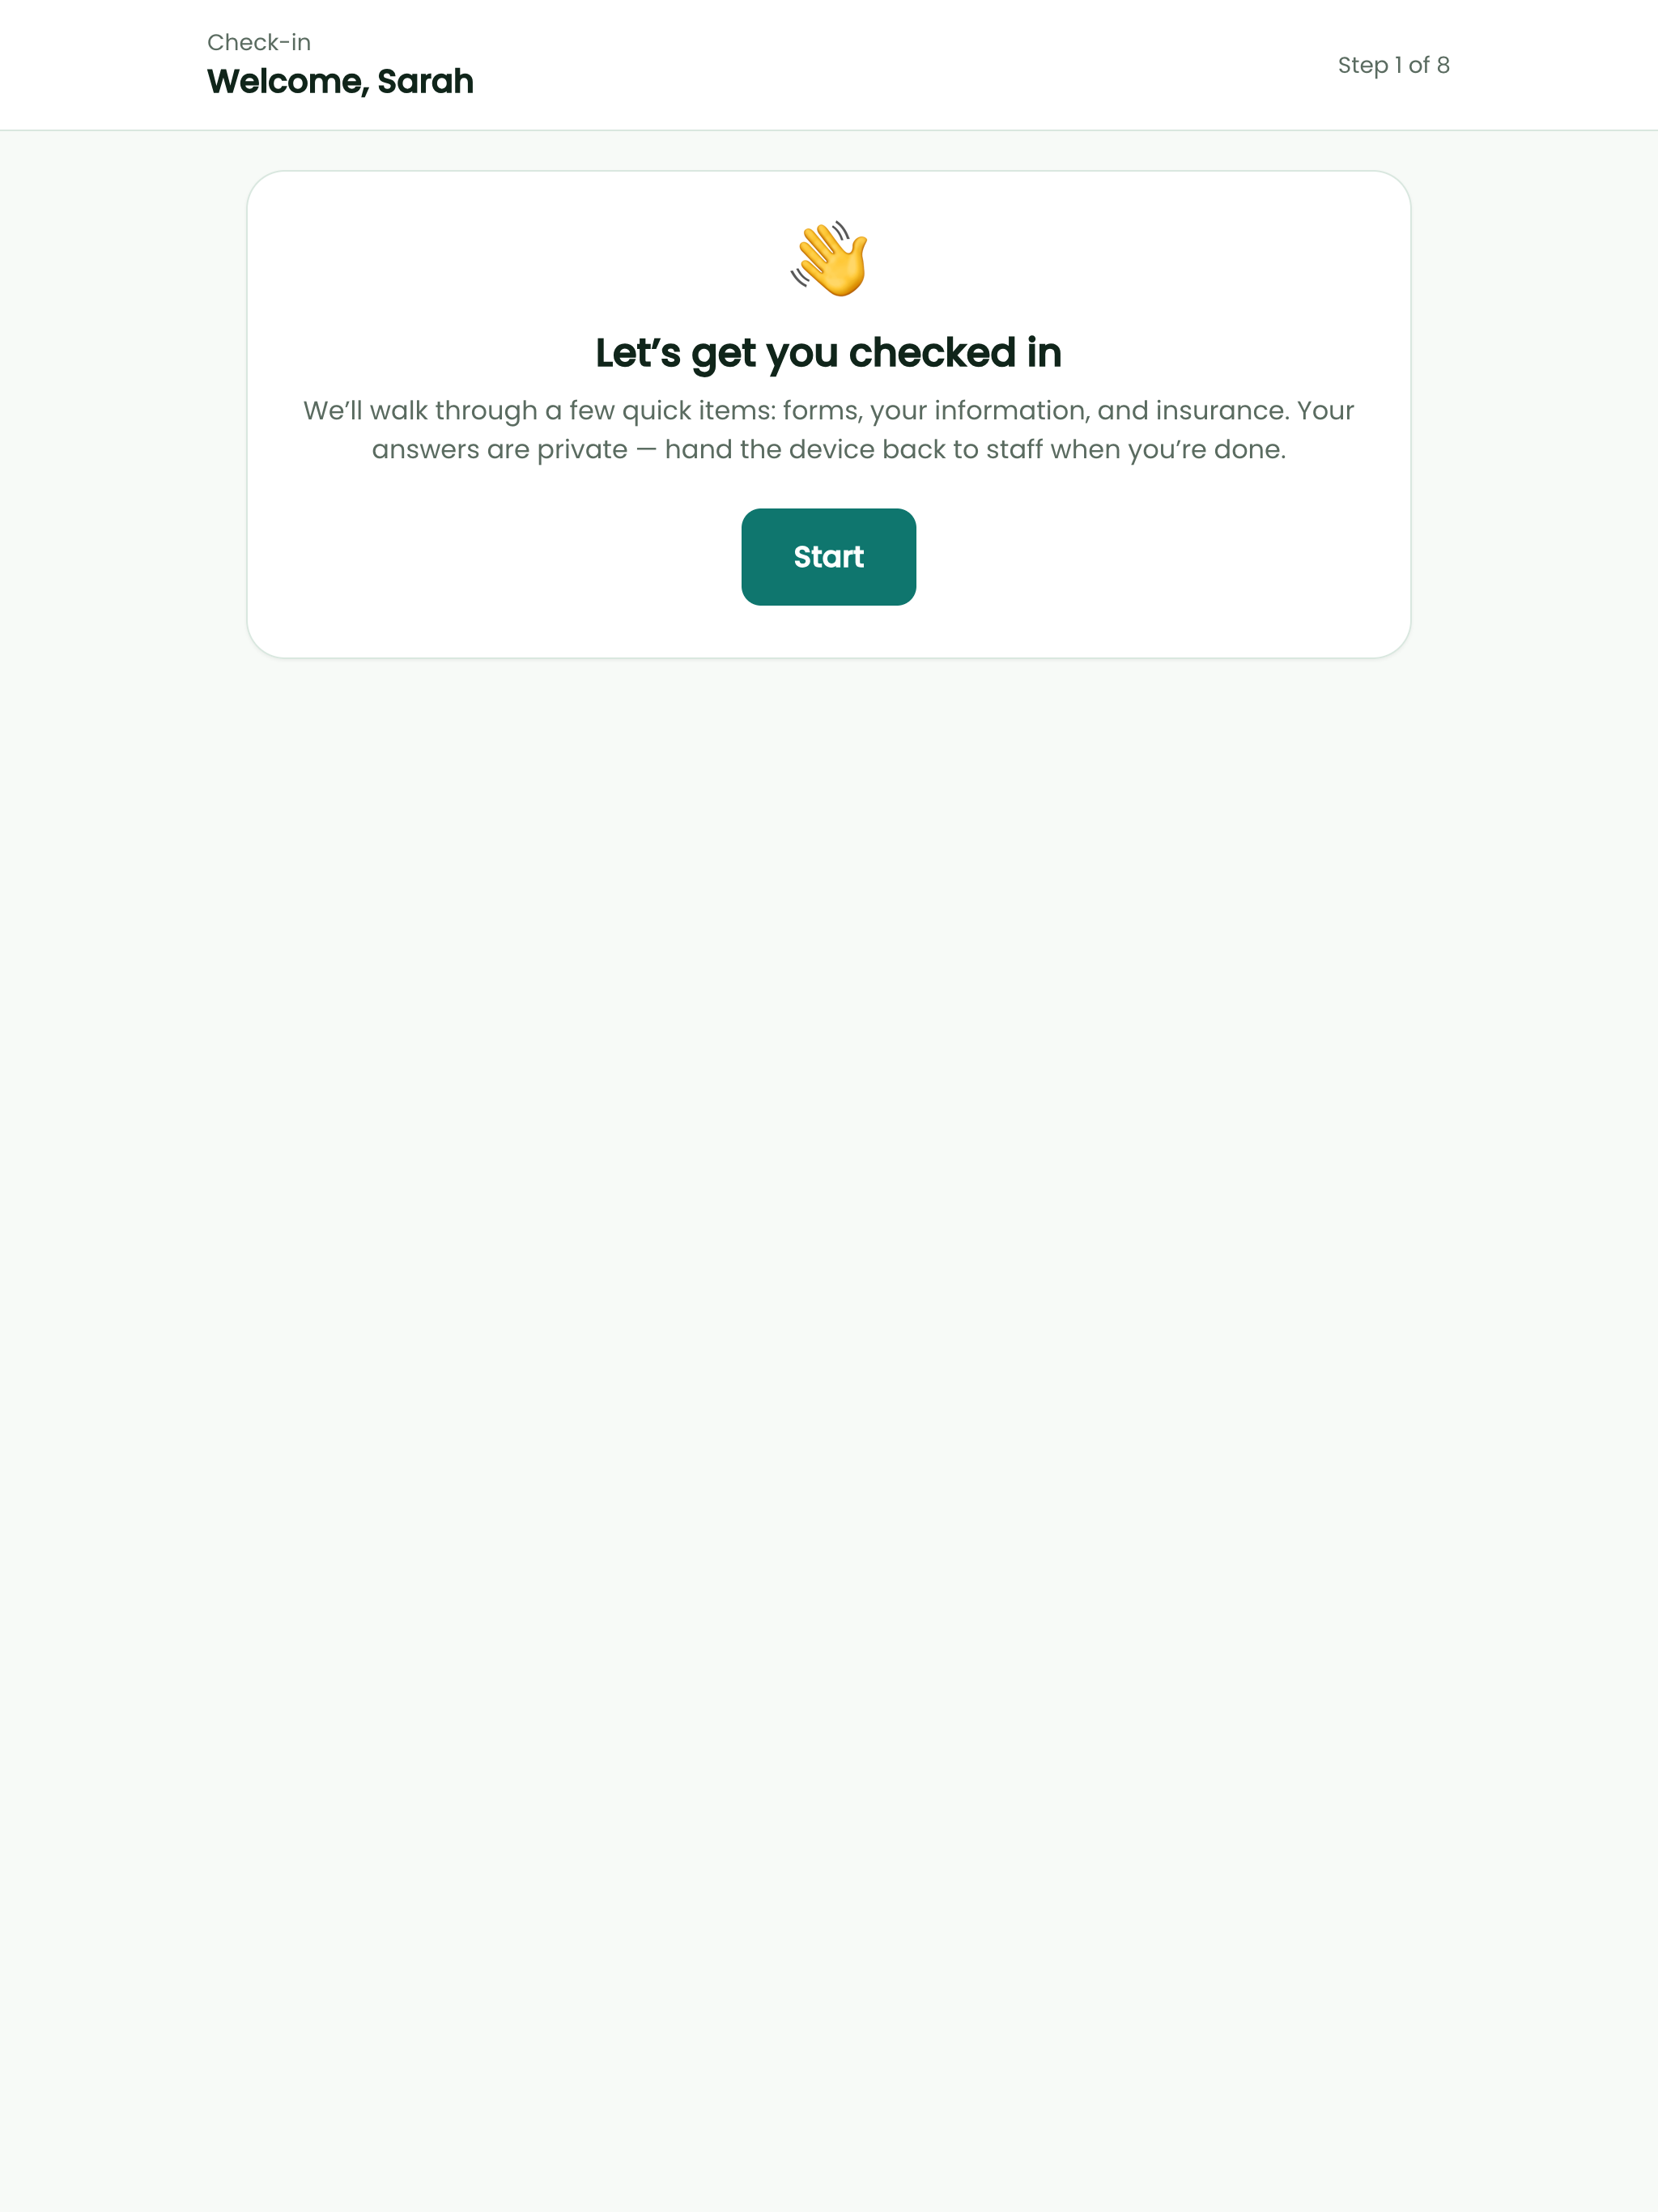
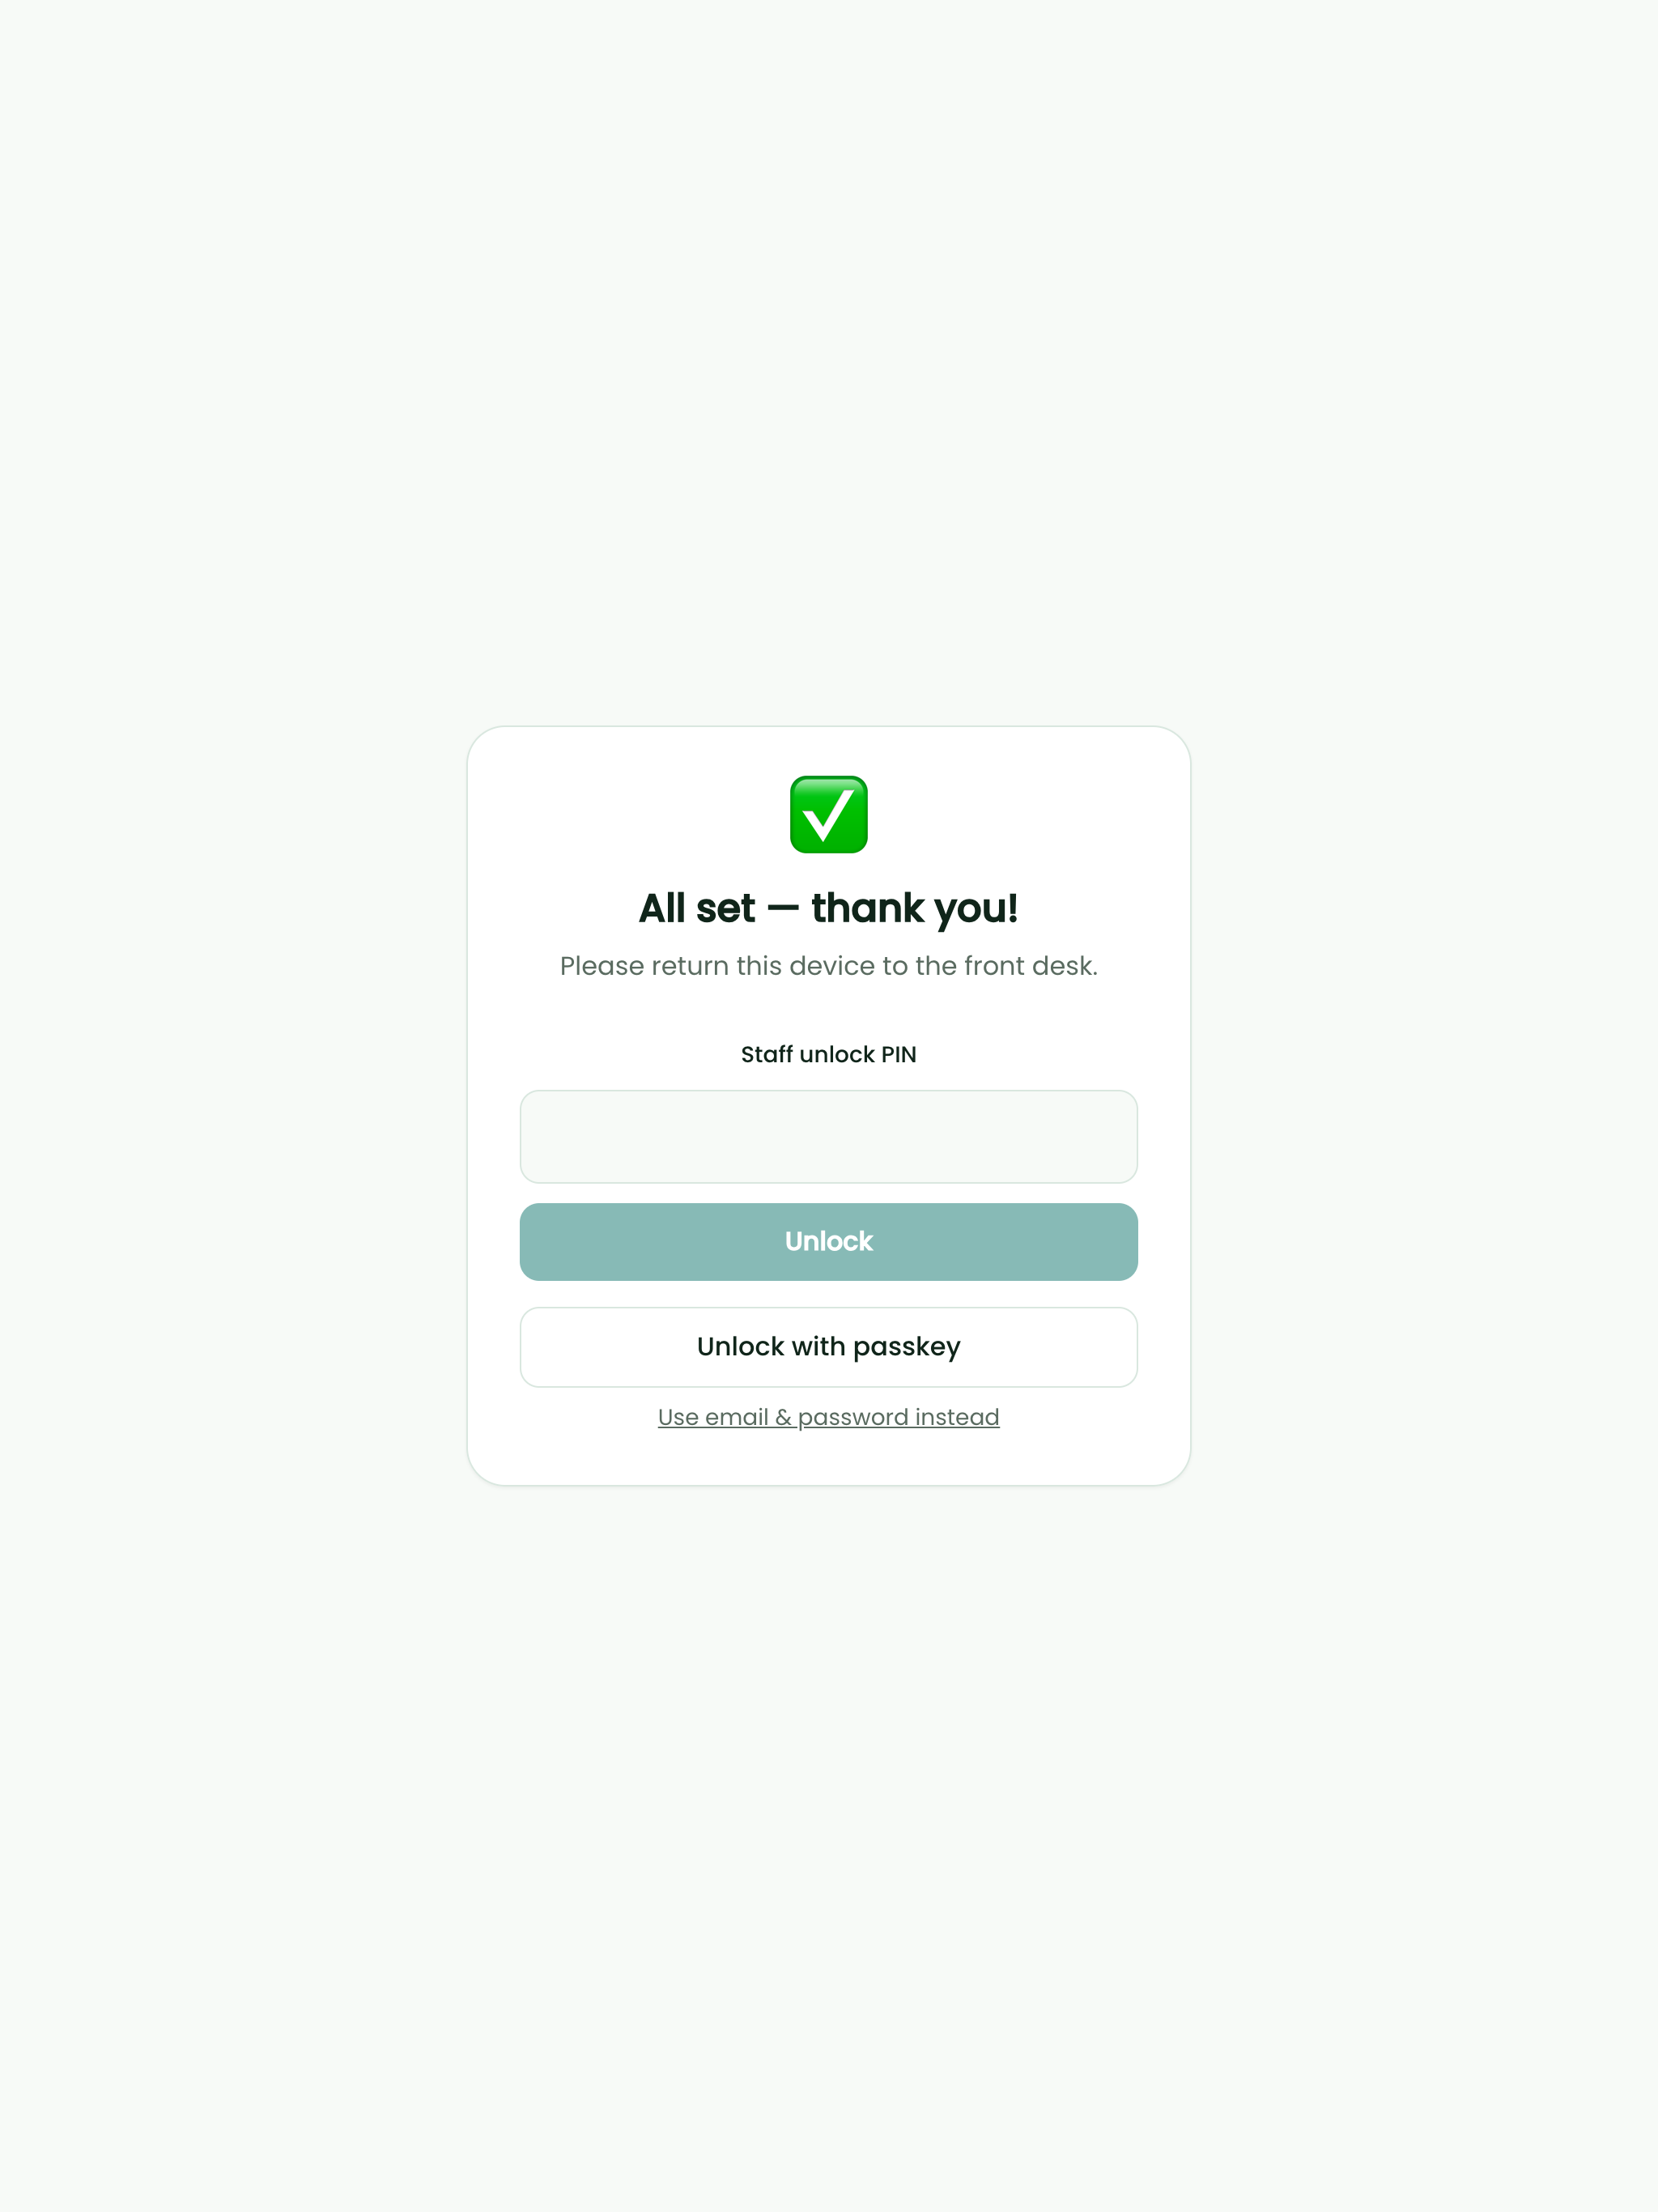
Arrived at hand-off — not when the paperwork is done — so the care team sees the patient is physically present while they finish intake. Intake progress itself lives in the pre-visit checklist chips on the calendar and on the kiosk’s review screen.
Need help? Email support@heroemr.com.