Inbox & messaging
One queue for everything that arrives at the practice: patient threads from every channel, results, prescription requests, forms, faxes, and inquiries — plus the triage, forwarding, and AI tools to clear it.
Inbox & messaging
One queue for everything that arrives at the practice: patient threads from every channel, results, prescription requests, forms, faxes, and inquiries — plus the triage, forwarding, and AI tools to clear it.
Open the Inbox and tour the views
The Inbox is your unified work queue for everything that arrives at the practice — patient messages, lab and imaging results, prescription requests, completed paperwork, referrals, faxes, website inquiries, and billing exceptions. It lives in its own always-open tab beside Home and Calendar, and the dashboard queue buttons (Dashboard queues) deep-link straight into the right view. Inside, work is sorted into views:
-
Open the Inbox tab.
Inboxsits besideHomeandCalendarat the top of the workspace. Like those two, it’s a system tab — it can’t be closed, so your queue is always one click away. -
Know the three columns.
A collapsible view sidebar on the left lists the views, each with its own unread-count pill. Next to it, a narrow message list carries the action bar on top and a blue
New Messagebutton pinned at the bottom. The reading pane fills the rest of the screen. -
Collapse the sidebar when you want room.
The chevron button (
Collapse sidebar/Expand sidebar) shrinks the views to icon badges; large counts cap at99+. - Pick up where you left off. Each view remembers your selected message, search text, and scroll position when you navigate away and back, so flipping to a chart mid-triage doesn’t cost you your place.
| View | What lands there |
|---|---|
| Patient | Secure patient conversations from every channel — the heart of this chapter (Patient threads). |
| Results | Lab & imaging results with Critical values / Abnormal values badges and a reply box — see The results inbox. |
| Rx | Refill and prescription requests with Approve / Reject actions — see The Rx inbox. |
| Forms/Letters | Patient-completed paperwork awaiting your review and signature — see Reviewing responses. |
| Referrals | Referral activity for your patients — see Tracking referrals. |
| Faxes | The inbound fax queue — covered in depth in The fax inbox. |
| Inquiries | Website contact-form inquiries, pre-analyzed by Hero AI (AI replies). |
| Billing | Payment and charge exceptions — see The billing workspace. The New Message button is hidden on this view. |
Which views you see depends on your role: physicians get every view except Billing, practice admins see all eight — Billing only if their account is allowed to see financial amounts — and staff see the views their messaging, document, and billing permissions unlock; staff with no inbox permissions don’t get the Inbox tab at all (see Staff accounts & permissions).
New Message button anywhere? Besides being hidden on Billing, the button disappears from every view when patient portal messaging is switched off for the practice under Admin > Patient Portal Configuration > Features. You can still read and triage what arrives; you just can’t start a new portal conversation.
Work from the dashboard queues
You don’t have to start in the Inbox itself. The Home dashboard groups your inbox work into three labeled button groups, each header showing an N total rollup. Every button carries a live count and deep-links into the matching Inbox view, so the dashboard doubles as your morning triage board.
| Queue group | Buttons | Where they open |
|---|---|---|
Priority Inbox (red badges) | Lab Results, Prescriptions, Urgent Messages, Urgent Faxes | The Results and Rx views; Urgent Messages opens the Patient view and Urgent Faxes the Faxes view, their counts tally only the urgent items, but the view they open is the full one. |
Messages (blue badges) | Patient Messages, Faxes | The Patient and Faxes views. |
Admin Queue (amber badges) | Forms, New Patients | Forms opens the Forms/Letters view; New Patients is the exception — it opens the Calendar, not the Inbox. |
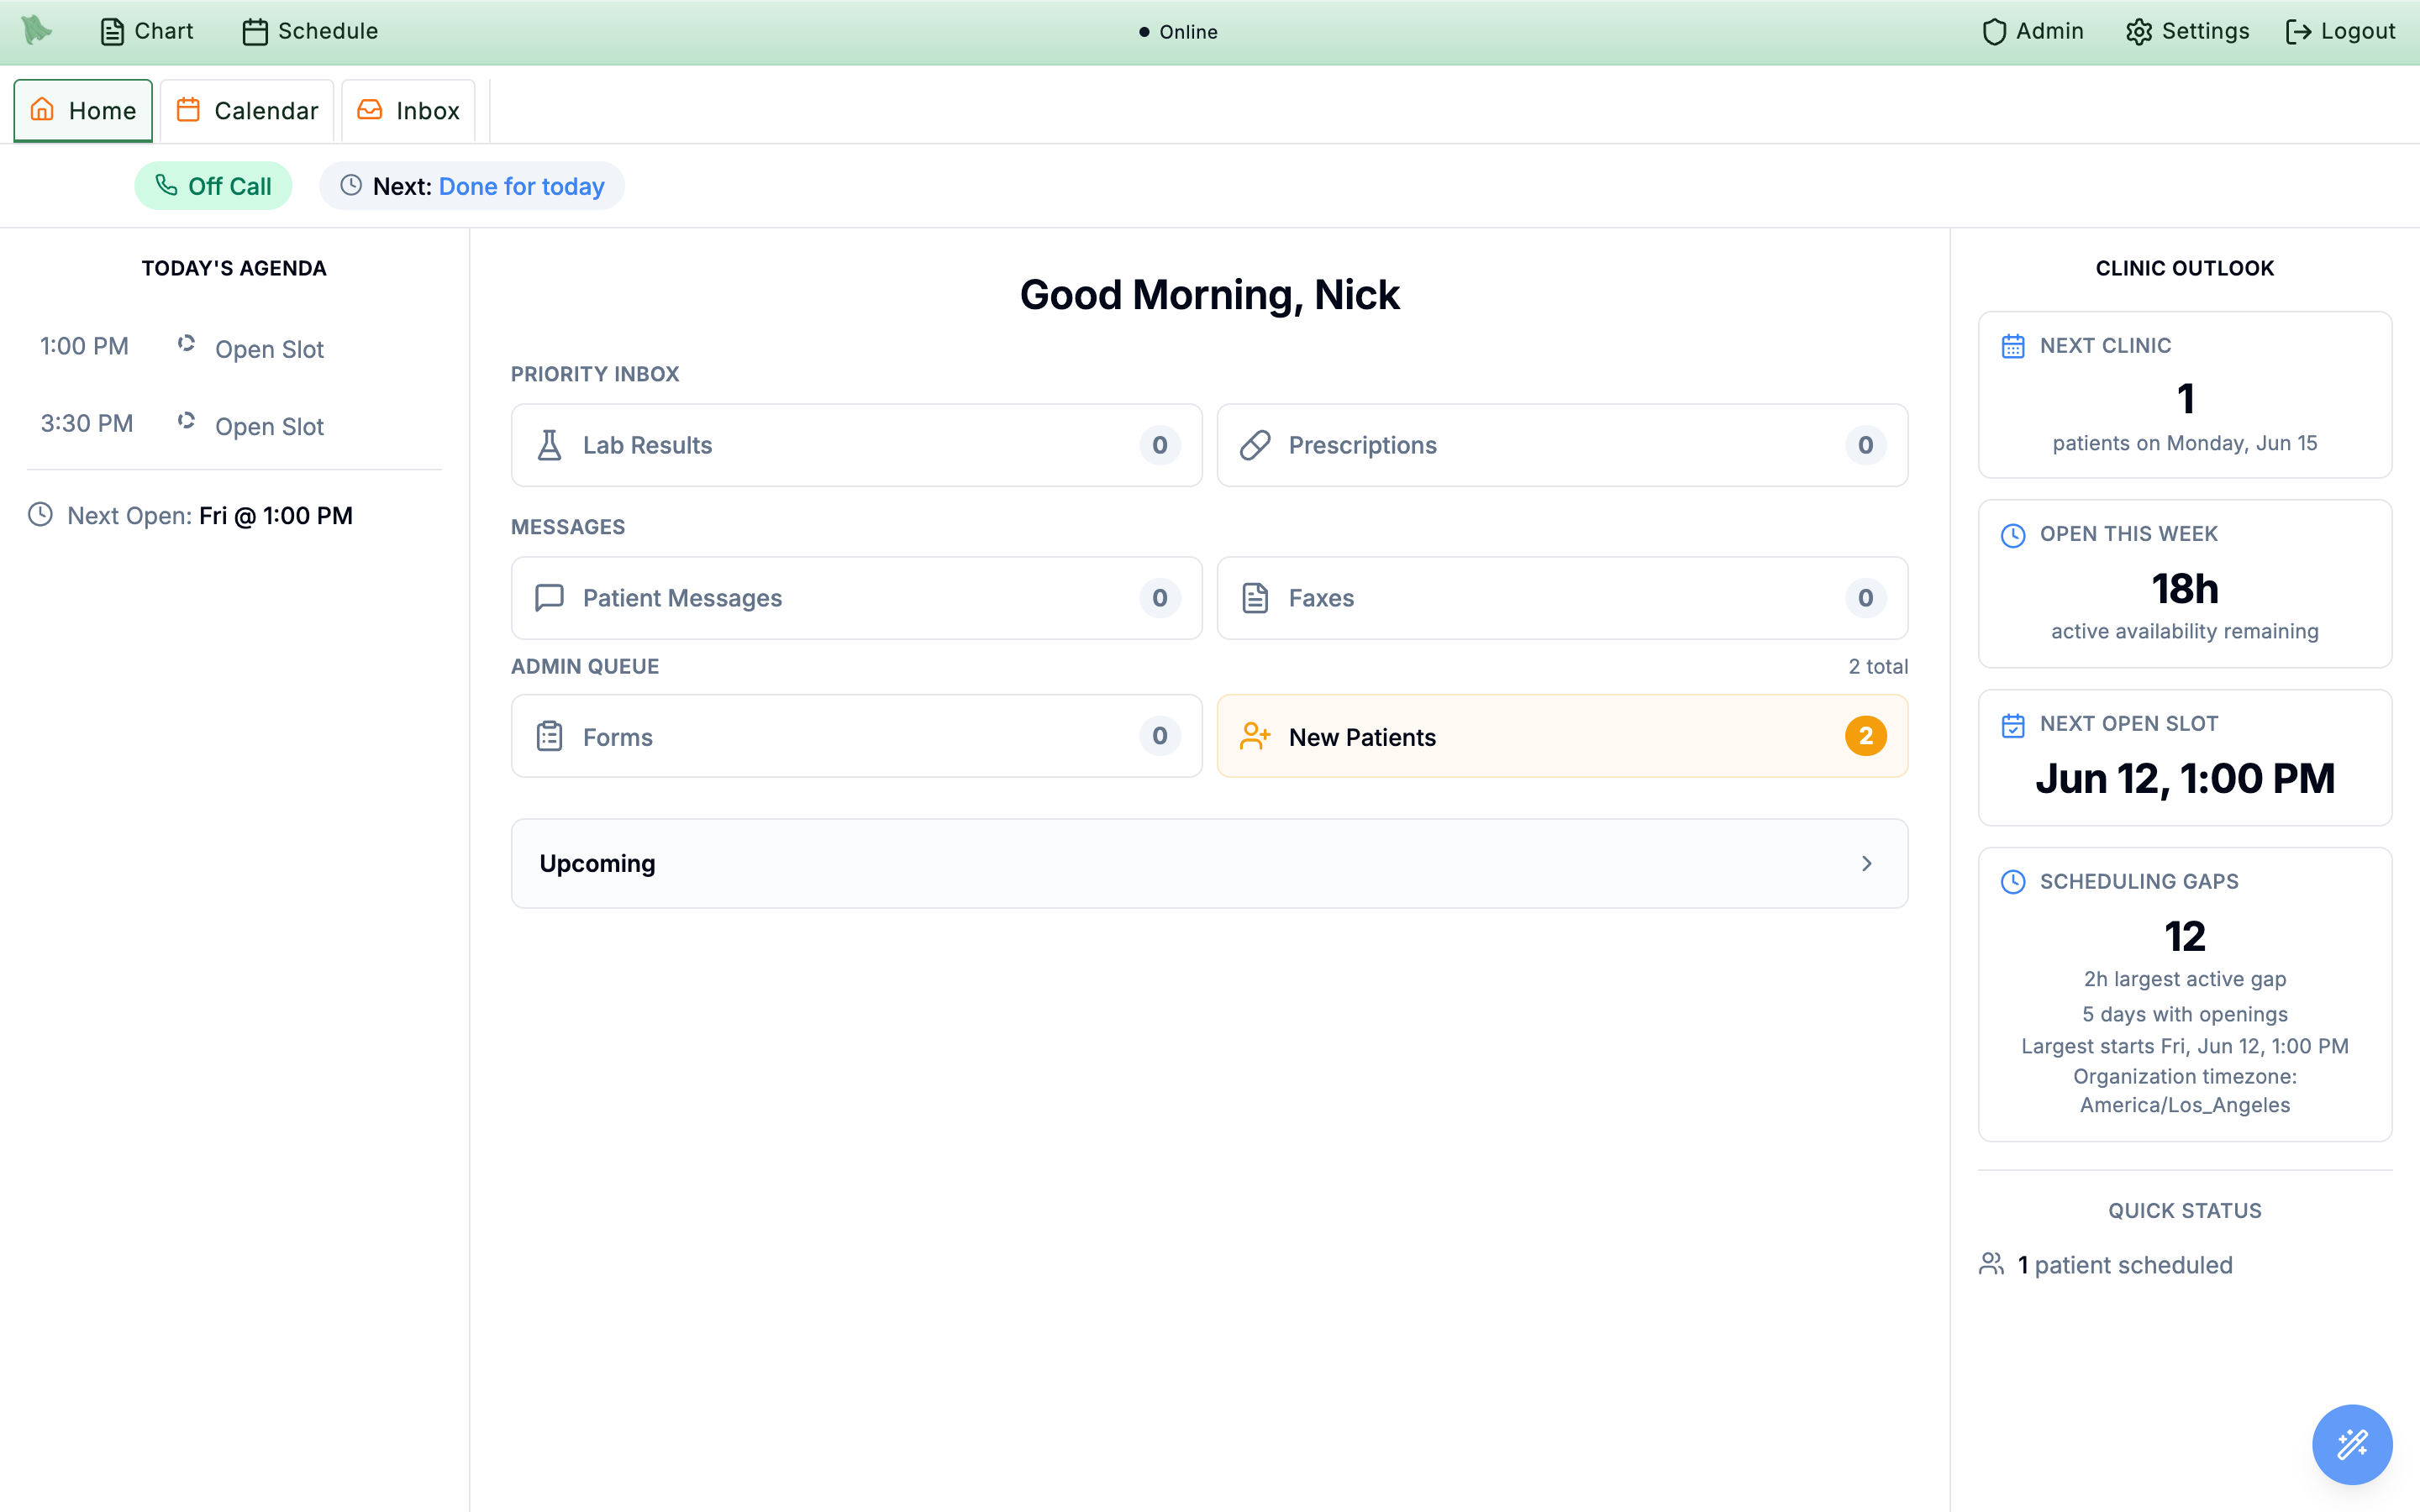
The unread badges — on these buttons and on the Inbox sidebar — refresh automatically about every minute, and opening or triaging an item updates them immediately. How loudly Hero EMR notifies you about new messages is tunable per physician — urgency thresholds and after-hours rules live in Message Settings.
Read and answer patient threads
The Patient view shows one row per conversation, and every inbound channel funnels into it: portal secure messages, texted-in SMS, mail to the practice email address, and the AI phone agent — verified callers can leave messages, and calls the agent can’t handle escalate as Phone Agent Escalation messages with the caller, the reason, and call context attached.
You can tell the channels apart at a glance: a small glyph sits in front of the subject in the list — hover it for Text message (SMS), Email, or Phone. Portal messages, the default, carry no glyph. Behind the scenes the channel is recorded as a [SMS] / [Email] / [Phone] marker on the subject line, but those brackets are stripped out of what you read, so the subject stays clean even after several rounds of Re:.
-
Scan the list.
- A blue dot (tooltip
Unread) and bold sender/subject mark unread threads. - Colored corner dots flag urgency — yellow for Medium, red for High.
- A green check marks threads you’ve responded to; a gray check marks
Completedones.
- A blue dot (tooltip
-
Open a thread.
Selecting a row opens a split reading pane under a patient info bar, and marks the thread read automatically (use
Mark as unreadto put it back in the queue — see Triage tools). The toolbar offersChart Review(jump to the chart),Schedule(the appointment modal, pre-loaded with the patient),New Order(Ctrl+O — see standalone orders), andForward. -
Use the clinical context.
The left half shows the linked encounter: collapsible
Diagnoses,Orders, andFollow-uppanels — the same tools you use during encounter completion, embedded right in the message — plus theEncounter Notecard with theChief Complaintand full note. Messages without an encounter showNo encounter linked to this message. -
Reply in the thread.
The right half shows
Message History— your messages in green, the patient’s in gray, forwarding events as pills — with theYour Response to Patientbox at the bottom. Enter sends, Shift+Enter adds a line, or clickSend to Patient. While sending, the bubble showsSending…; a failure showsFailedwithRetryandDismiss. Drafts auto-save per thread for your session, so switching threads never loses a half-written reply. Attachments render inline underAttachments (n), and replies support inline images and dot phrases.
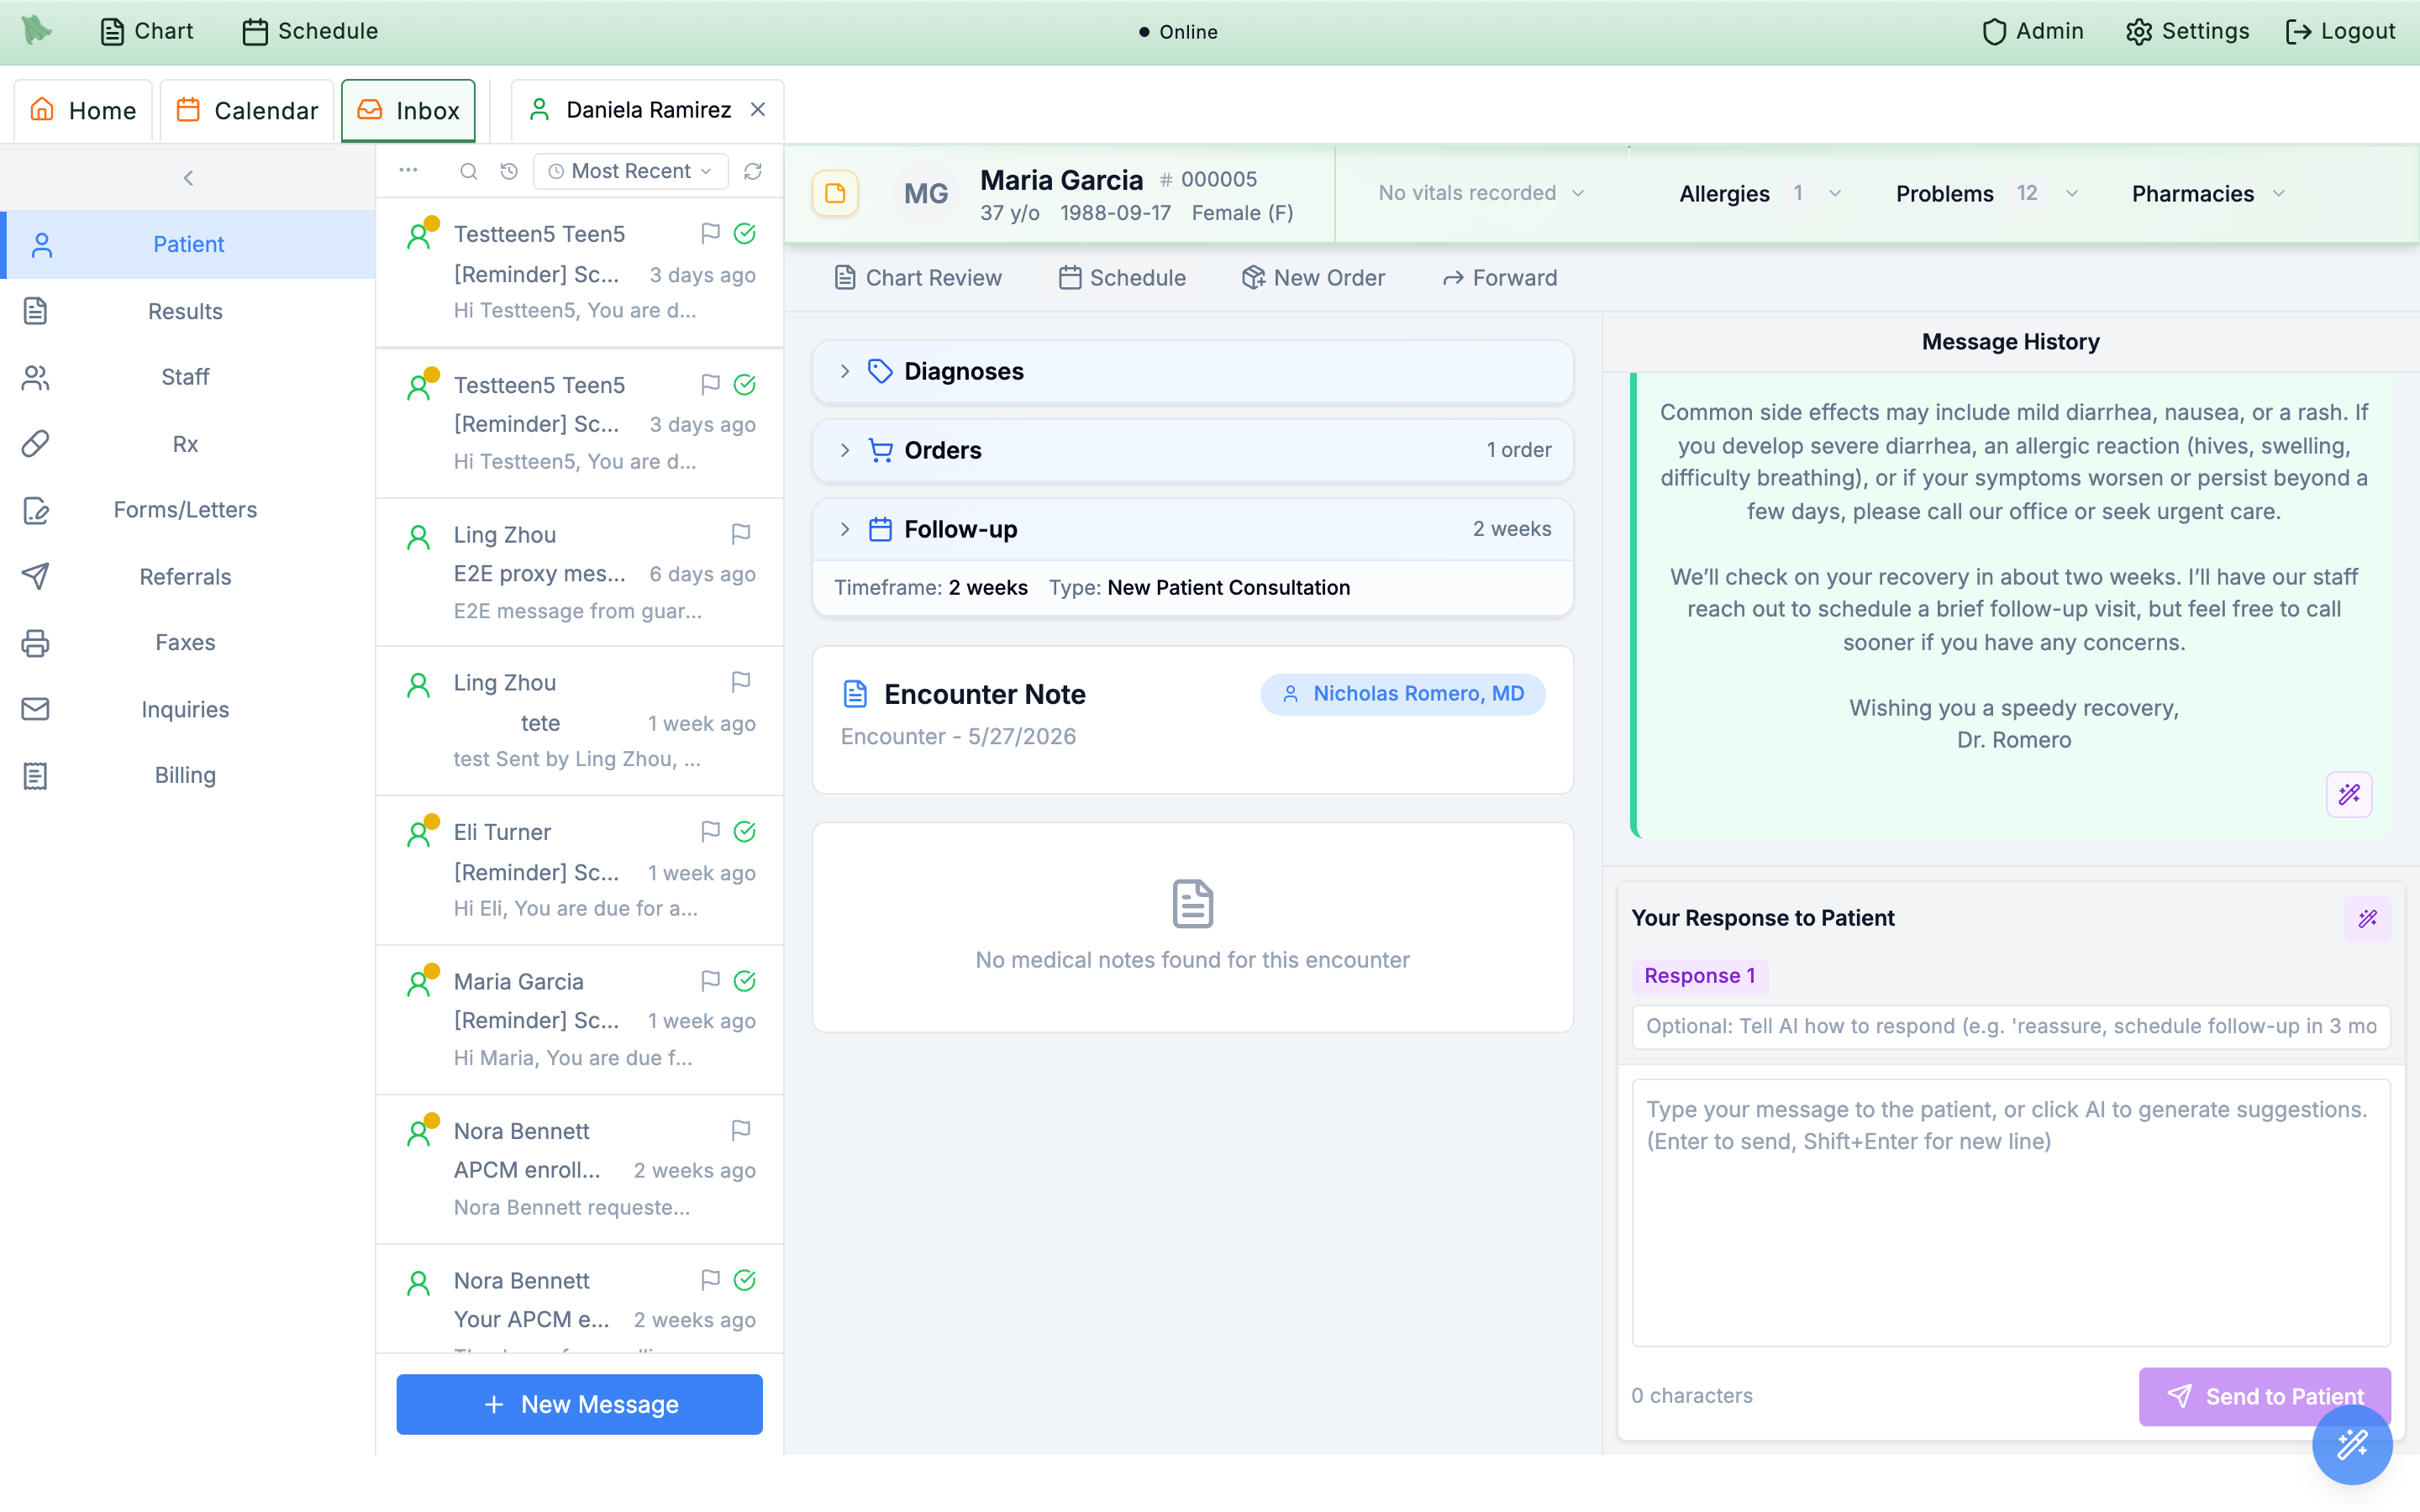
Response 1 chip is an AI draft (AI replies).This reply will be texted to the patient, and ticking Send via portal instead redirects that one reply to their secure portal inbox (the choice resets to texting on every thread you open). Emailed-in threads reply by email.
Send via portal instead and let the patient read it in the portal.
Let Hero AI draft the reply
Next to Your Response to Patient sits a purple wand button (Generate AI responses). One click asks Hero AI to read the full conversation and draft up to two replies — you preview, pick, edit, and stay in control of what actually goes to the patient.
-
Click the wand.
The button shows
Generating responses…, then the drafts appear in anAI Suggested Responsesoverlay and asResponse 1/2chips above the compose box. If nothing useful comes back you’ll seeNo AI suggestions available. - Preview, pick, and edit. Hover a chip to read the full draft with the AI’s rationale; click it to insert the text into your reply for editing (the selected chip shows a check mark). Suggestions are stored per thread, so they survive navigating away and back.
-
Steer the drafts.
The optional instruction box —
Optional: Tell AI how to respond (e.g. “reassure, schedule follow-up in 3 months”)— shapes the tone and content before you generate. Leave it blank for two contrasting drafts; fill it in and you get a single draft written to your instruction instead. The Results view works the same way (see Notify the patient). -
Extract orders from your sent replies.
On your own sent messages, a small wand (
Extract orders) reads the text and turns commitments — “I’ll order a CBC” — into draft orders in theOrderspanel. Disabled states explain themselves:Wait for the message to send before extracting orders,Only sent messages can be extracted.
Same pattern on Results
- The Results view has the same
Your Response to Patientbox with anAIbutton and the same instruction field. Send to Patientposts the reply and confirms with a greenResponse Sent.- The full result-review workflow lives in The results inbox.
Same pattern on Inquiries
- Website inquiries arrive pre-processed with an
AI Analysiscard (category and summary). - Click
Generateor aResponse 1chip underAI Suggestions, thenSend Response— inquiry replies are emailed to the inquirer (“Inquiry response was saved and emailed.”). - Inquiries carry a workflow
Status(pending, in progress, responded, closed), priority badges, aFlagtoggle, andOriginal Message/Response History/Status Timelinepanels. A closed inquiry must be reopened from the status dropdown before you can respond.
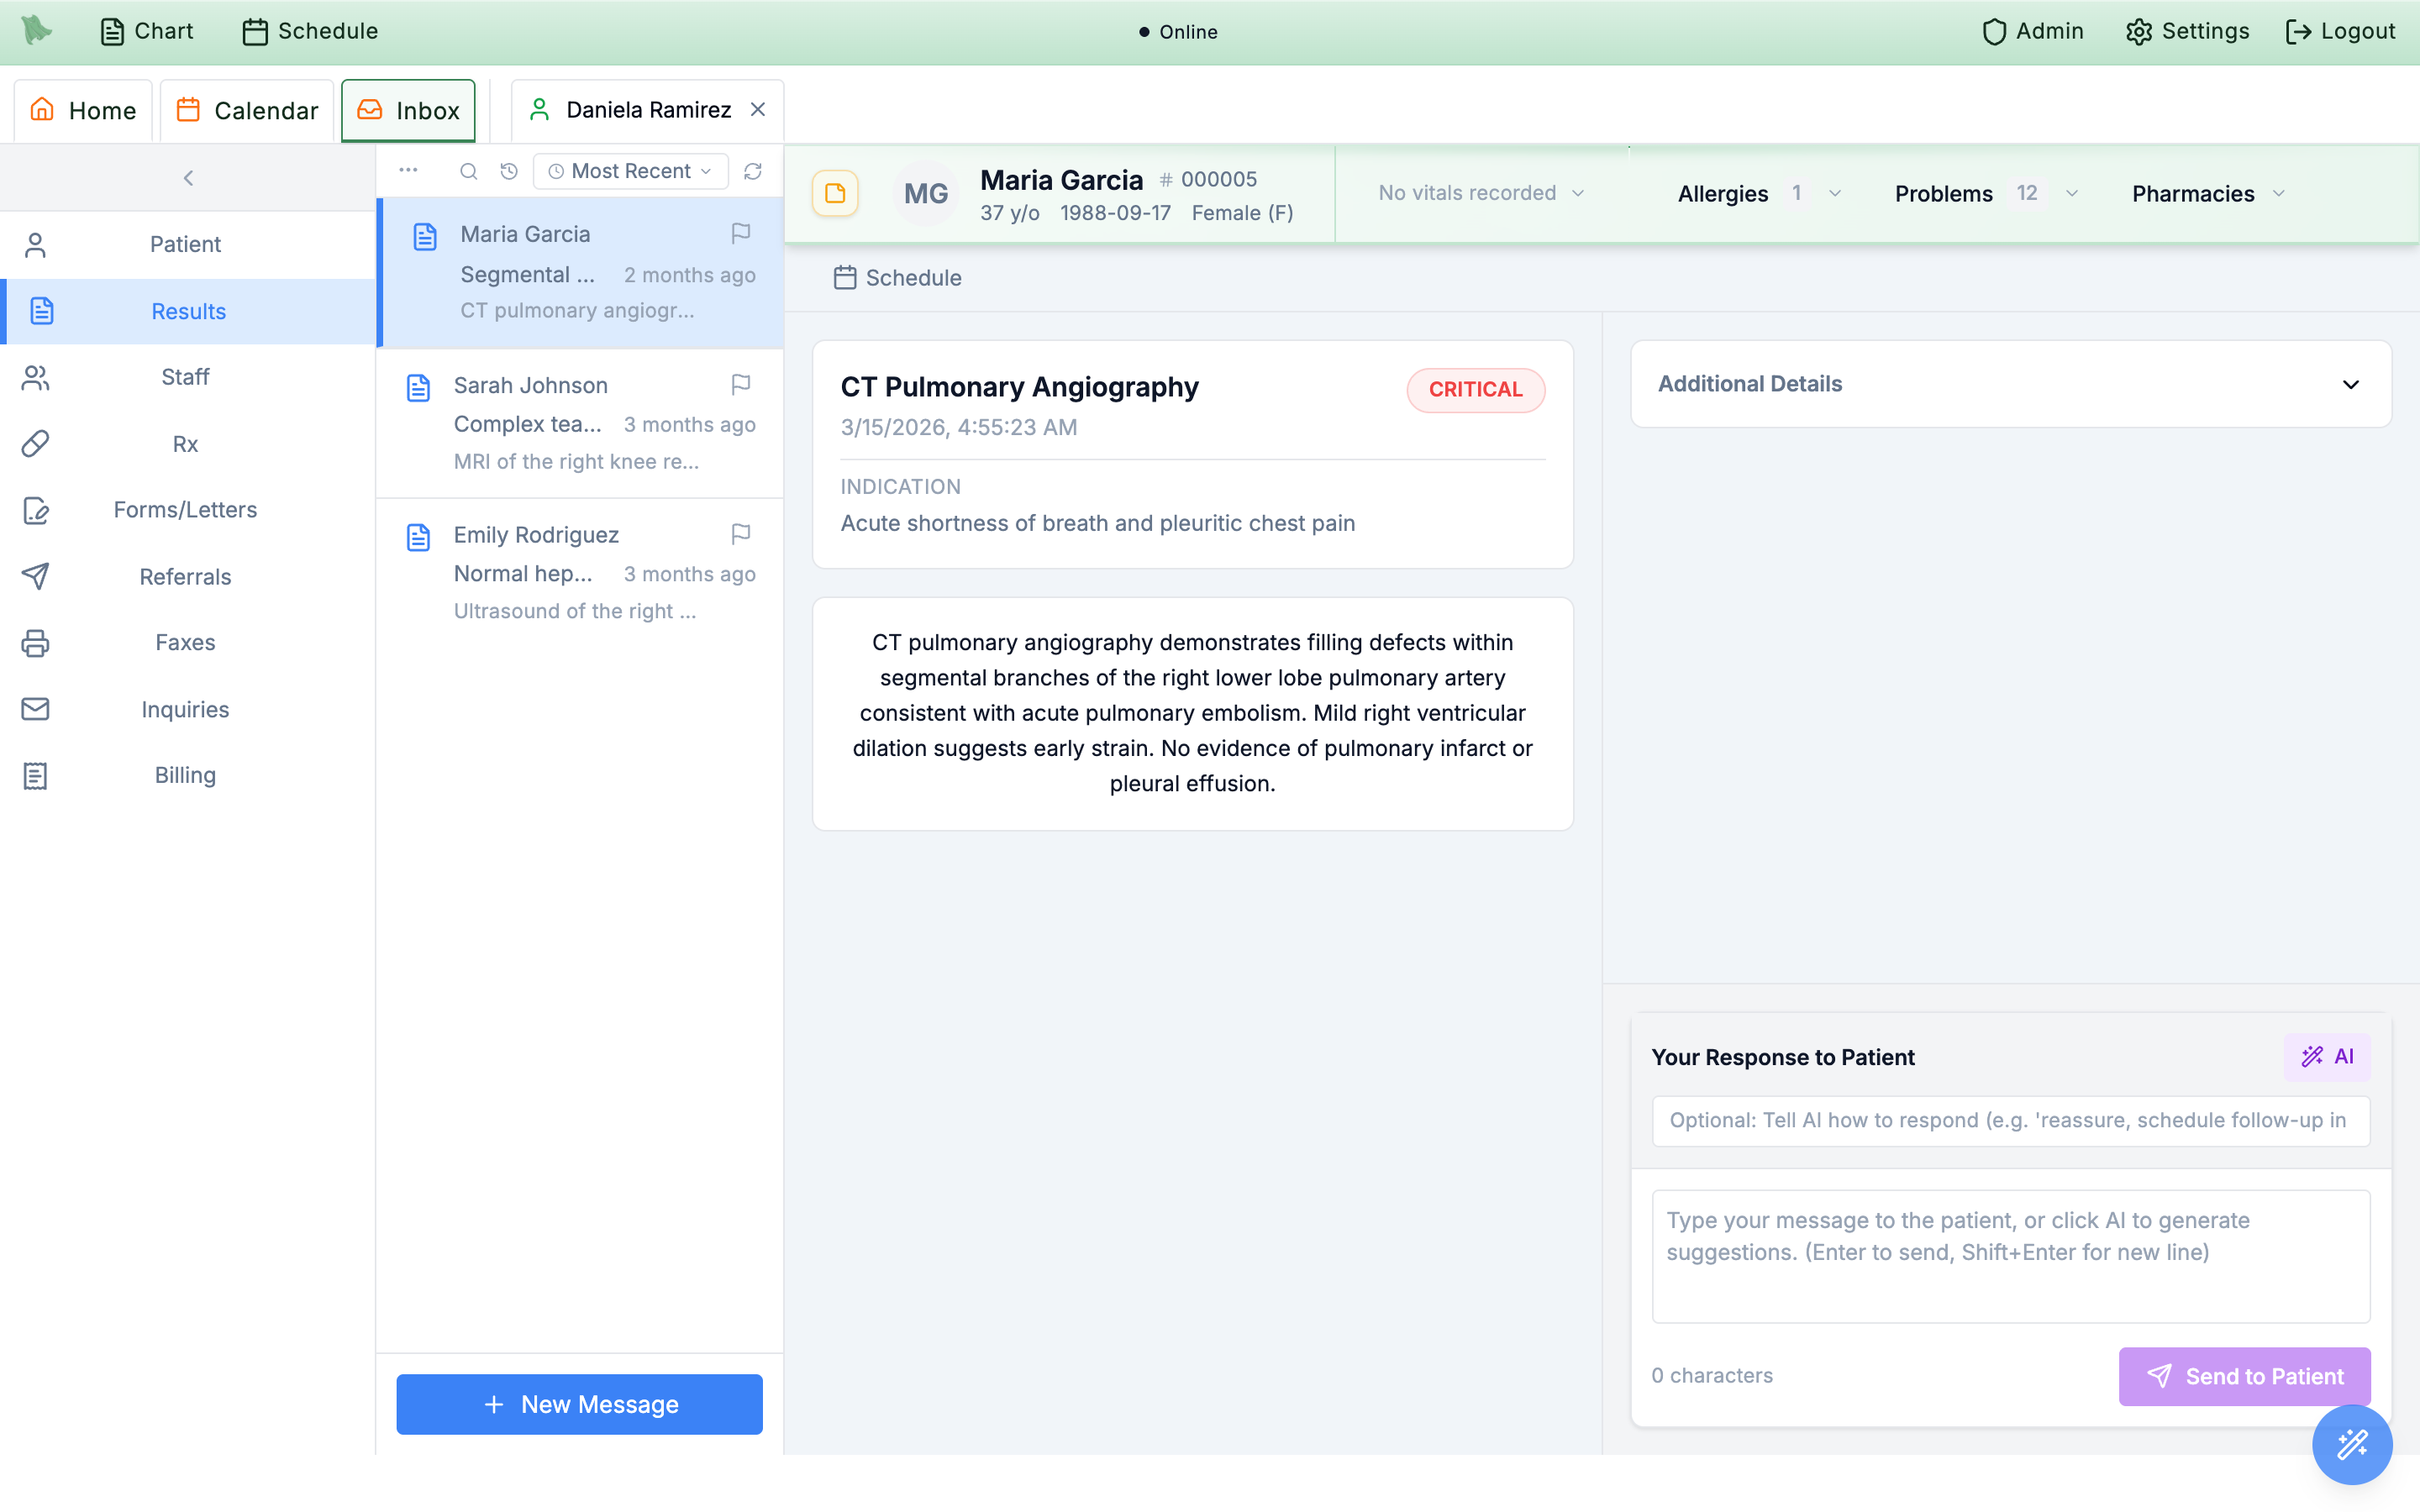
AI, edit, then Send to Patient.This message is not linked to a conversation thread.
Triage with flags, read state & completion
Every view shares the same triage toolkit: read state, flags, completion, sorting, and search. The quickest path is the right-click menu on any list row; the same actions live in the action bar above the list (as icon buttons on very wide screens, otherwise behind a … overflow menu).
-
Right-click any row.
The context menu offers
Open,Mark as read/Mark as unread,Flag/Remove flag,Forward thread…(patient threads only), andMark as complete/Mark as incomplete. The action-bar equivalents areMark as complete,Flag message, andMark as unread. -
Sort the list.
The sort dropdown offers
Most Recent,Unread First, andFlagged First. Sort buckets stay stable until you refresh or change the sort, so items don’t jump around while you work through them. -
Search and filter.
The magnifier (
Search / Filters) opens a panel withSearch text(placeholderSubject, sender, body…),Received withinchips (24h/7d/1mo/All), and aPatientfilter (Choose…opens patient search;Any patientwhen unset), plusClear filtersandDone. While filters are active, the magnifier becomes a one-clickClear filters. -
Complete finished work.
Completing an item hides it from the list. The clock button toggles
Show completed messages/Hide completed messagesto reveal them grayed out with aCompletedcheck. For patient threads, completing covers the whole conversation — and the thread automatically returns to your list if the patient sends a newer message. -
Refresh without losing your place.
Refresh messagesre-pulls the current view while keeping your selection.
Inbox keyboard shortcuts
The Inbox has its own Outlook-style chords, active whenever you’re in the Inbox tab. They use Ctrl on Windows and Mac alike, and they stand down while a dialog — compose, forward, scheduling — is open, so the dialog keeps the keyboard.
| Shortcut | What it does |
|---|---|
| Ctrl+N | New message. |
| Ctrl+R | Reply to the selected message. |
| Ctrl+F | Forward the selected message. |
| Ctrl+Q / Ctrl+U | Mark the selected message read / unread. |
| Backspace | Mark the selected message complete. |
| Ctrl+Shift+G | Flag / unflag the selected message. |
| Ctrl+. / Ctrl+, | Open the next / previous message in the list. |
| Ctrl+E | Jump to the search box. |
| Ctrl+Shift+L | Schedule an appointment for this patient. |
| Ctrl+O / F7 | Open order entry from the selected message (standalone orders). |
None of these are fixed: the Settings menu > Hotkeys opens the Keyboard Shortcuts editor, where you can rebind any of them to a chord you prefer.
Forward a conversation to your team
Forwarding is how patient conversations are handed to another physician or staff member — the message stays one thread, but ownership of the work moves to the recipient’s queue with the full prior history attached.
-
Open the dialog.
Click the
Forwardtoolbar button on a patient thread, or right-click the row and chooseForward thread…. -
Pick the recipient.
The
Forward Conversationdialog lists your organization’s clinicians and staff with aSearch team members…box — physicians show a stethoscope icon with credentials, staff show their title. Star a physician (Add to favorites/Remove from favorites) to pin them under aFavoritesheader aboveAll Team Members; it’s the same favorites list the calendar uses. Only physicians can be starred. -
Send it.
Select the person and click
Forward(it readsForwarding…while in flight);Cancelcloses without forwarding. -
What the recipient sees.
The conversation appears in their own Patient view with a blue forward arrow (tooltip
This conversation has been forwarded to you), and the thread timeline records an event pill — Dr. A forwarded to Dr. B.
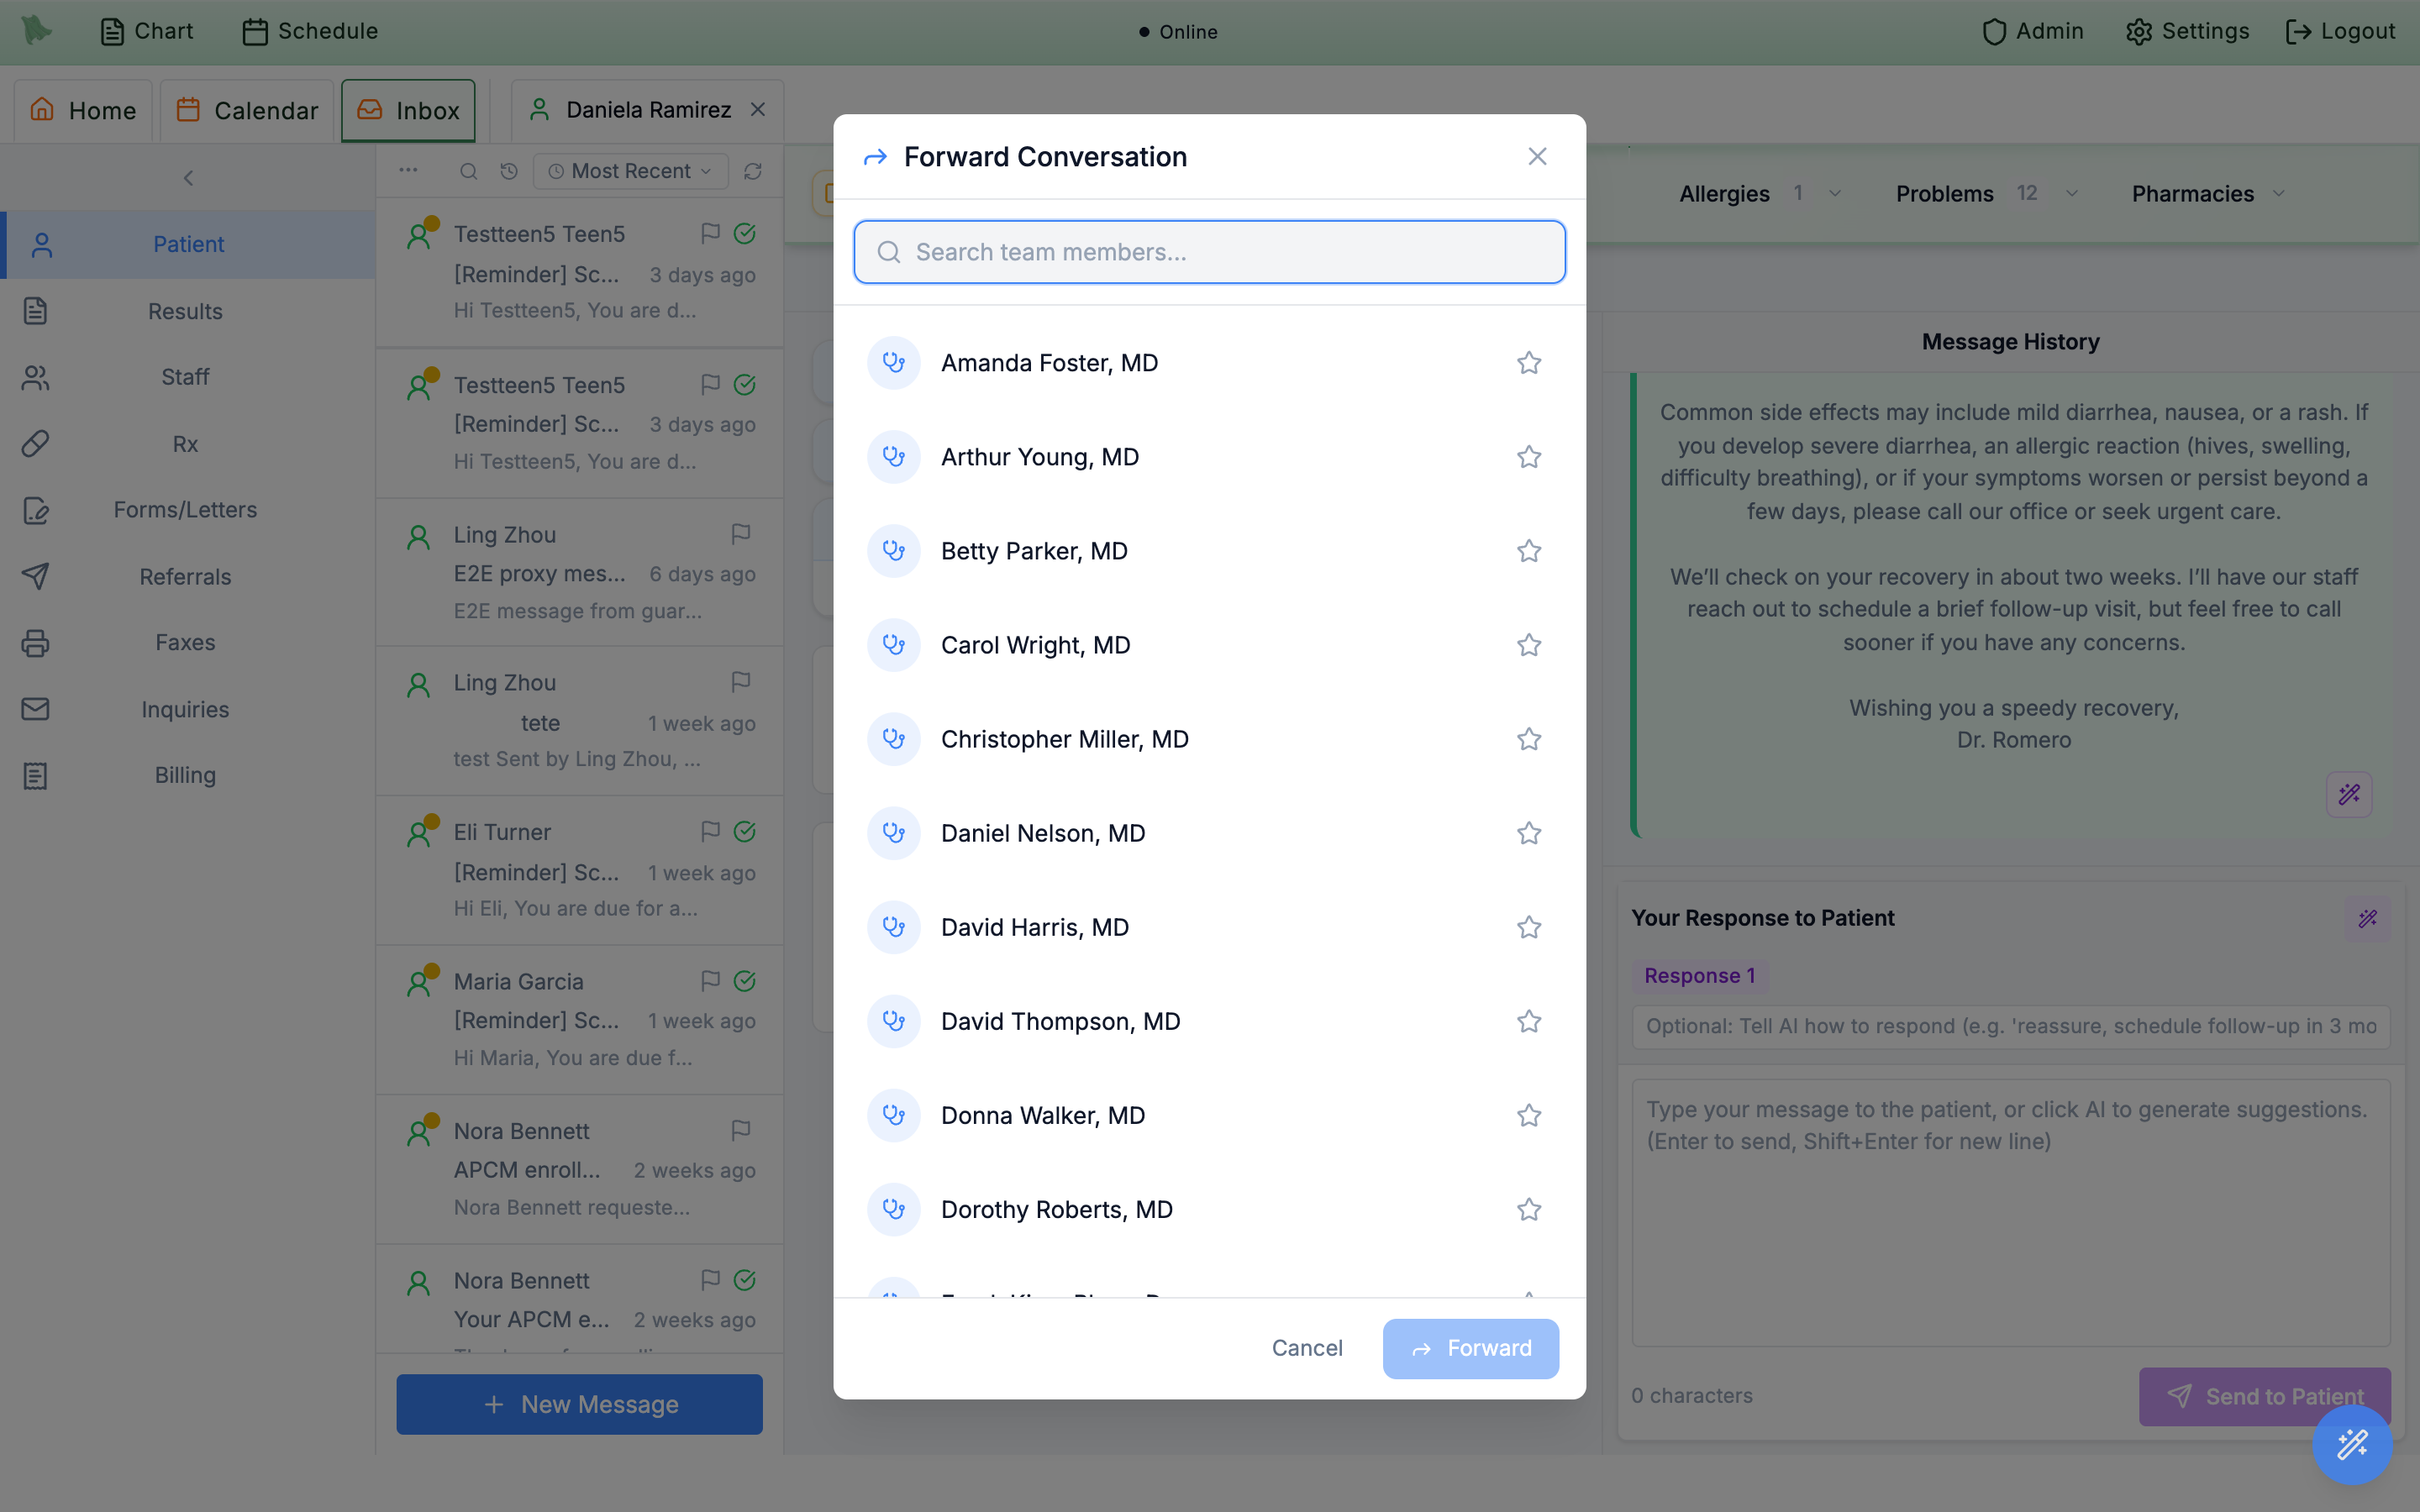
Forward Conversation dialog — star your frequent recipients to pin them under Favorites.Compose new messages & tune your messaging rules
To start a conversation rather than answer one, use the blue New Message button pinned at the bottom of the message-list column. A new message opens a fresh secure thread; the patient is alerted by push/SMS/email and replies from the portal, which lands right back in your Patient view.
-
Click
New Message. The compose modal opens (the same modal titles itselfReply to MessageorForward Messagein those contexts). -
Pick the patient.
To:is a patient picker — type two or more characters inSearch for a patient…, or choose fromRECENT PATIENTS(shown with DOB and MRN). Patients without a portal account are grayed out with aNo accounttag; selecting one shows an error that they cannot receive messages. -
Write and send.
Fill
Subject:andMessage:(inline images and dot phrases are supported), then clickSend Message— it showsSending…, thenMessage Sentwith aMessage sent successfully!banner before the modal closes. -
Or send it later.
A
Send laterbutton sits besideSend Messagein the compose modal and besideSend to Patientin the thread reply box. Pick one of the presets — stated in your practice’s time zone, not your laptop’s — or a custom date and time, and the message drops onto theQueuedtab of the todo panel, where you can still reschedule, send now, or cancel it right up until it goes (see Send a message later). Drafts carrying an attachment or an inline image can’t be scheduled; the button explains why and you send those immediately. -
Replies stay in the conversation.
Replying from a thread reuses the conversation, prefixes the subject with
Re:, and locks the recipient to the patient on the thread.
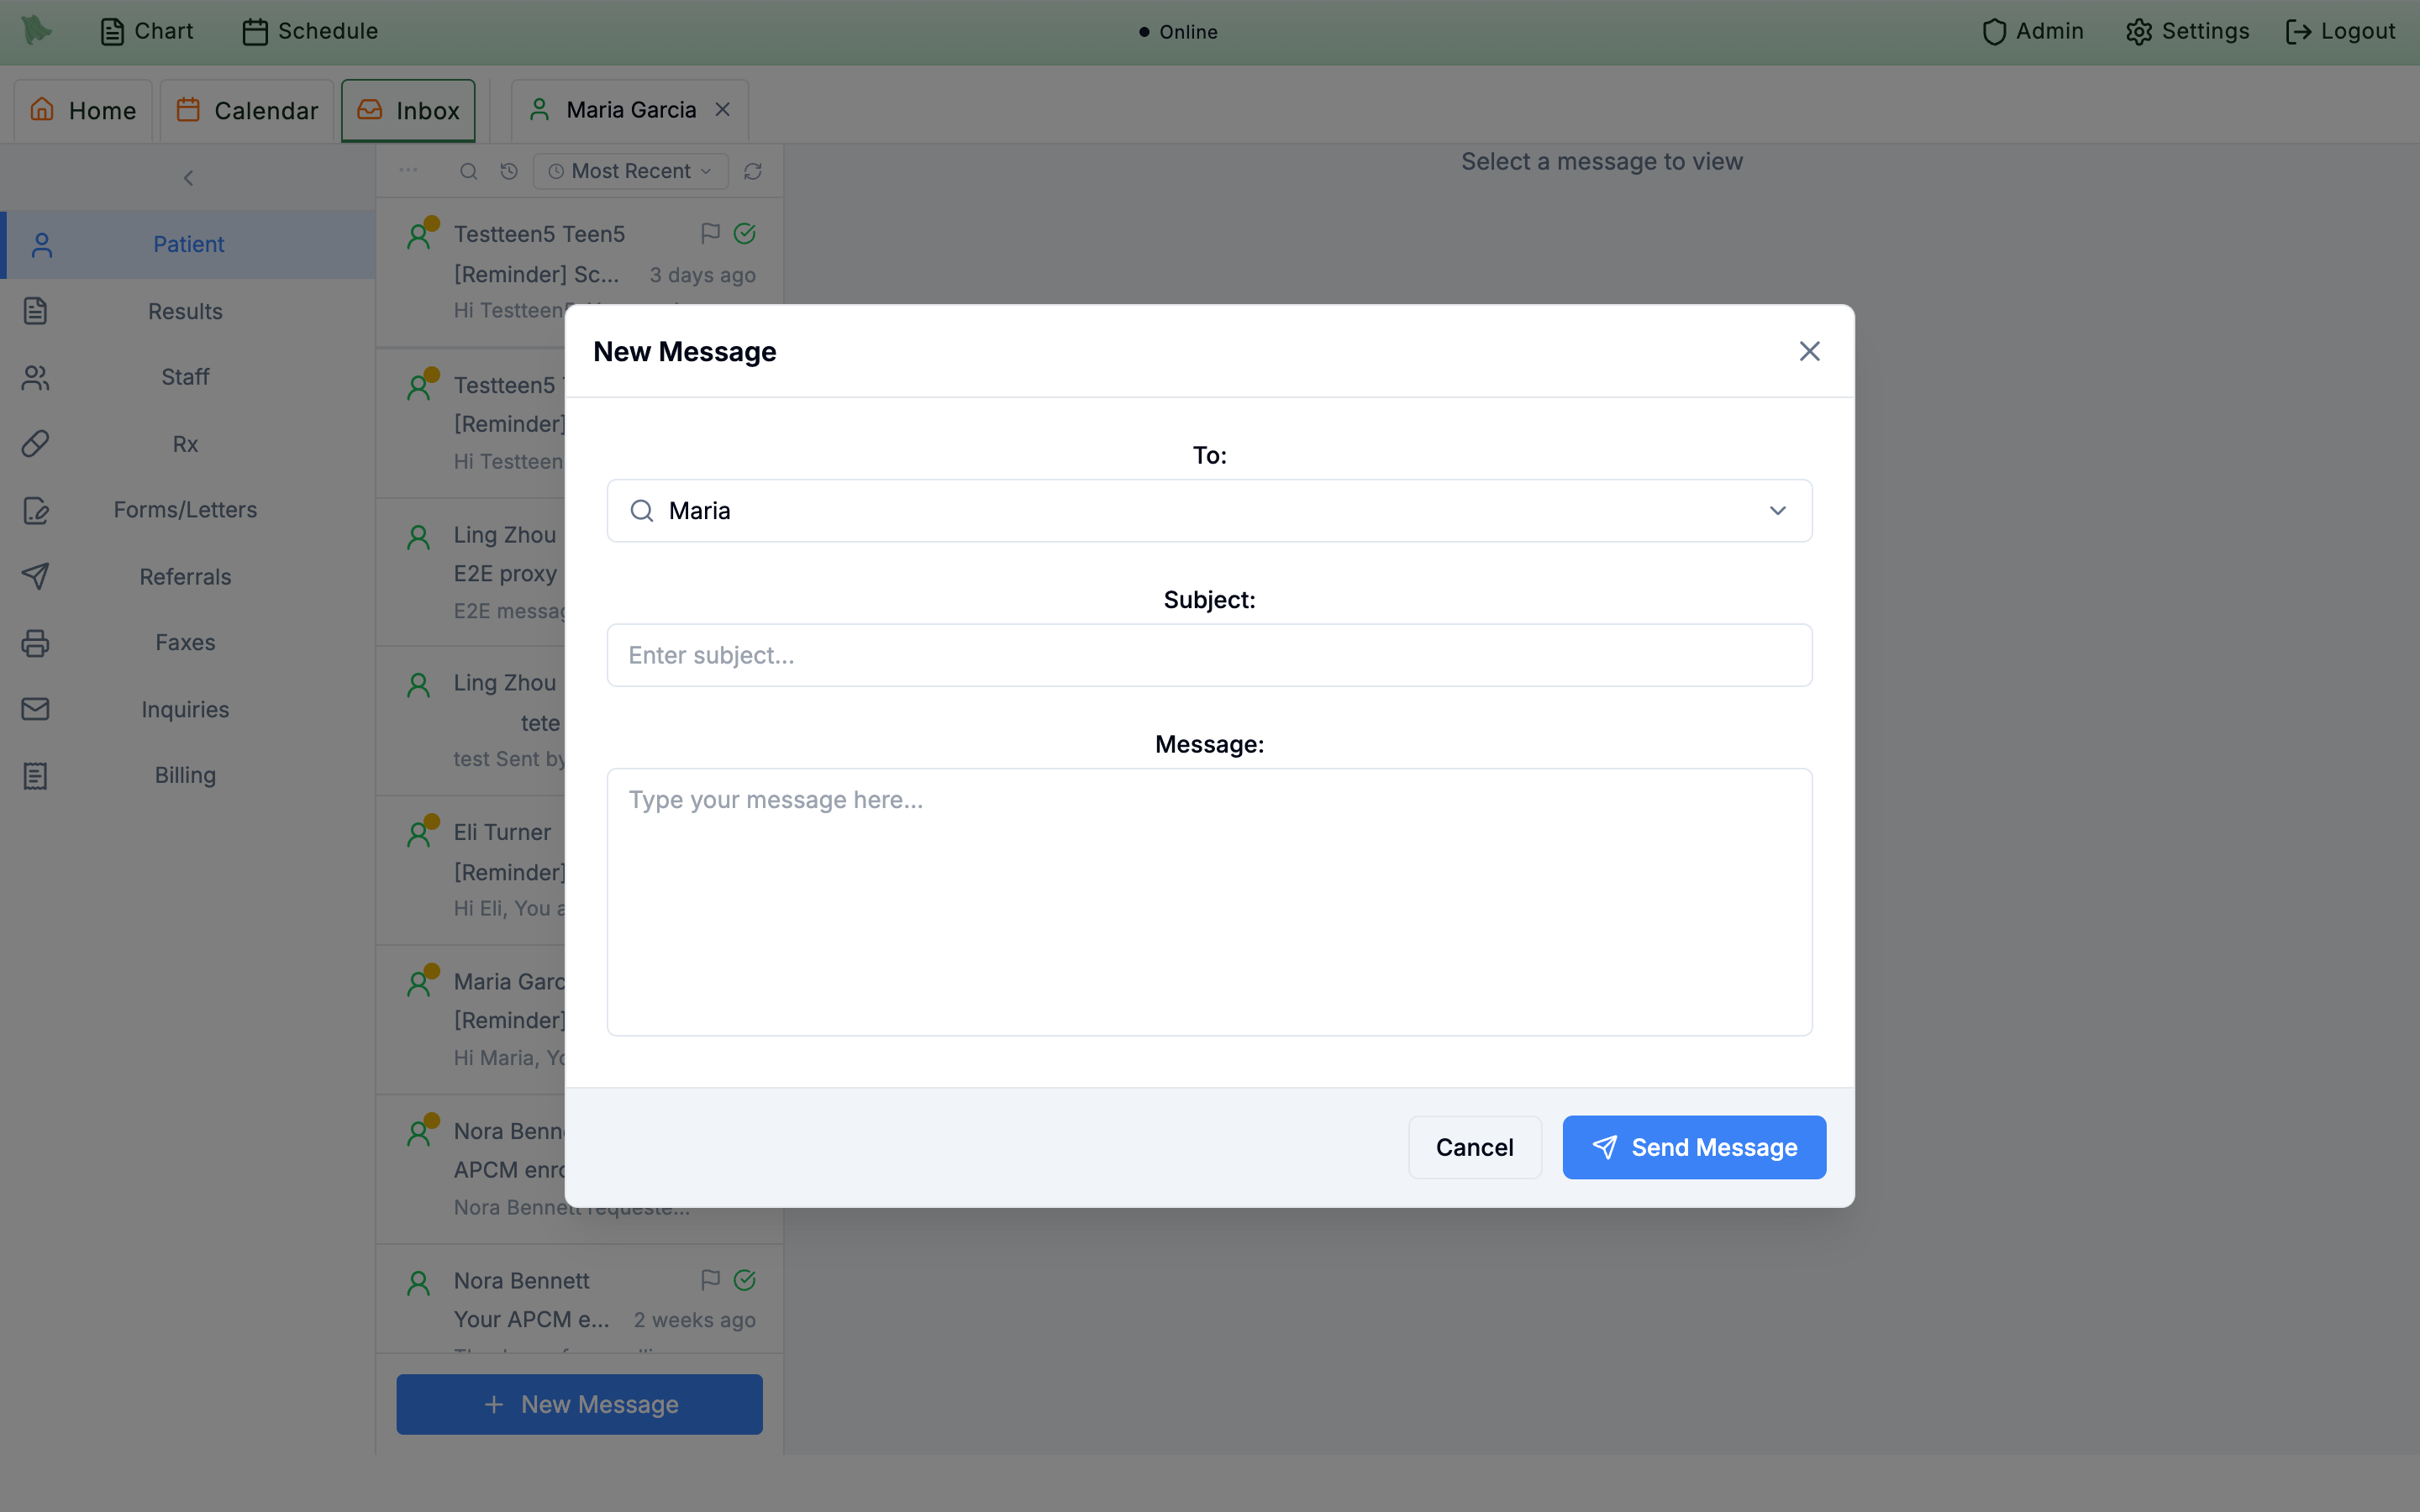
New Message modal — search or pick a recent patient, then subject, message, send.Your personal messaging rules live under the toolbar Settings menu > Message Settings (the modal is titled Message Preferences):
Patient Messaging Permissions
Who can message you? — All patients in the practice, Only patients you’ve seen before, Only patients you’ve seen recently (with a Recent encounter timeframe (months) field), or Disable patient messaging.
Notification Settings
Minimum urgency level for notifications — Low (All messages), Medium, or High (Urgent only). Note that manually composed messages always send at Medium urgency; there’s no urgency picker in compose.
After-Hours Settings
Allow after-hours messages, with its own Minimum urgency for after-hours messages threshold so only what matters reaches you off-hours.
No account, invite them to the portal first (see Inviting patients).
Need help? Email support@heroemr.com.