Referrals & external care
Care beyond your walls: order referrals and imaging, send the letters, track what's outstanding, and capture the consult reports that come back.
Referrals & external care
Care beyond your walls: order referrals and imaging, send the letters, track what's outstanding, and capture the consult reports that come back.
Order a referral to a specialist
A referral is an order type, placed from the same Orders search you use for prescriptions and labs (see Order medications, labs, imaging & more). You look the receiving provider up in the national NPPES registry, describe why you’re sending the patient, and Hero EMR generates and faxes the referral letter when you sign the order.
-
Find
New Referral. In the encounter’s Orders section, type ref into the order search (F7 or Ctrl+O jumps straight to it), or open the Search Orders window and switch to theReferraltab. Pick the resultNew Referral— “Refer patient to specialist”. -
Search for the receiving provider.
The
Search for Providerpanel queries the national NPPES registry — not your practice’s own provider directory. Fill in at least one ofFirst Name,Last Name,Specialty,City, orState, then clickSearch Providers(Enter works too). Each result shows the provider’s credential, specialty, city and NPI, plus a fax number when NPPES has one on file. Click a result to select it — a green summary shows their contact details, andChange Providerreopens the search. -
Describe the referral.
Enter the
Reason for Referral(required — for example “Evaluation of chest pain and abnormal EKG”), set theUrgency(Routine,Urgent, orSTAT), and addClinical Noteswith the history and exam findings the specialist should see. -
Choose
Fax Delivery. TheDelivery Methodpanel offers two cards:Electronic Delivery(taggedRecommended) andFax Delivery. ChooseFax Delivery— direct electronic delivery to outside EHRs is still on the roadmap, and today the letter travels by fax in every case, so a provider without a fax number cannot receive it. If NPPES had no fax on file, anEnter Fax Number Manuallyfield appears (“No fax number found in NPPES registry”) — get the number from the specialist’s office and type it in. -
Click
Add Referral. Hero validates first: a selected provider with an NPI, a provider name, a provider specialty, and a reason are all required, and choosingFax Deliveryadditionally requires a fax number (“Fax number is required for fax delivery. Please enter a fax number or select electronic delivery.”). Specialty normally arrives prefilled from NPPES, but some registry rows come back blank — if you see Provider specialty is required, type it in yourself. Once it passes, the referral lands on the encounter’s order list with aRefbadge, the provider’s name and specialty, and aReason:line.
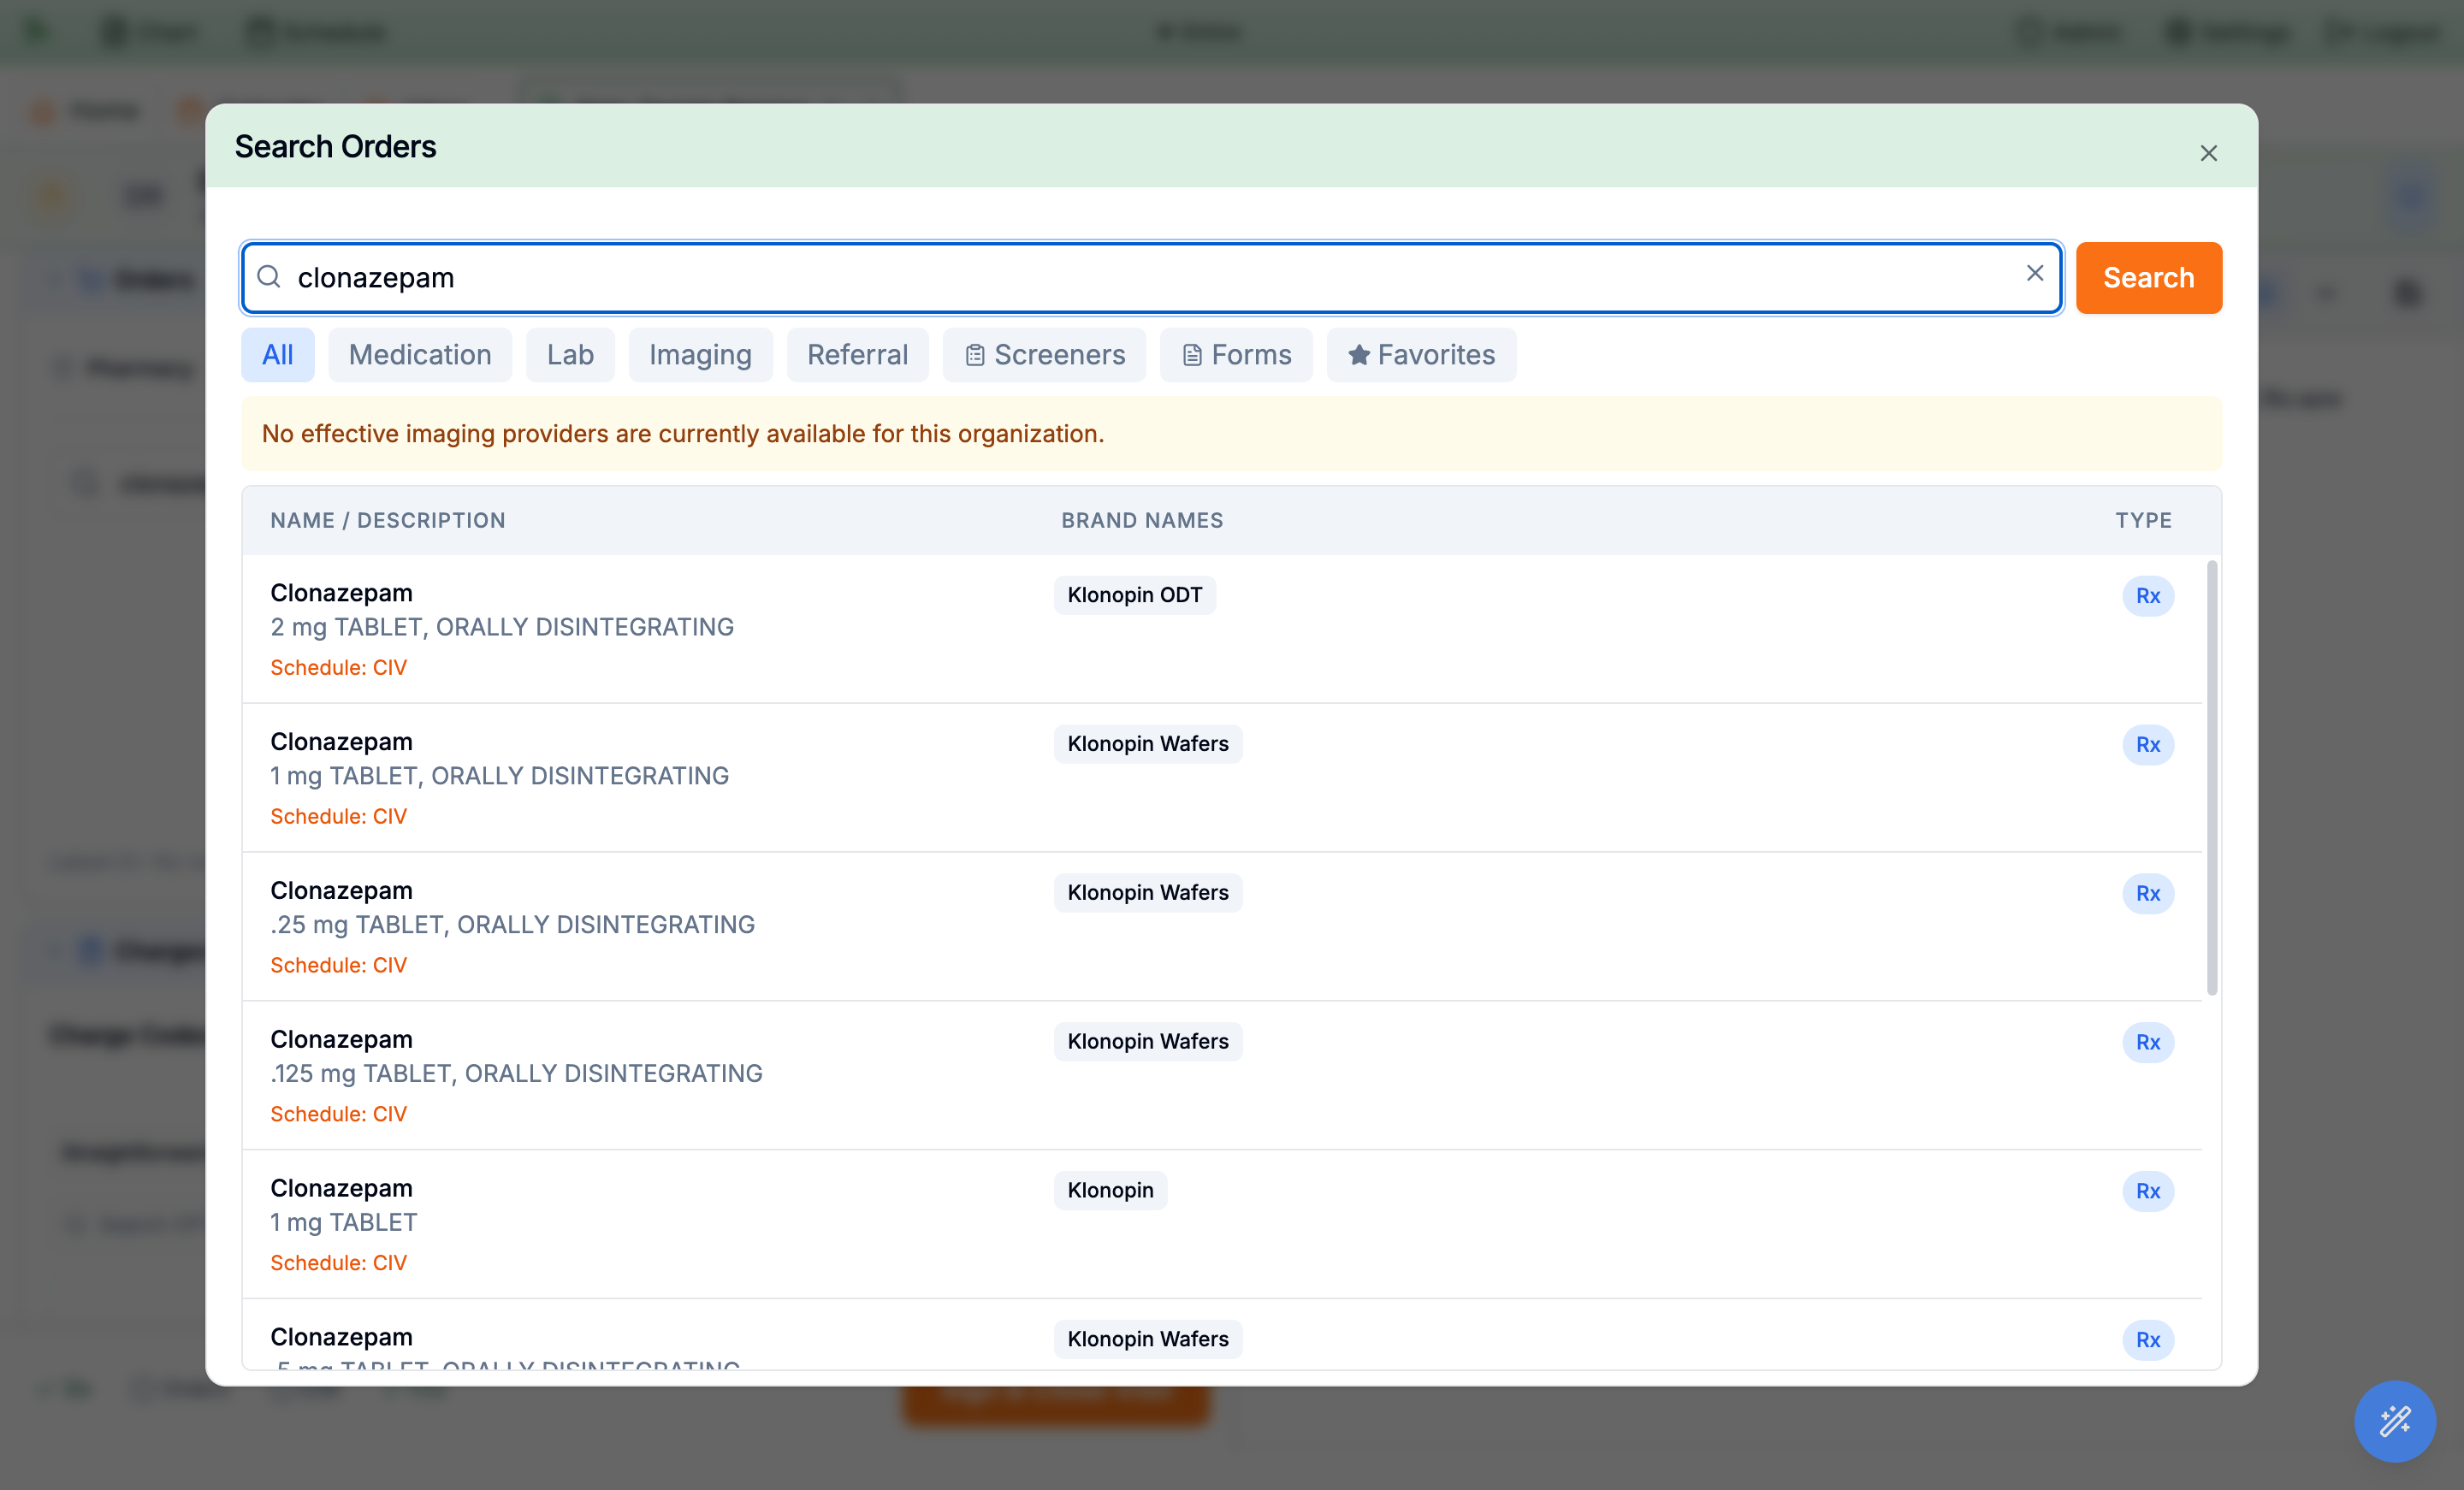
All, Order Sets, Medication, Lab, Imaging, Referral, Screeners, Forms, and Favorites — or just type ref to surface New Referral.Remove referral (trash), Save as favorite (star — it reappears under the Favorites tab of Search Orders; see Favorites), and Sign & Send. To change any detail, remove the referral and add it again.
Sign & send the referral letter
There is no separate letter to compose. When you send a referral, Hero EMR generates the PATIENT REFERRAL FORM — a PDF carrying your referring-physician block and saved signature, the patient’s information, the receiving provider, the reason, clinical notes and urgency, and the visit’s diagnosis codes — and faxes it from your practice’s fax line. That PDF is the referral letter.
-
Link a diagnosis first.
The referral row’s
Sign & Sendbutton stays disabled until the encounter has at least one diagnosis and that diagnosis is tied to the referral in the Associations grid. The tooltip tells you what’s missing —Cannot send: Add a diagnosis to the encounter, orAssociate a diagnosis with this referral. -
Click
Sign & Send. Hero assembles the letter (STATandUrgentreferrals carry a warning banner on the form) and faxes it via your practice’s SRFax line with a cover page reading Referral for <patient name>. While a send is in flight, other users see a lock badge (“<name> sending…”); if a lock looks stuck, Hero offers to override and send anyway. -
Confirm the green
Sentbadge. A successful send turns the row’s badge toSentwith aReferral ID:reference — check that you actually see it before moving on (see the failure note below if you don’t). A sent referral is immutable; reprint or re-download the letter any time from the Referrals inbox with itsPDFbutton.
Failed to send referral toast means the letter was not confirmed sent — depending on where the send failed, the referral either stays unsent or appears in the Referrals inbox with a failed badge. Retry from the same row; if the error appeared late in the send, confirm with the receiving office (or your fax provider’s outbox) before retrying so the letter isn’t delivered twice.
Referrals are unavailable during downtime.
Order an imaging study
Imaging goes through the same Orders search, but the catalog behind it is your practice’s own: studies come from the radiology providers configured under External providers, with contrast variants of the same study consolidated into a single result.
-
Find the study.
Search by name (for example mri) or use the
Imagingtab of the Search Orders window. If the search instead reports “Imaging provider visibility is misconfigured. Ask an admin to select at least one send-ready provider or switch mode to all.”, an admin needs to adjust the imaging-provider visibility setting first. -
Describe the study.
The dialog opens titled with the composed study name (for example MRI Brain With Contrast). Enter the required
Clinical Indication(“Reason for imaging study…”), then setContrast(Without Contrast,With Contrast, orWith and Without Contrast— only the variants the chosen provider actually offers),Laterality(Left/Right/Bilateral, required only for sided studies), theProvider, theUrgency, and anySpecial Instructions. -
Confirm the patient weight.
Patient Weight (lbs)auto-fills from the latest chart vitals. It’s mandatory for RadNet-routed orders — the helper text readsRequired for RadNet submission if no recent weight is available in vitals.— and must be a whole number between 1 and 999. -
Answer the
Contrast Safety Questionnaire. Choosing any contrast option reveals safety checkboxes, includingPatient has known allergy to IV contrast(which warns “Warning: Consider alternative imaging or consult with radiology.”) and a diabetes question. Then clickSave Changesto add the order. -
Sign & send — and cancel if plans change.
The order appears with an
Imgbadge and sends like a referral: link a diagnosis (“Associate a diagnosis with this imaging order”), thenSign & Send. If contrast or laterality is still missing, Imaging order needs an update reopens the dialog. On success the row showsSentandOrder ID:, and gains aCancelbutton that opens theCancel Imaging Orderdialog (“Are you sure you want to cancel this imaging order?”) with reasonsDuplicate Order,Ordered by Mistake, andTesting Not Needed. Cancellations of RadNet orders are forwarded to the imaging center.
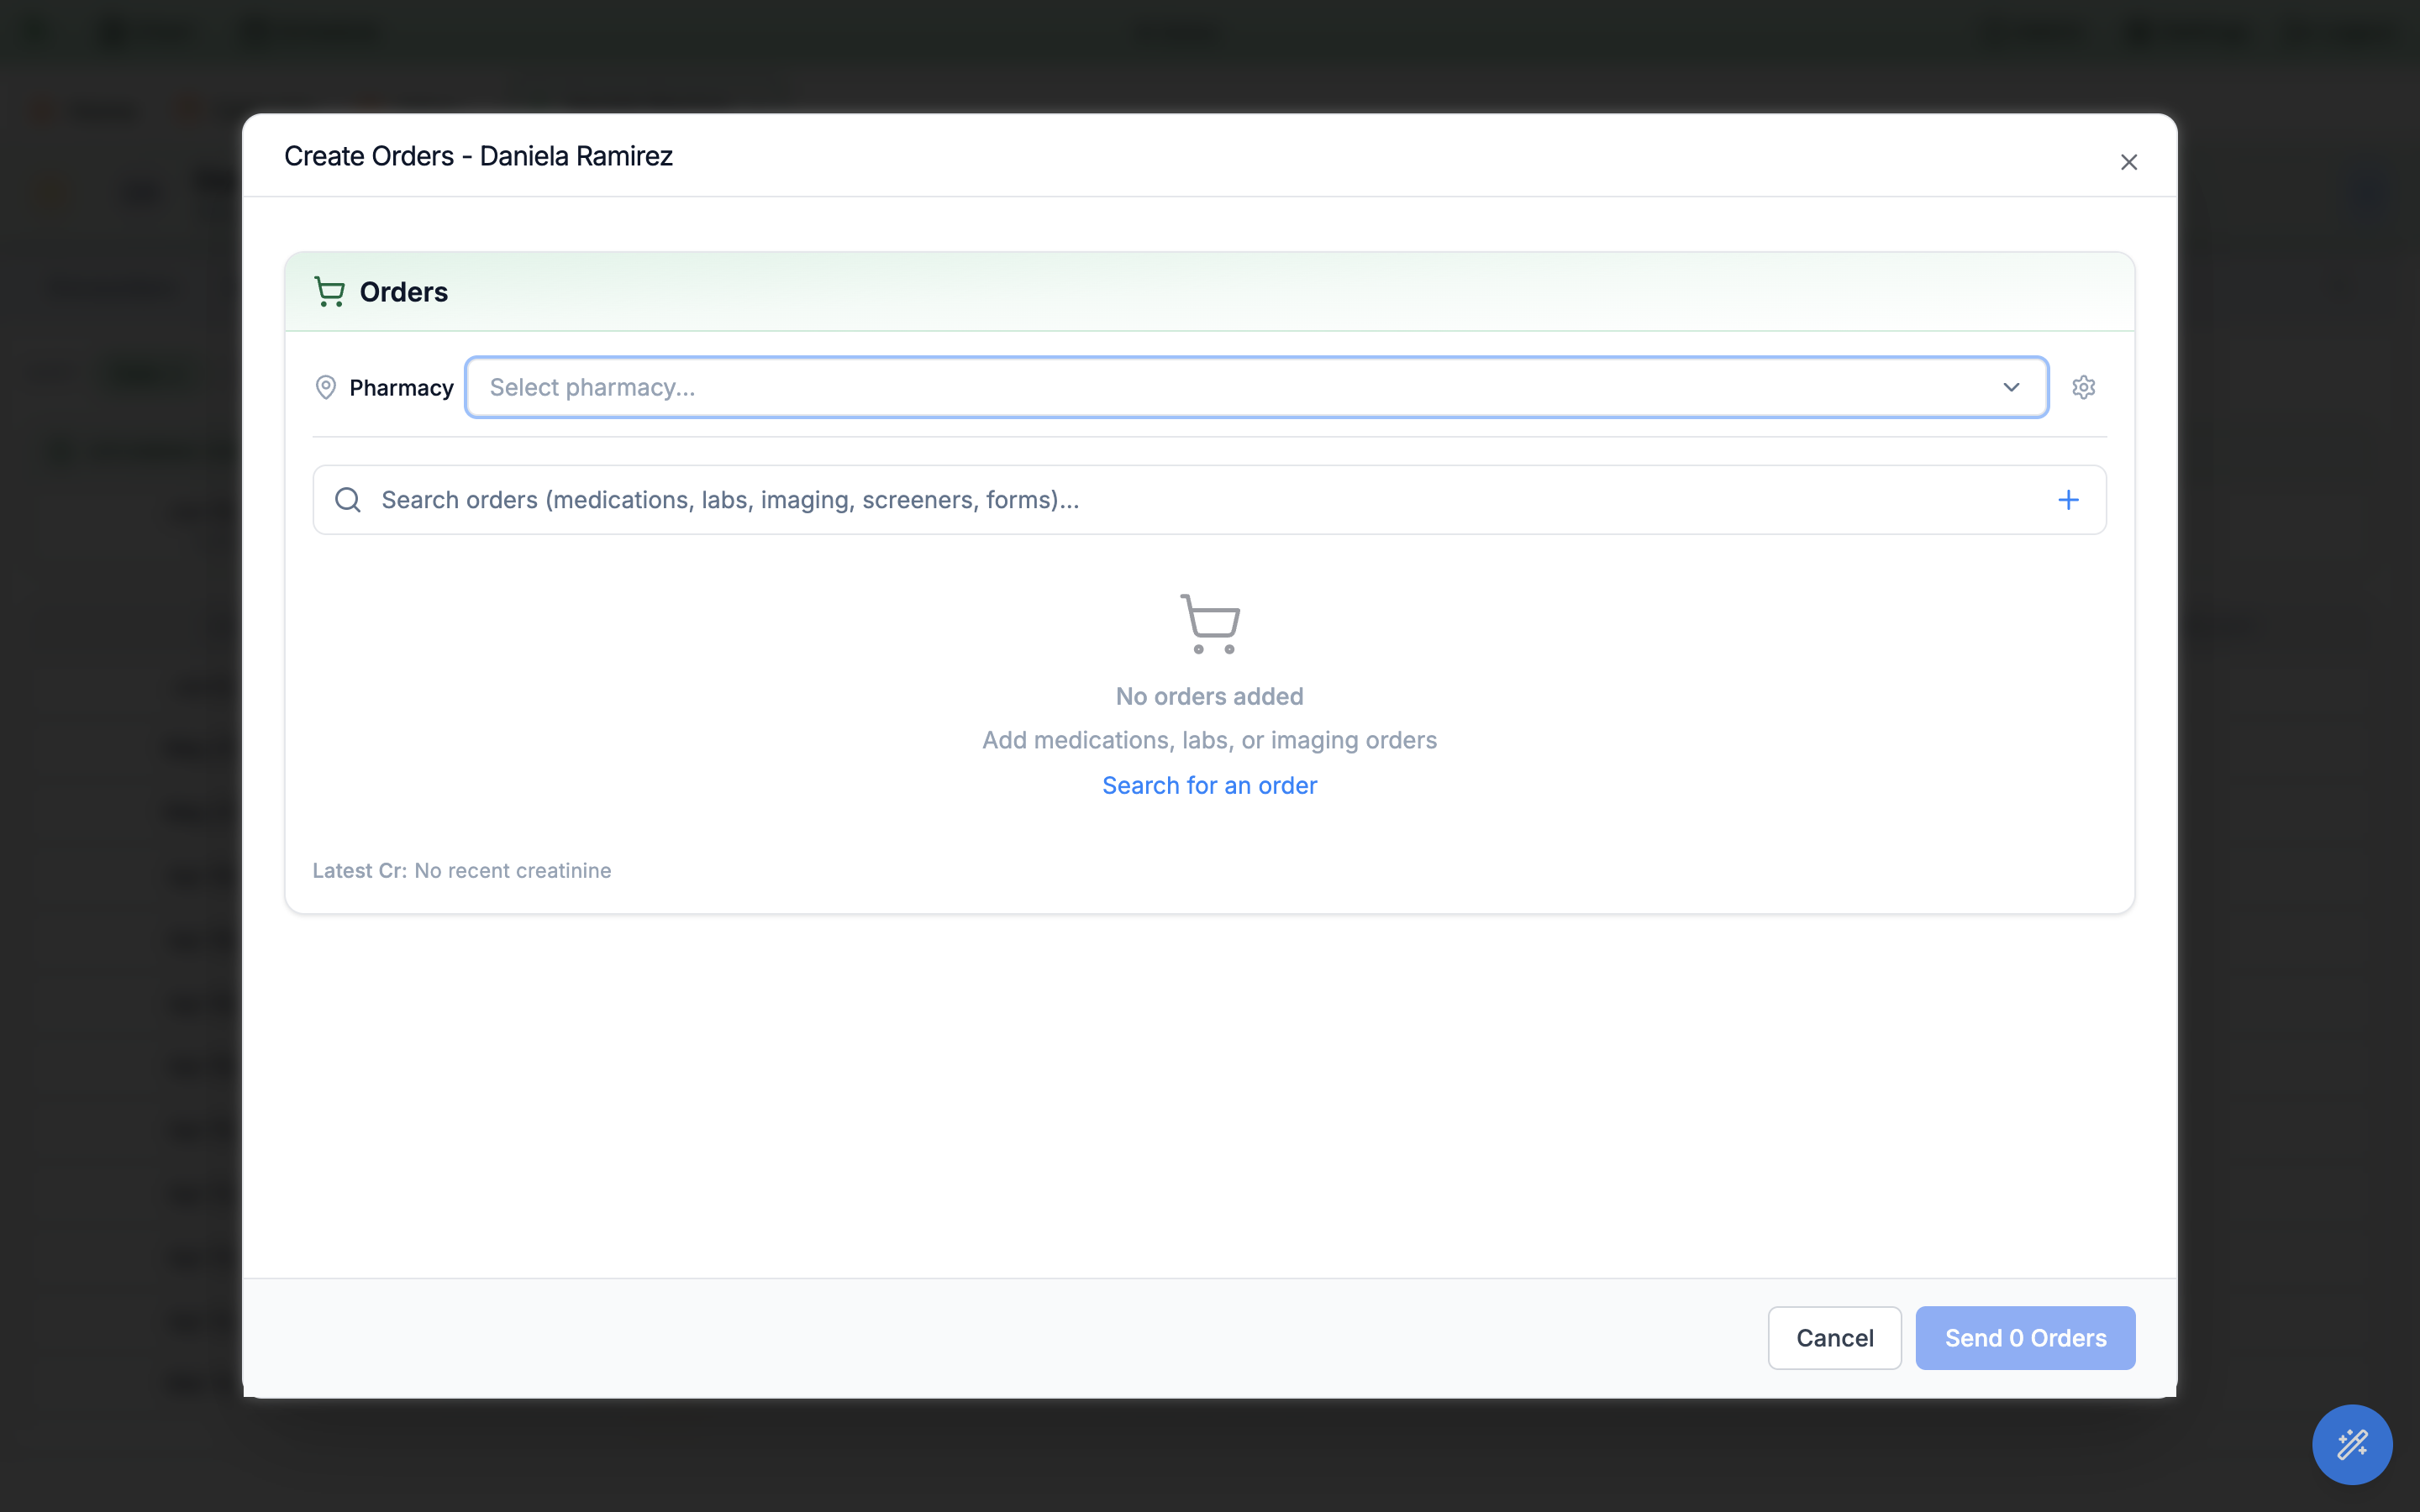
Create Orders window.Send N Orders, Hero shows “Creating encounter and sending orders…” and files a lightweight encounter for you automatically.
Contrast choices are limited to what the selected provider’s catalog offers, so switching Provider can change which options exist — recheck after a switch. During a downtime window imaging is blocked: Imaging is unavailable during downtime.
How RadNet Connect orders flow
If your practice has RadNet Connect configured (an admin sets it up under External providers), imaging orders routed to a RadNet provider transmit electronically in the background the moment you Sign & Send — no fax to dial, no phone call to make.
- Hero matches the patient. The patient’s demographics and primary insurance are mapped to RadNet’s format, and Hero finds — or creates — the matching patient on RadNet’s side. Orders missing required demographics fail with a specific reason, so keep the chart complete.
- The order is submitted. The exam from your procedure catalog is sent with the order details, and RadNet’s confirmation reference is stored on the order for later lookup.
-
Failures come back to you.
If transmission ultimately fails, the ordering provider receives an entry in the Results inbox titled
RadNet order failed:followed by the study — including the failure reason, modality, body part, and reason for study. Failures are never silent.
| Order status | What it means |
|---|---|
| pending | Created in Hero, not yet transmitted. |
| submitted | Accepted by RadNet; the confirmation reference is on file. |
| scheduled | The imaging center has booked the patient. |
| imaged | The study has been performed. |
| completed | The study is finalized. |
| failed / canceled | Transmission failed, or the order was canceled — cancellations placed in Hero are forwarded to RadNet. Statuses only ever move forward. |
Track sent referrals in the Inbox
Every referral you send is tracked in the Referrals view of the Inbox — the Referrals item (send icon) in the left sidebar, with an unread-count badge. It lists every non-draft referral for the practice, newest first, each entry titled Referral to <provider name>.
-
Open a referral.
The header shows
Referralwith a status badge, the subject, aPatient:line, aReferred to:line with the provider’s name and specialty, andFax:with the number on file. -
Read the detail.
The body shows a
Reasonsection with the referral reason and aTimelinewithCreatedandUpdatedtimestamps. -
Reprint the letter.
The
PDFbutton (it readsPreparing…while generating) regenerates the PATIENT REFERRAL FORM and opens it in a new tab — this is how you re-download or reprint a referral letter after the fact. - Triage like any inbox item. Mark referrals read or unread and flag the ones you’re chasing — flags and read state are shared across the organization.
| Status badge | Meaning & what to do |
|---|---|
| sent | The letter was generated and queued to your fax line. Confirm receipt with the receiving office by phone or fax. |
| failed | The send didn’t complete. Retry from the referral row in the encounter (see Referral letters). |
| draft | Created but never sent — drafts do not appear in this view at all. |
sent indefinitely. Confirm receipt and the patient’s specialist appointment directly with the receiving office.
referral.view (view referral records), referral.manage (create, edit, send, and track referrals), and referral.coordinate (coordinate incoming referrals, PDFs, and routing) — but actually sending orders and referrals remains physician/admin-only regardless.
Receive consult reports & review the Letters tab
What comes back from outside care lands in three places: incoming documents arrive in the Faxes inbox, returned imaging surfaces on the chart’s Imaging tab, and the chart’s Letters tab keeps the history of every letter generated for the patient.
-
Import incoming faxes.
Consult notes and imaging reports from outside providers usually arrive on your fax line. In
Faxes, useLink patient & import(the button readsLinking & importing…while it works) to attach the document to the right chart — full mechanics in Import faxes into the chart. Imported documents are auto-classified — consultation notes file as clinical notes, referral paperwork asReferral— and land on the chart’s Media tab. -
Review returned imaging.
Reports attached to an imaging order surface on the chart’s
Imagingtab with status chipsPending,No findings available,Normal study, andAbnormal. Opening a study shows the Technique, Findings, and Impression parsed from the report, theAccession Number:, and anAdd to Notebutton to pull results into your documentation — report review in depth lives in Imaging results. -
Check the
Letterstab. It lists every generated letter and form with columnsDate Requested,Physician,Type of Letter,Approval Status, and aViewaction, sortable by Date, Physician, Type, or Status. Status chips runPending Review,Approved,Rejected,Completed,Processing, andFailed; letter types includeReferral,FMLA Letter,Work/School Note,Insurance Letter, andMedical Summary. -
Spot records the patient imported.
Records a patient pulls in from Epic-based health systems through the portal’s record-import flow appear in the chart with an
Imported from Epicbadge on imaging studies and medications — handy when reconciling outside care.
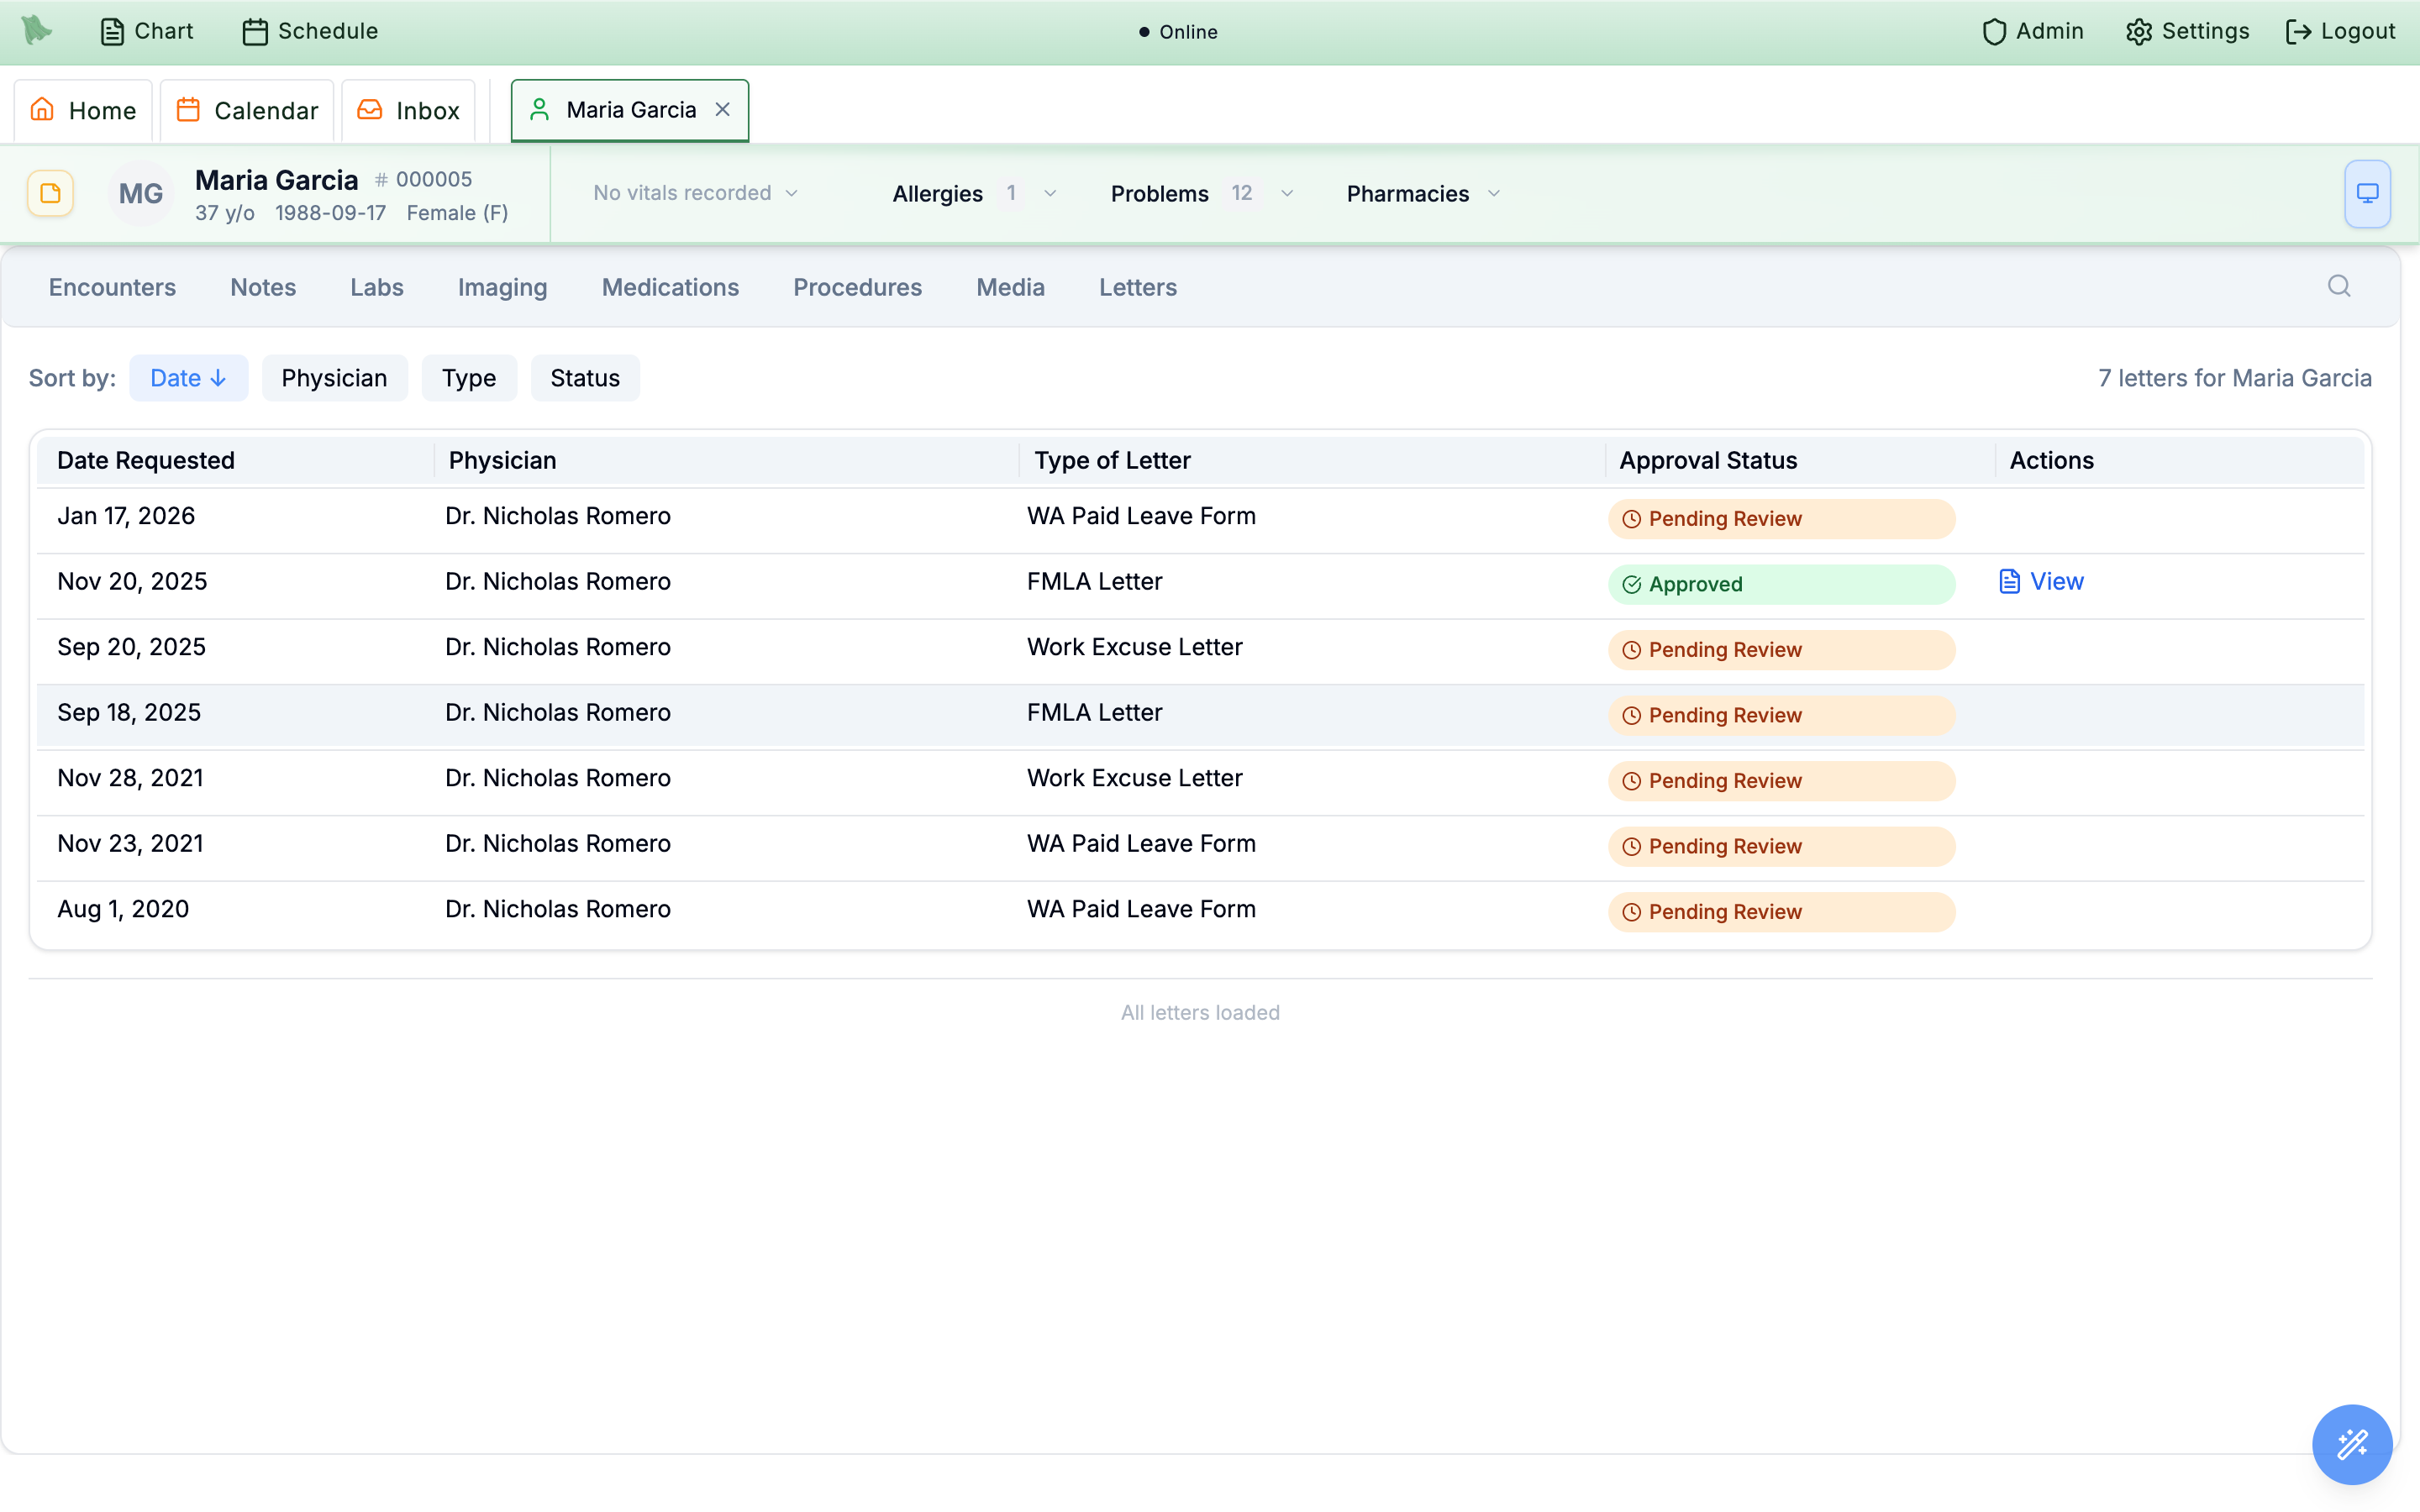
View action.Pending until a report is attached to the order.
Forms/Letters view (approval requires your saved signature), while the day-to-day referral letter is the auto-generated PATIENT REFERRAL FORM from Referral letters.
Need help? Email support@heroemr.com.