Building paperwork templates
Author a paperwork template end to end — who gets it, how it's signed, its content and response fields, publishing and versioning, and how it looks to the patient.
Building paperwork templates
Author a paperwork template end to end — who gets it, how it's signed, its content and response fields, publishing and versioning, and how it looks to the patient.
Name the template and pick the document type
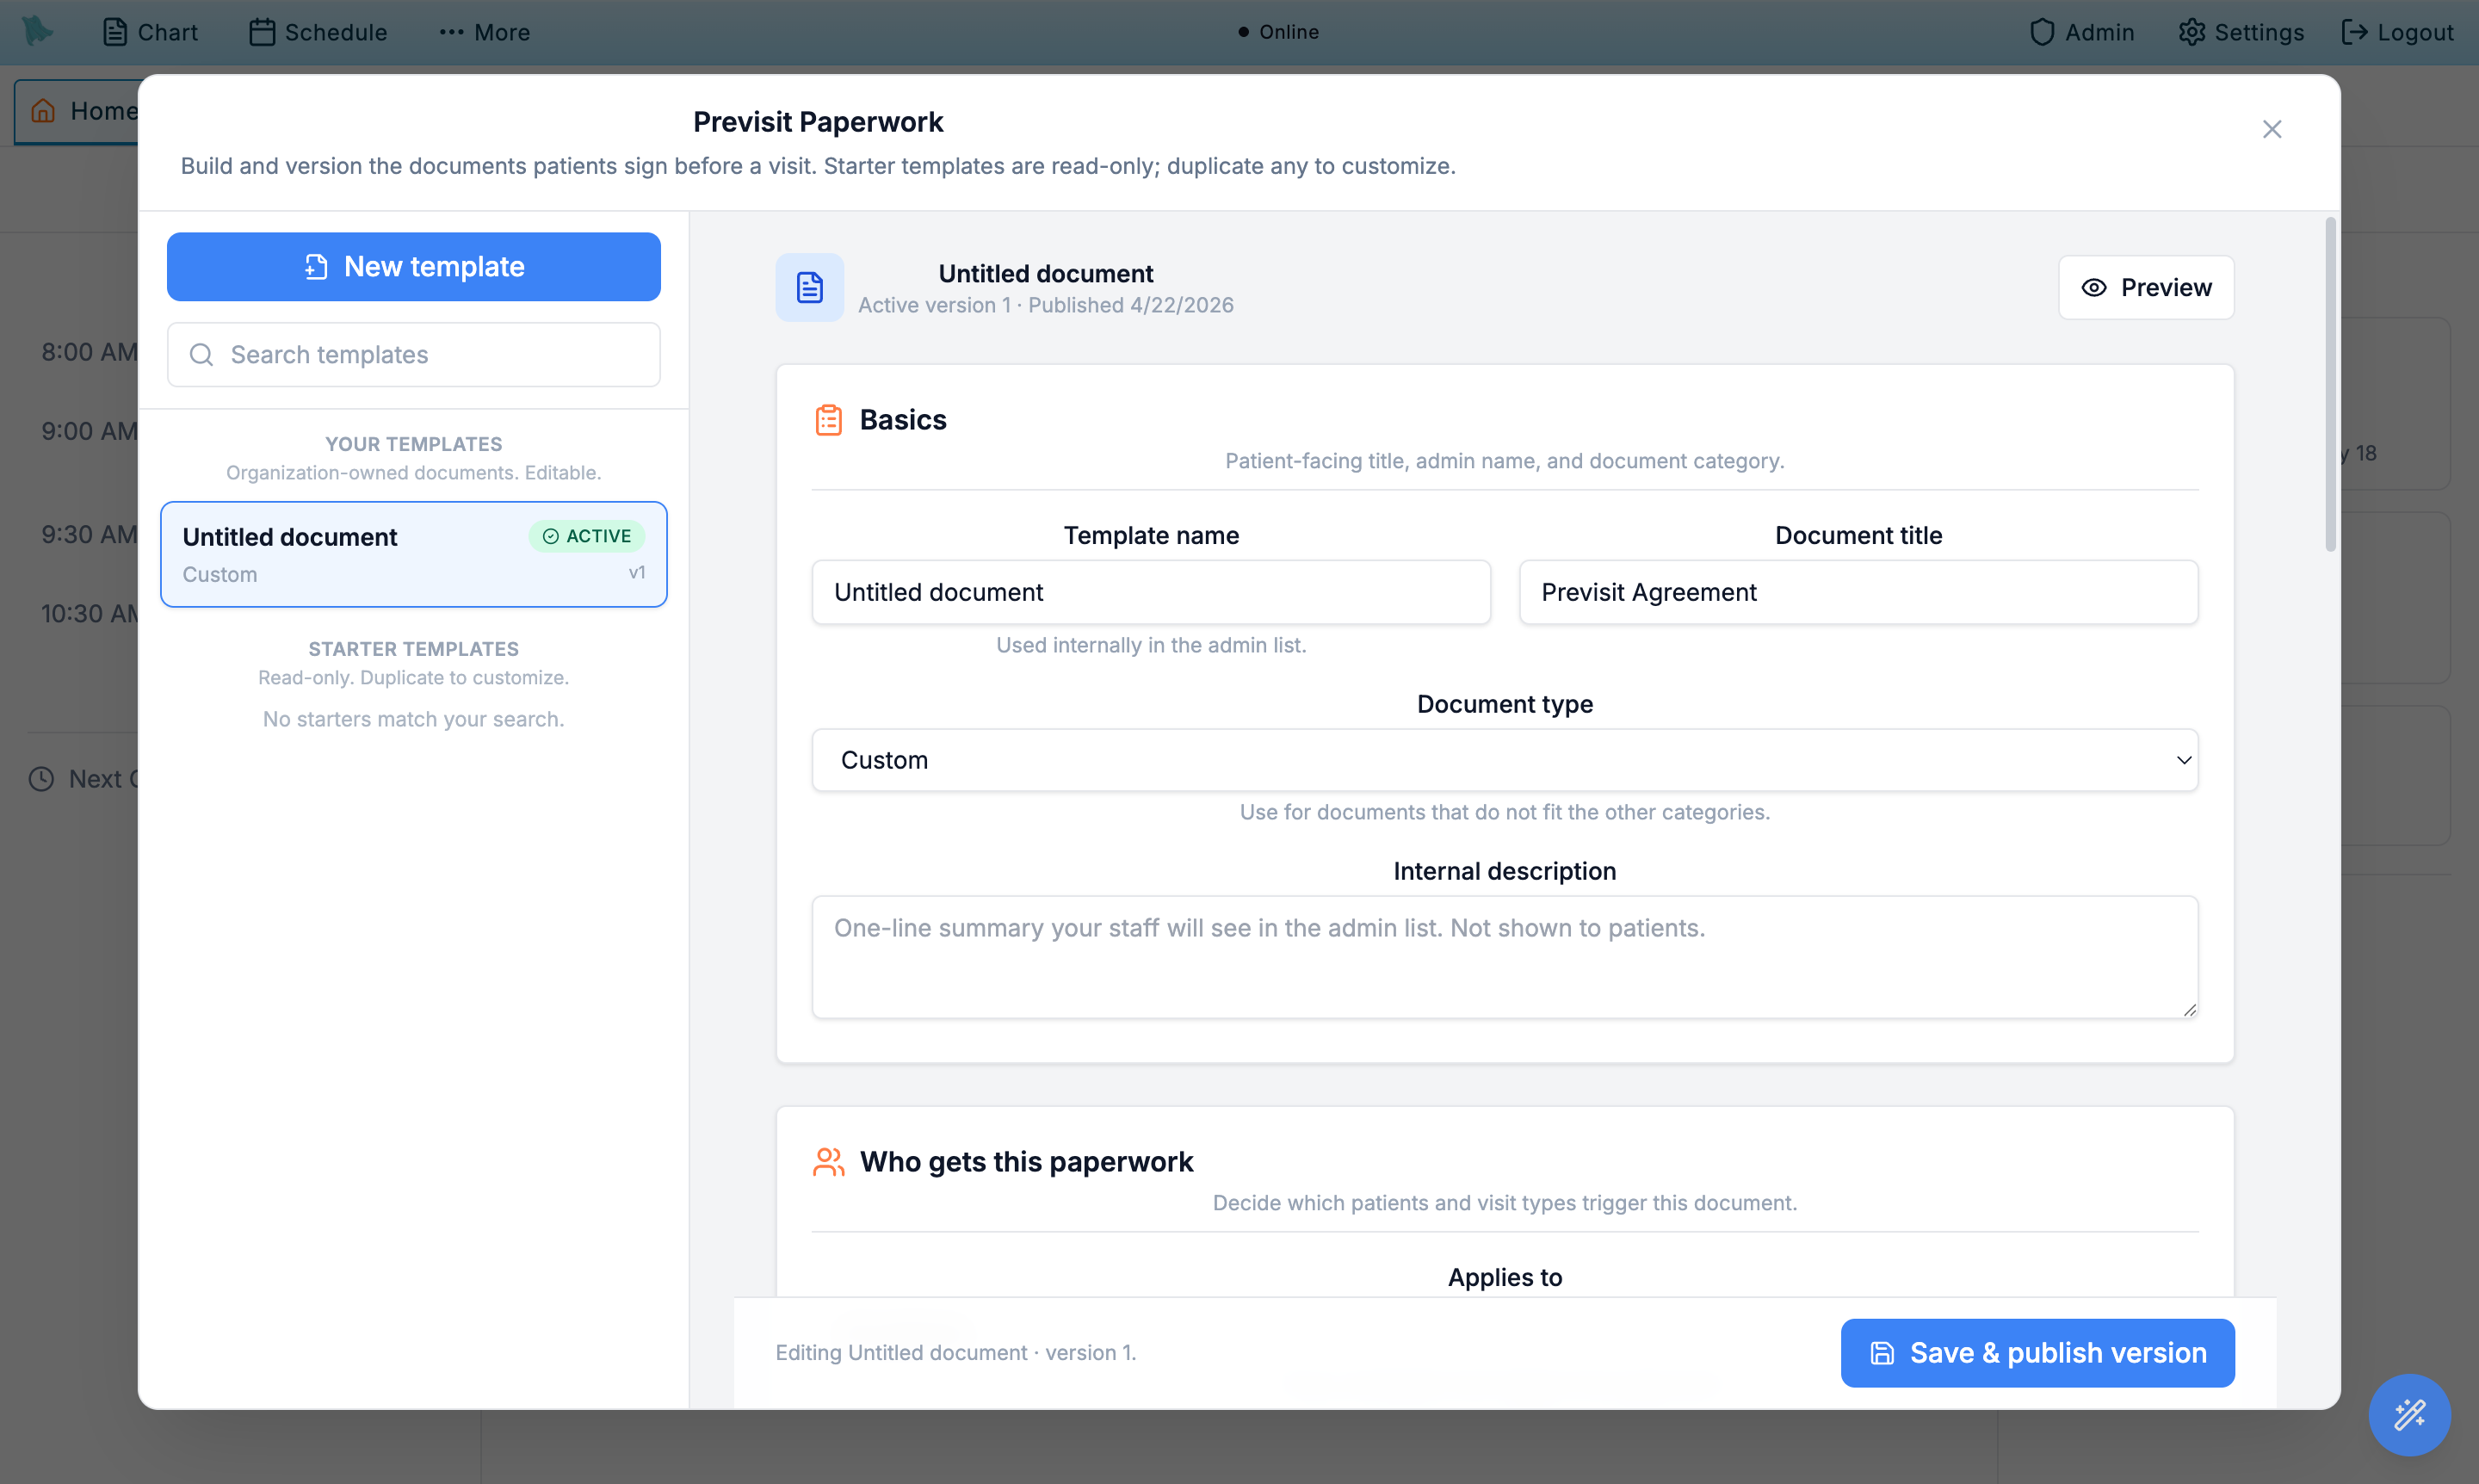
The Basics card is the first card in the editor — the editor cards are stacked and always open, so there is nothing to expand. Basics sets the template's name (internal only), the document title patients see at the top of the form, and the standardized type — which drives reporting and which compliance bucket the document falls into.
- Enter a Template name. Internal label for admins (for example, "2026 HIPAA NPP — Mercer Island ENT"). Patients never see this.
- Enter a Document title. Patient-facing heading rendered at the top of the signing page and on the saved PDF (for example, "Notice of Privacy Practices").
- Pick the Document type. Choose the closest match from the dropdown — HIPAA NPP, Consent to Treat, Financial Policy + AOB, Financial Policy, Payment Responsibility, Communication Preferences, Telehealth Consent, No-Show / Cancellation Policy, Clinical Photography Consent, Release of Information, Controlled Substance Agreement, or Custom.
- Add an Internal description (optional). Notes for your team — when to use the template, which jurisdictions it covers, the legal owner. Never shown to patients.
Decide who gets this paperwork
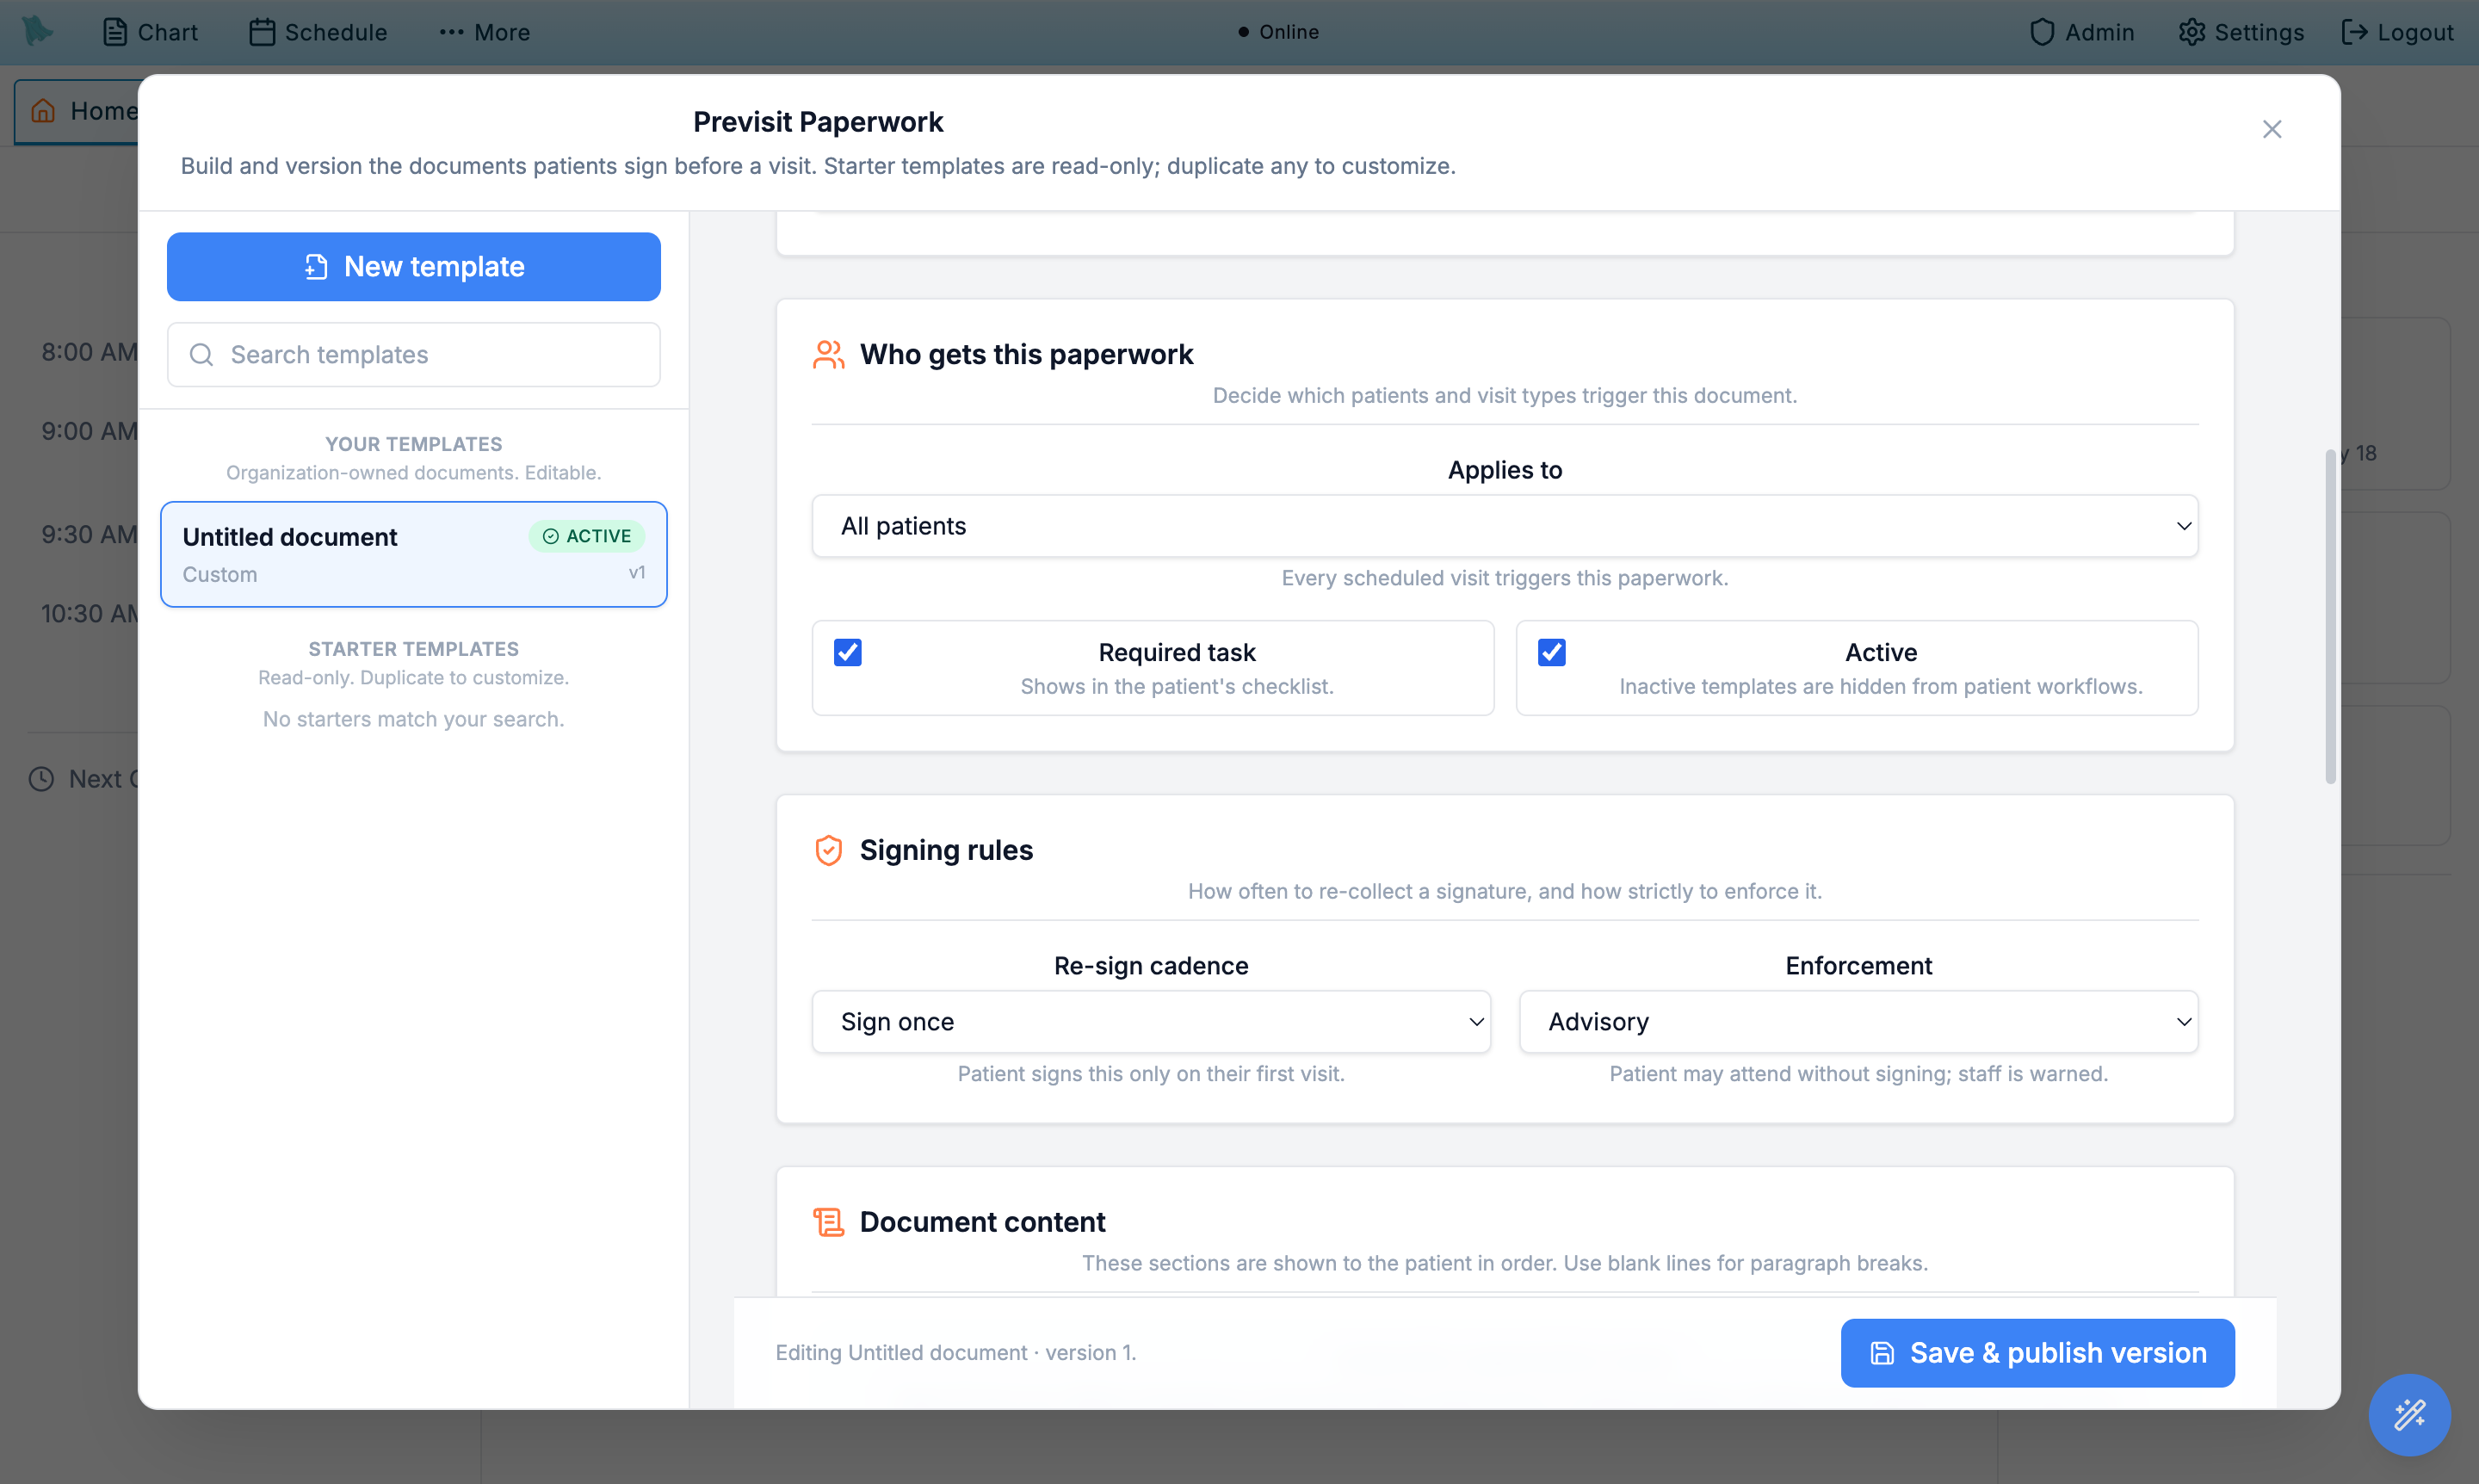
The Who gets this paperwork card controls scoping — its subtitle reads "Choose whether this is auto-assigned or only sent on demand." It determines which visits trigger the document: every booking, only new patients, only specific visit types, only patients living in specific states, or nothing automatic at all. A separate checkbox on the same card sends the document at registration instead of waiting for an appointment.
- Scroll to the Who gets this paperwork card.
- Pick an Applies to mode. Five choices:
- All patients — every scheduled visit triggers the paperwork.
- New patients only — applied when the patient has no prior visits at the practice.
- Specific visit types — applied when the visit type matches. Picking this reveals a checklist of every visit type configured across your physicians.
- Specific patient states — applied when the patient's address is in a matching state. Enter codes as comma-separated, e.g.
CA, NY. Useful for state-specific telehealth or controlled substance agreements. - Manual send only — never auto-added to a visit; staff push it on demand with Send to a patient (§2.4). This is the right setting for a document like a controlled substance agreement that you want on hand but not stapled to every booking.
- Tick Assign and send reminder at patient registration if the form should not wait for an appointment. Its hint says it plainly: "Goes to the patient the moment they register for the portal, with a reminder — no appointment needed. If they book later, this copy becomes the visit's checklist item." This is the setting for an intake packet you want signed before the first visit is even scheduled.
- Toggle Required task if the document must be acknowledged. Required tasks appear on the patient's outstanding-paperwork list. Optional tasks are presented but not blocking.
- Toggle Active to publish or pause the template. Inactive templates do not trigger for new visits, but their existing signed copies stay in patient records. Flipping a template from inactive to active does more than unpause it: Hero EMR backfills the form onto upcoming visits that are already on the calendar, so a batch of patients can gain a new task the moment you save.
Admin > Patient Registration. Adding a second account later (a parent or caregiver) does not send the form again, and neither does re-verifying an existing one. Patients who already had portal access when you ticked the box are not back-filled — push the form to them with Send to a patient (§2.4).
Set the re-sign cadence and enforcement
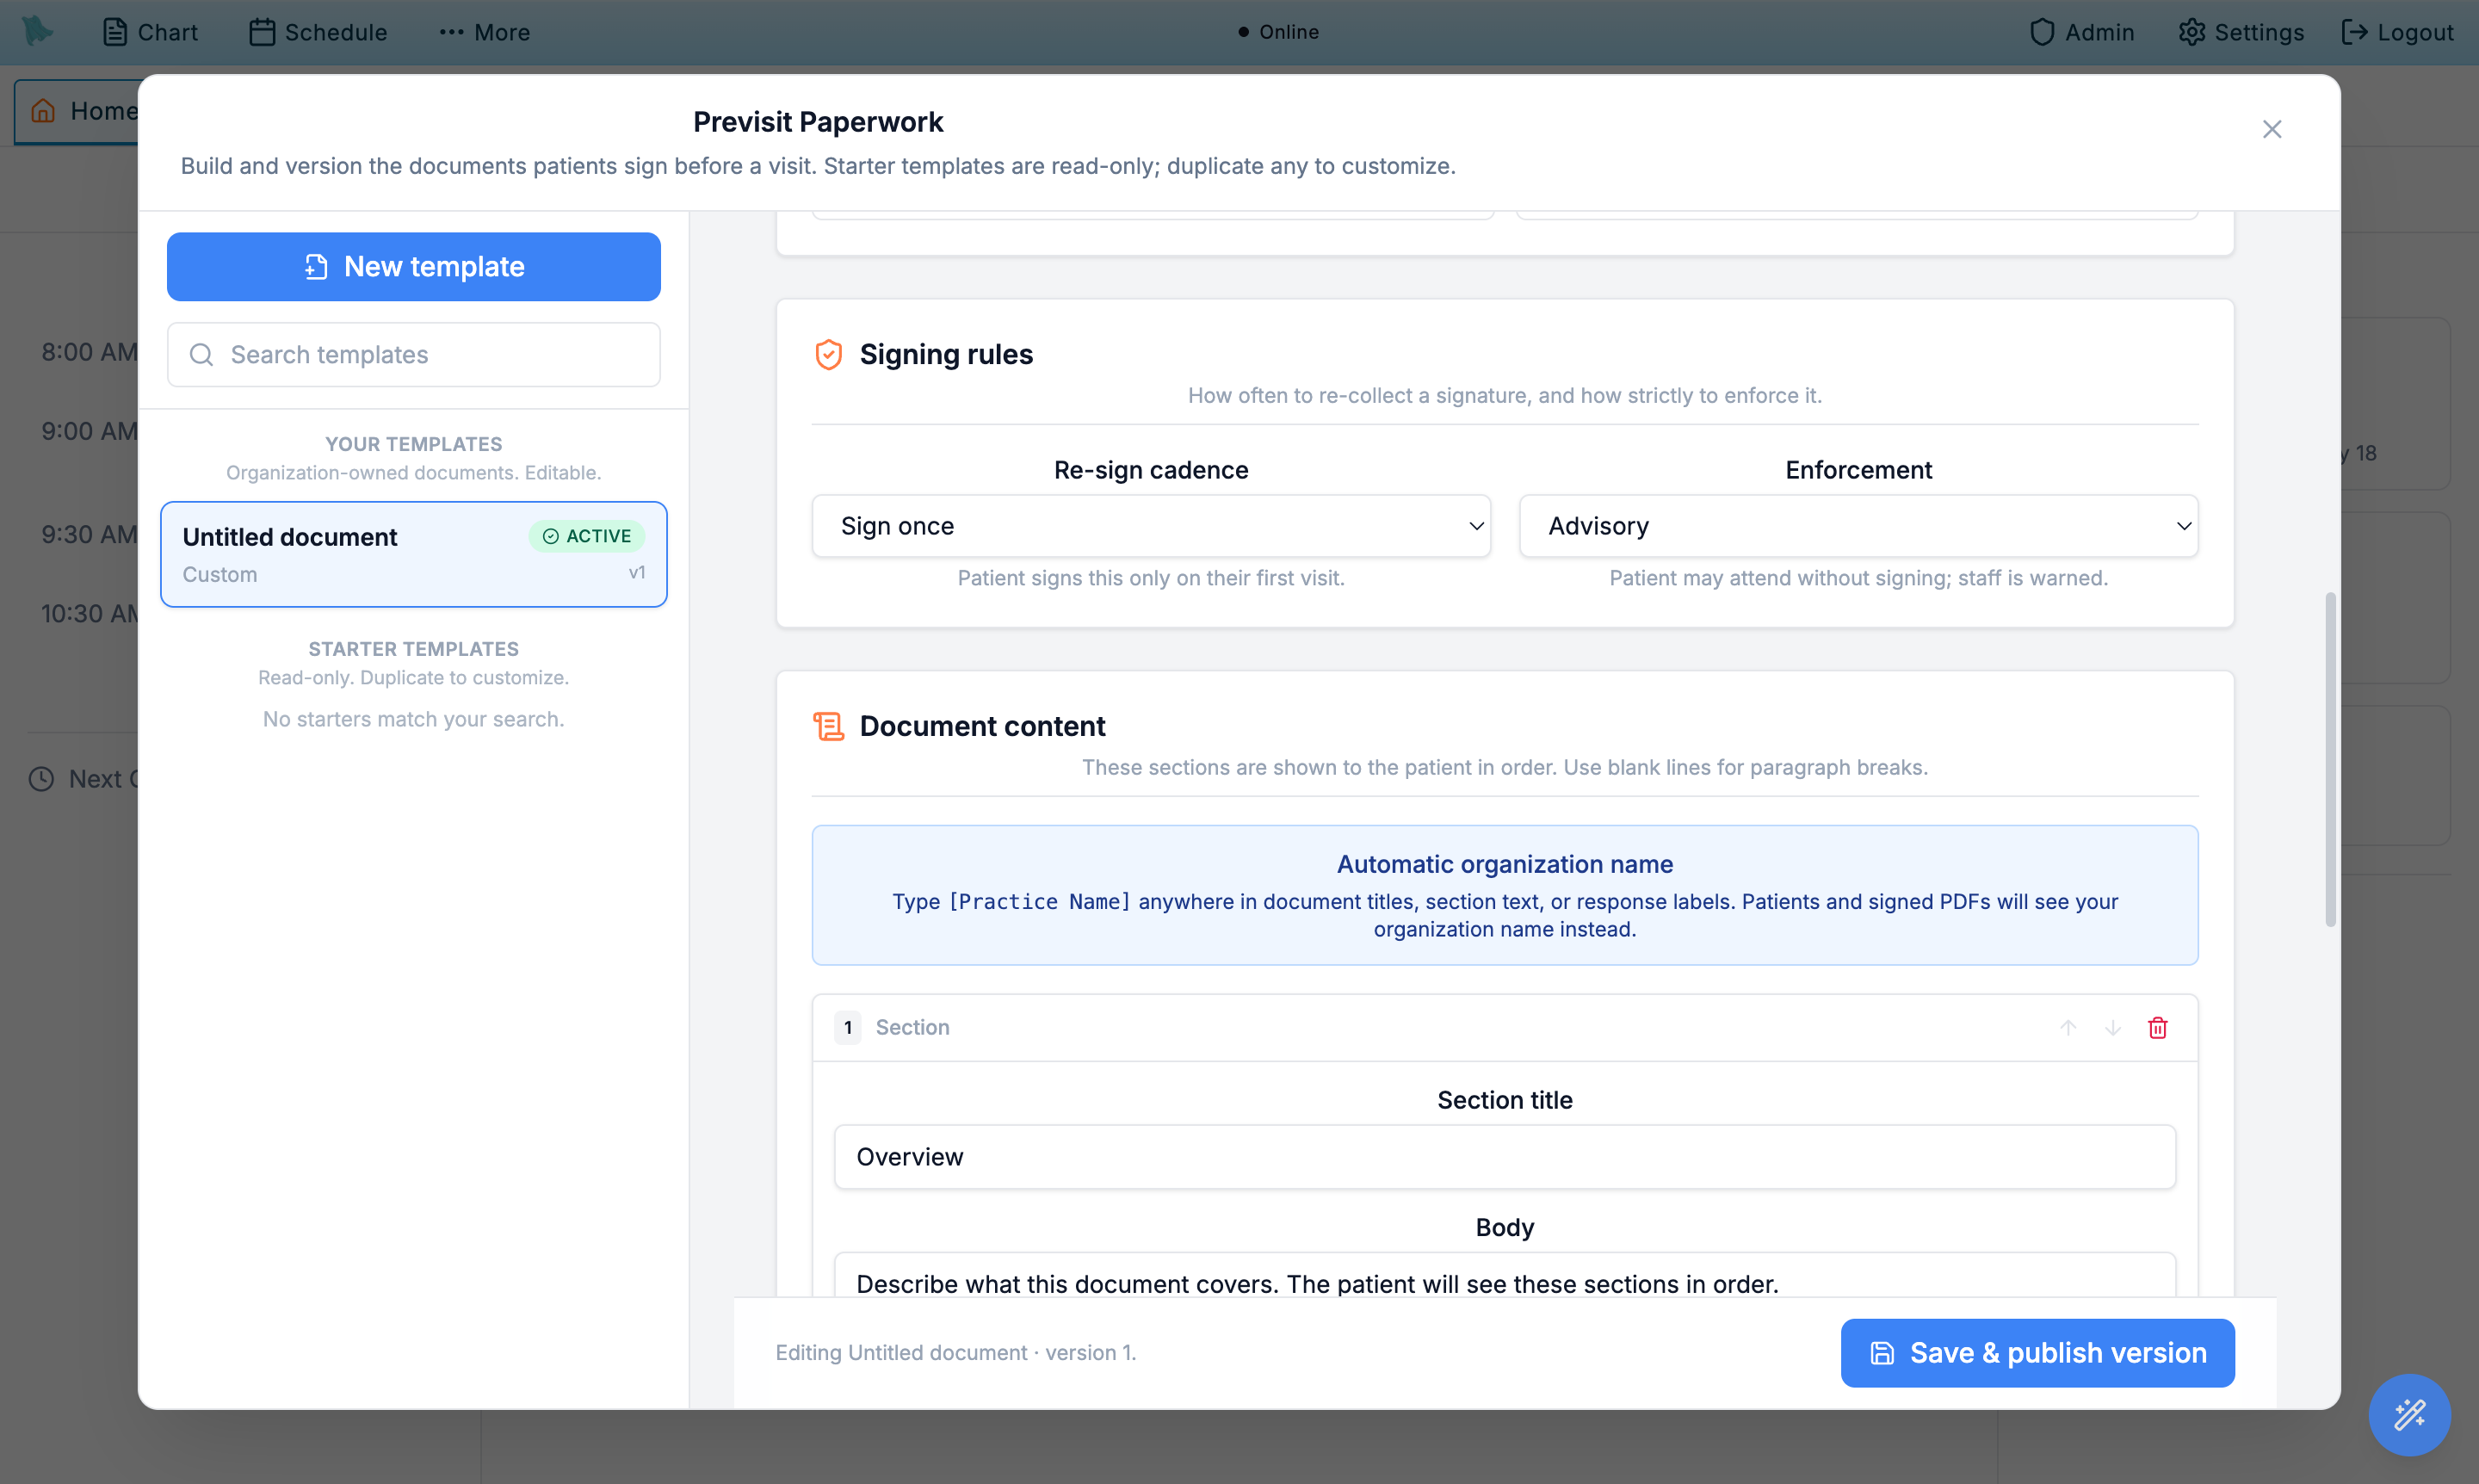
The Signing rules card controls how often a patient re-signs the document and whether an unsigned document blocks the visit. Re-sign cadence ties to your legal/compliance requirements, and enforcement controls whether the front desk can override.
- Pick a Re-sign cadence.
- Sign once — patient signs only on their first visit.
- Annually — re-sign when more than 365 days have passed since the last signature.
- On document change — re-sign whenever you republish a new version of the template.
- Every visit — always required, even if they signed last week.
- Pick an Enforcement level. Advisory means the patient can still attend even if it's unsigned — staff sees a warning. Required blocks the patient: they cannot self check in from the portal or mobile app and cannot join a telehealth visit until it's signed, and they see a "Complete previsit tasks before continuing" message instead. Front-desk staff can still check the visit in from the EMR, so an unsigned required document never strands someone standing at the desk.
Write the document content
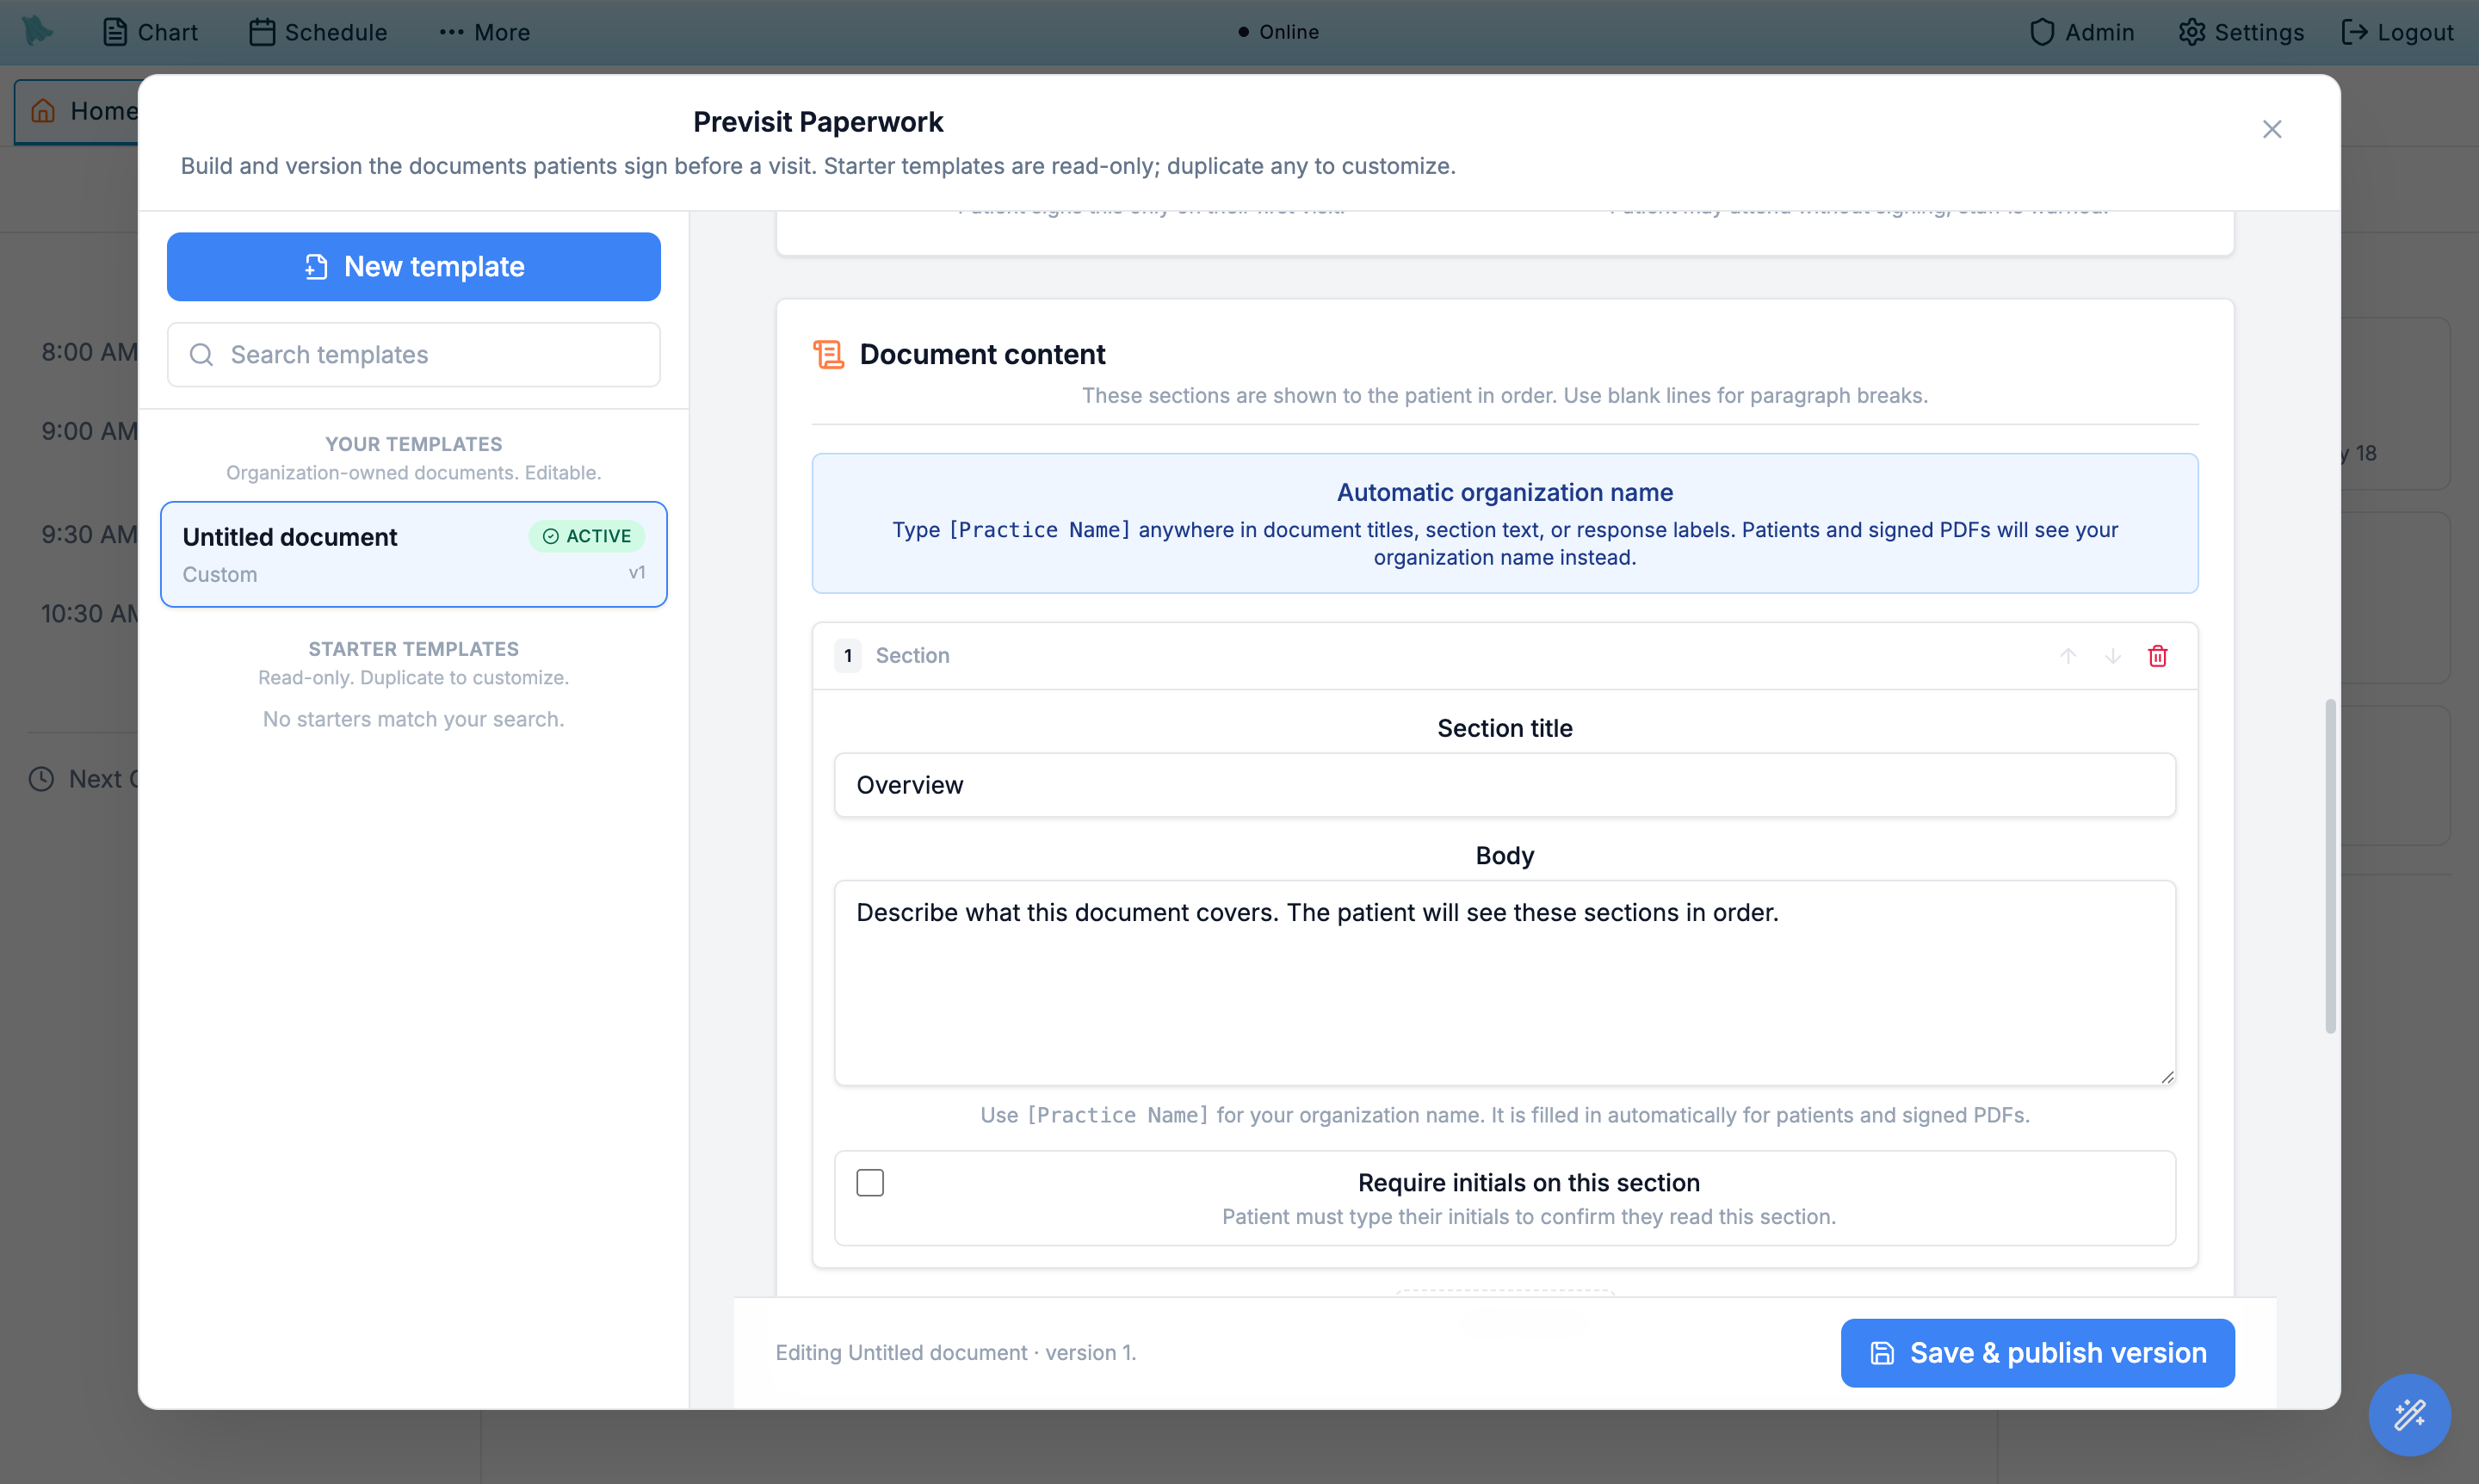
The Document content card holds the readable body of the document. Content is broken into numbered sections so patients can be required to initial individual provisions (HIPAA right to disclosures, telehealth limitations, payment policy, etc.).
- Scroll to the Document content card. A new template starts with one section already titled Overview, carrying the placeholder body "Describe what this document covers. The patient will see these sections in order." — replace that text rather than leaving it. Starter templates come pre-populated with standard language.
- Click Add section for each provision you need. Each section is a discrete block — title plus body.
- Fill in the Section title and Body. Use blank lines in the body to create paragraphs. The patient sees each section numbered and titled.
- Toggle Require initials on this section when a section needs separate acknowledgement. Required-initials sections show an initials button next to them on the patient side. The final signature alone is not enough.
- For an opt-in provision, also toggle Allow the patient to decline (optional / opt-in). This second toggle appears only once Require initials is on. The patient then sees both Initial and Decline: declining does not block submission, and the refusal is recorded affirmatively as
DECLINEDin the signed record rather than left blank. This is how you author per-provision opt-ins — marketing photo use, directory listing, research contact — inside an otherwise mandatory document. - Reorder sections. Use the up/down arrows on each section card to move it. Section numbers update automatically.
- Use the
[Practice Name]placeholder. Anywhere you'd write the practice's legal name, type[Practice Name]instead. At signing time the placeholder is replaced with your organization's name on screen and in the saved PDF.
Add patient response fields
The Patient response fields card is where you collect structured input — acknowledgement checkboxes, free-text answers, dates. Each response field is a single, ordered input that appears below the document body.
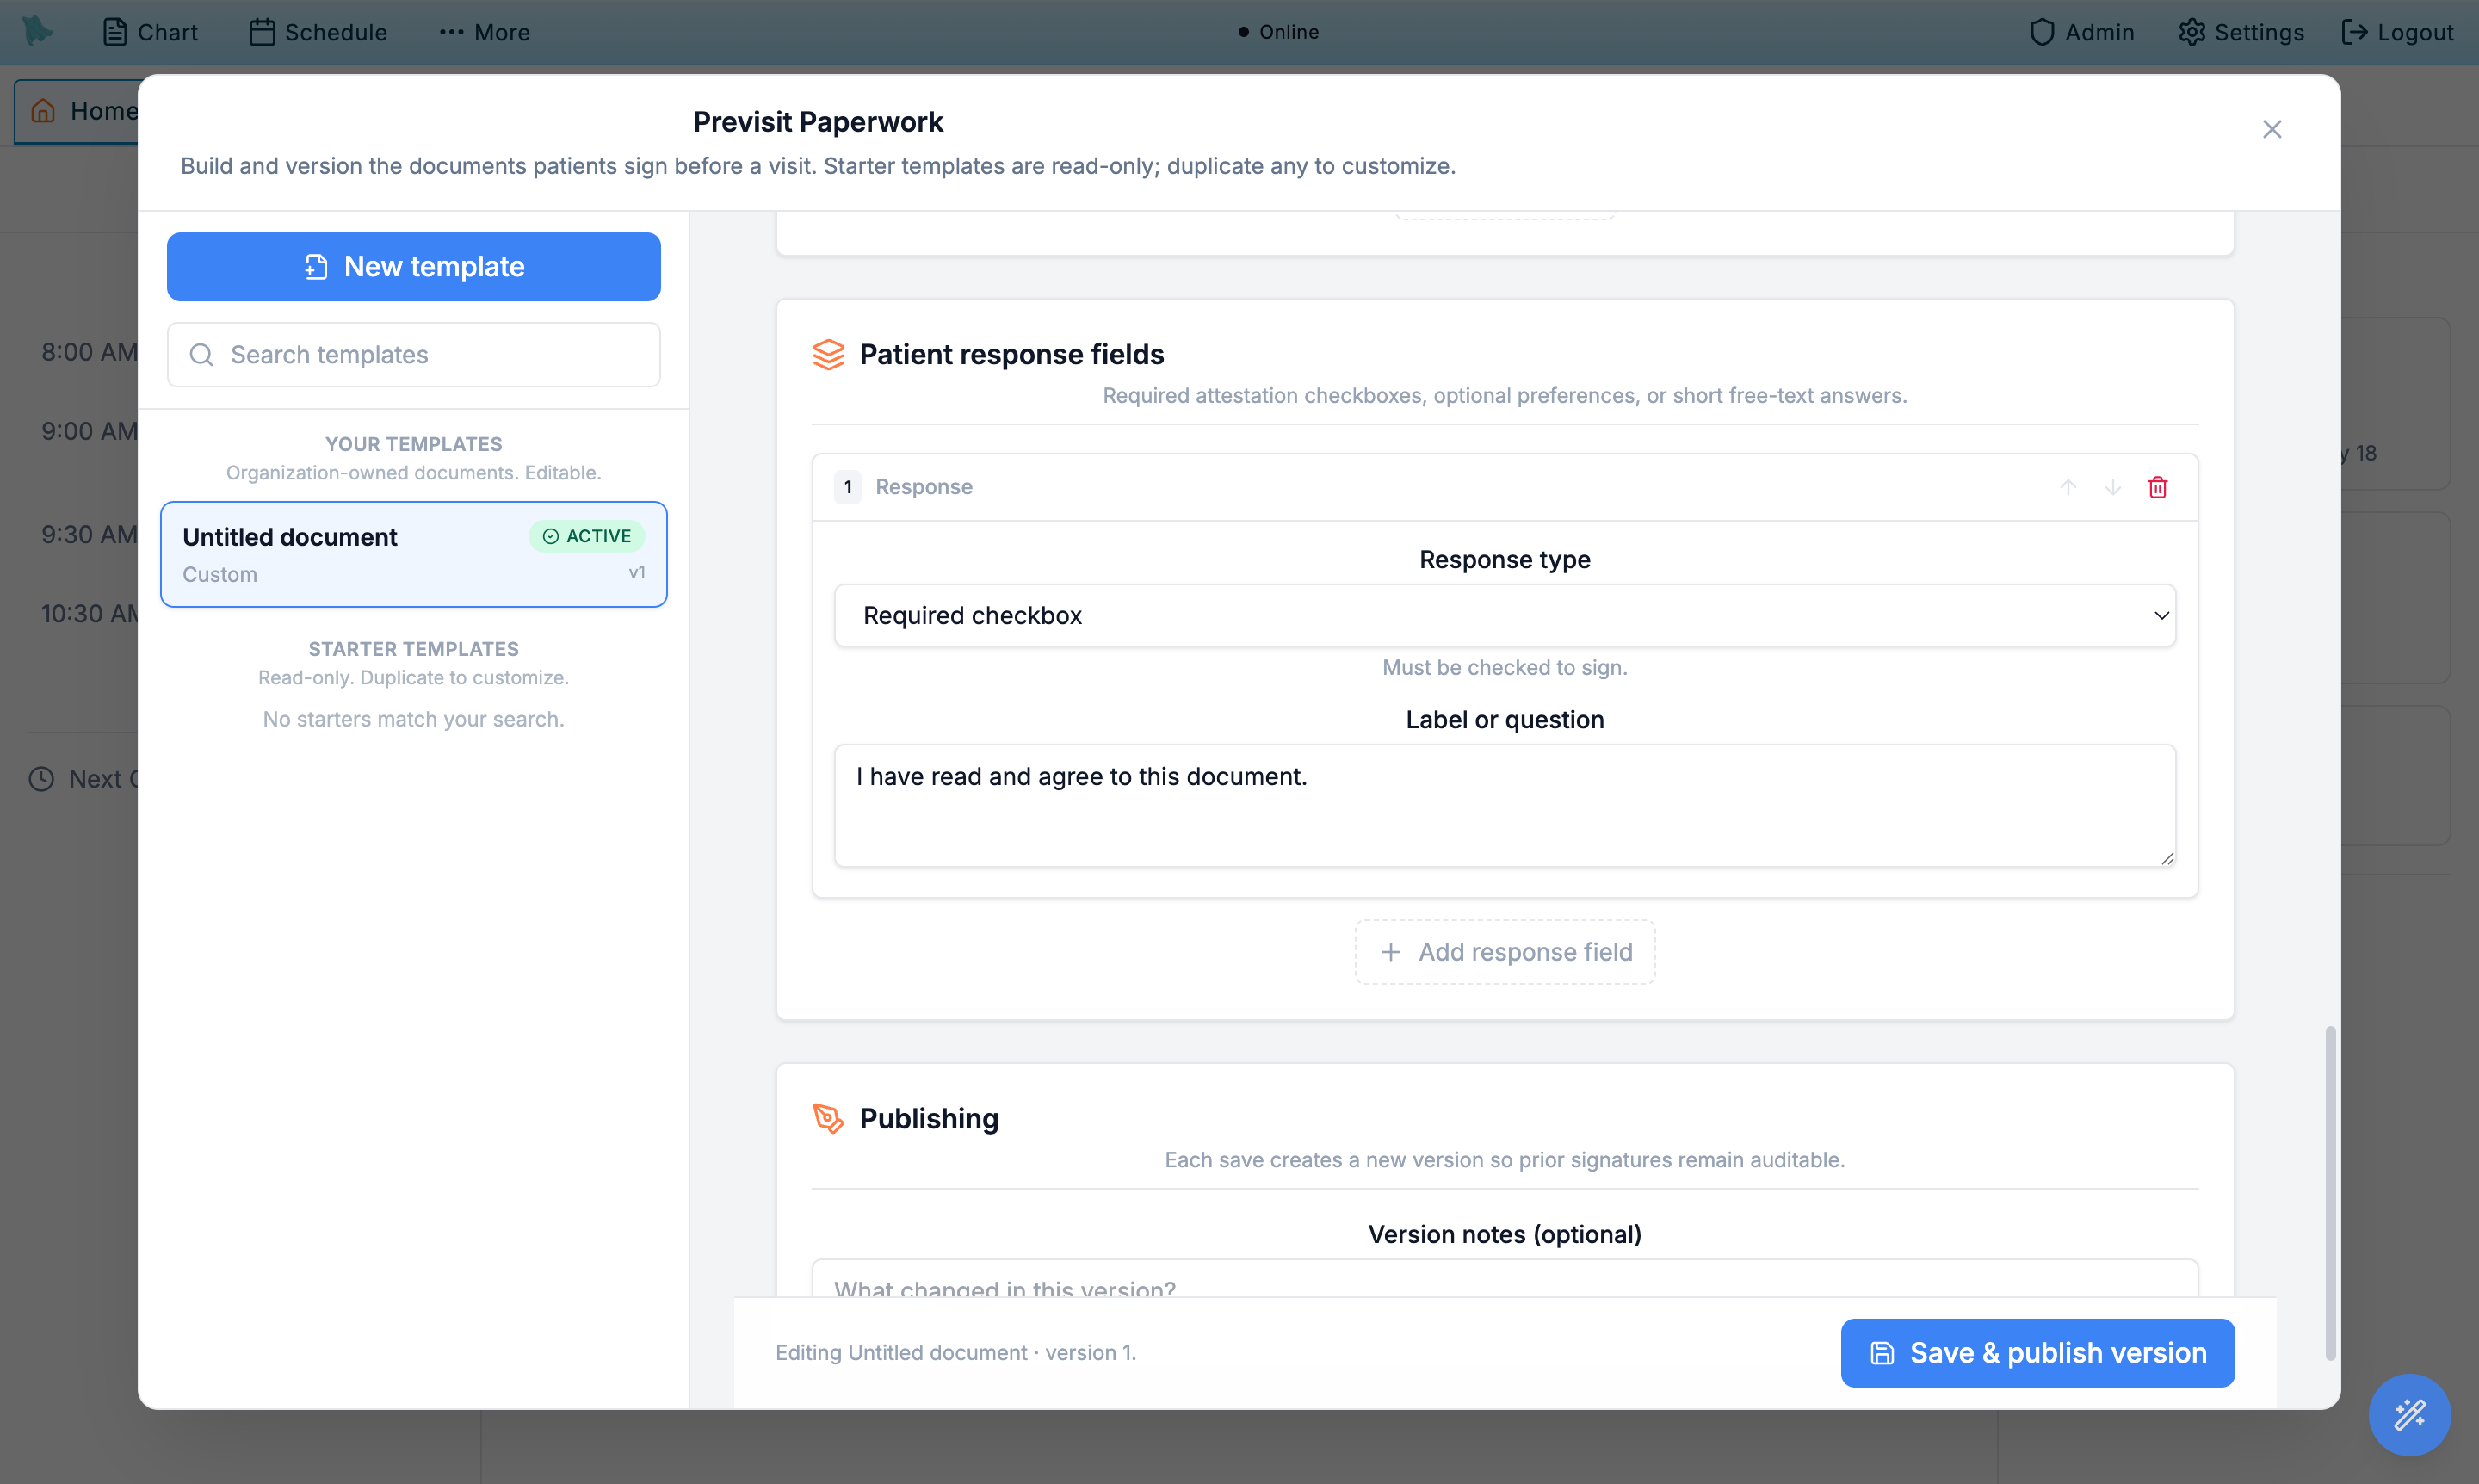
- Scroll to the Patient response fields card. A new template already contains one required attestation checkbox labelled "I have read and agree to this document." — edit or delete it as needed. Add more fields with Add response field.
- Pick a Response type.
- Required checkbox — patient must check the box to continue.
- Optional checkbox — presented pre-checked; the patient may uncheck it. This is an opt-out control, not an opt-in one.
- Short text — single-line input.
- Long text — multi-line input for narrative answers.
- Date — date picker, useful for declaration dates or witness dates.
- Write the Label or question. This is the prompt patients see next to the field. Be explicit ("I have received the HIPAA Notice of Privacy Practices.").
- For text and date types, toggle Require a response. Required fields block submission until filled in.
- Reorder or delete fields as needed. Use the arrows or trash icon on each field card.
Add version notes and publish
Every save creates a new version. The version number is shown in the editor header and in the sidebar; prior versions remain attached to the signatures captured on them, so historical audit trails are preserved.
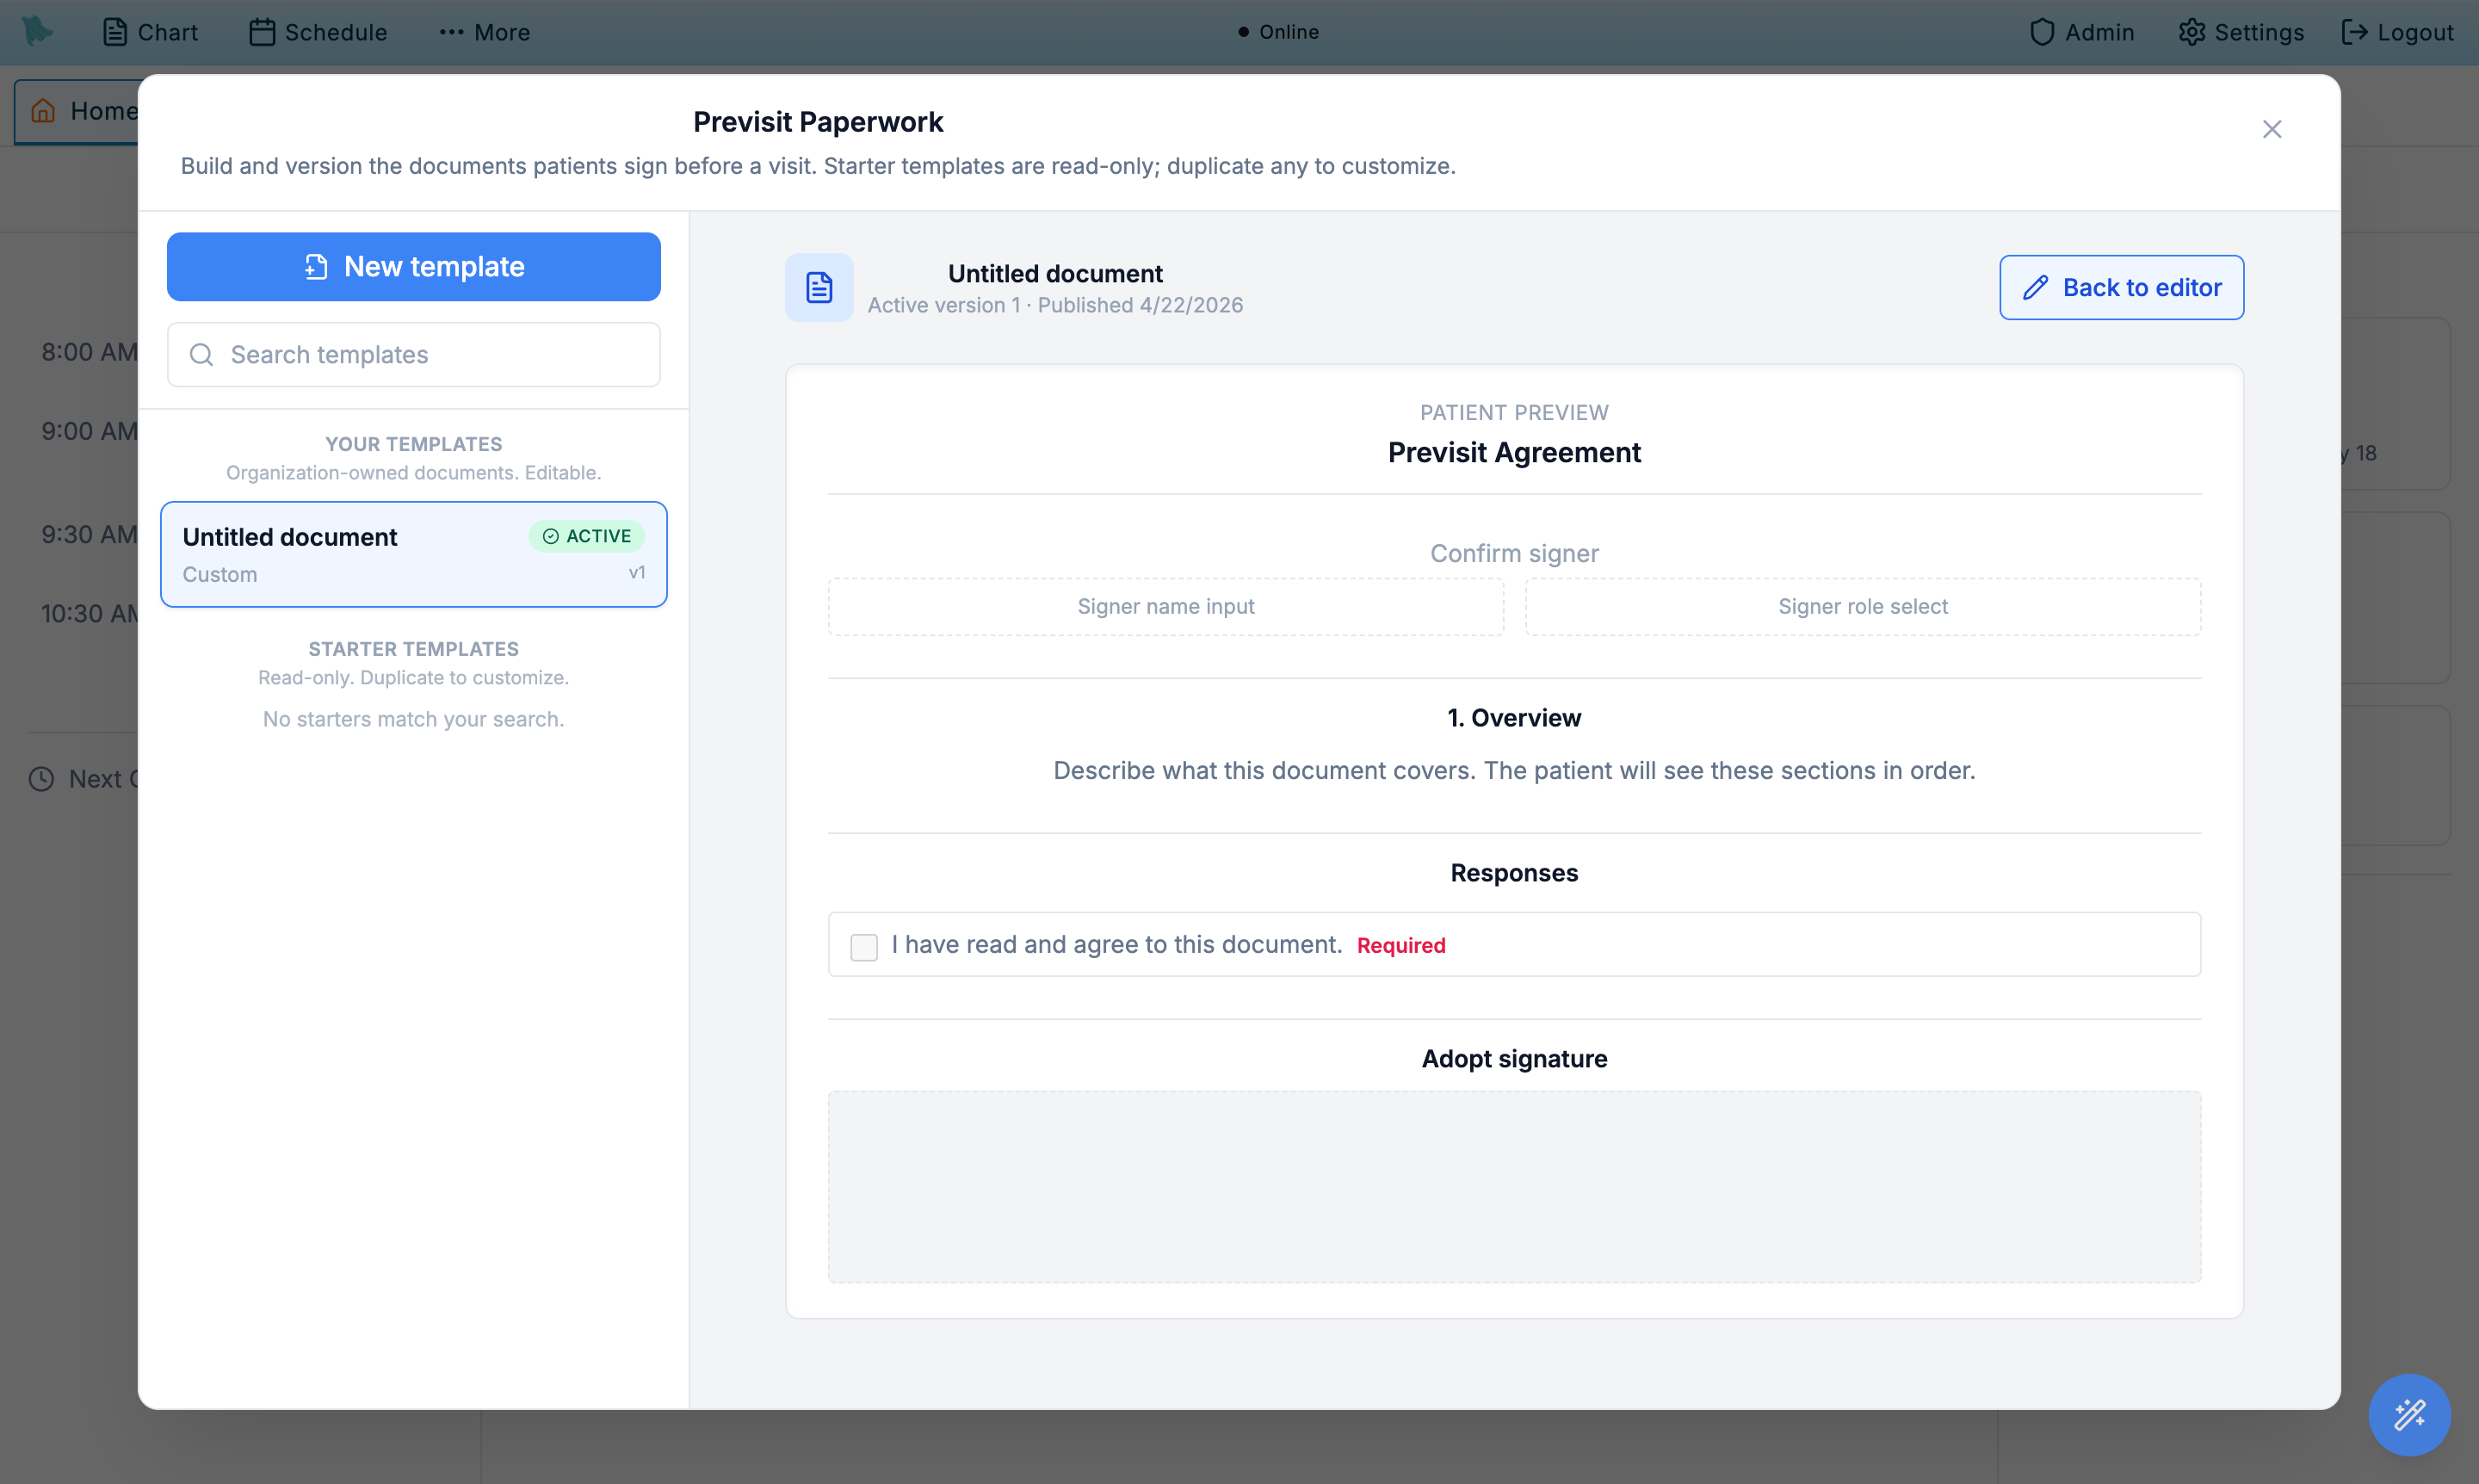
- Open the Preview toggle in the header. The preview pane renders exactly what the patient will see — title, sections, response fields, and the signature block.
- Walk through each required-initials section and response. Spot anything that reads awkwardly on a phone, missing punctuation, or unclear labels.
- Switch back with Back to editor and fix issues.
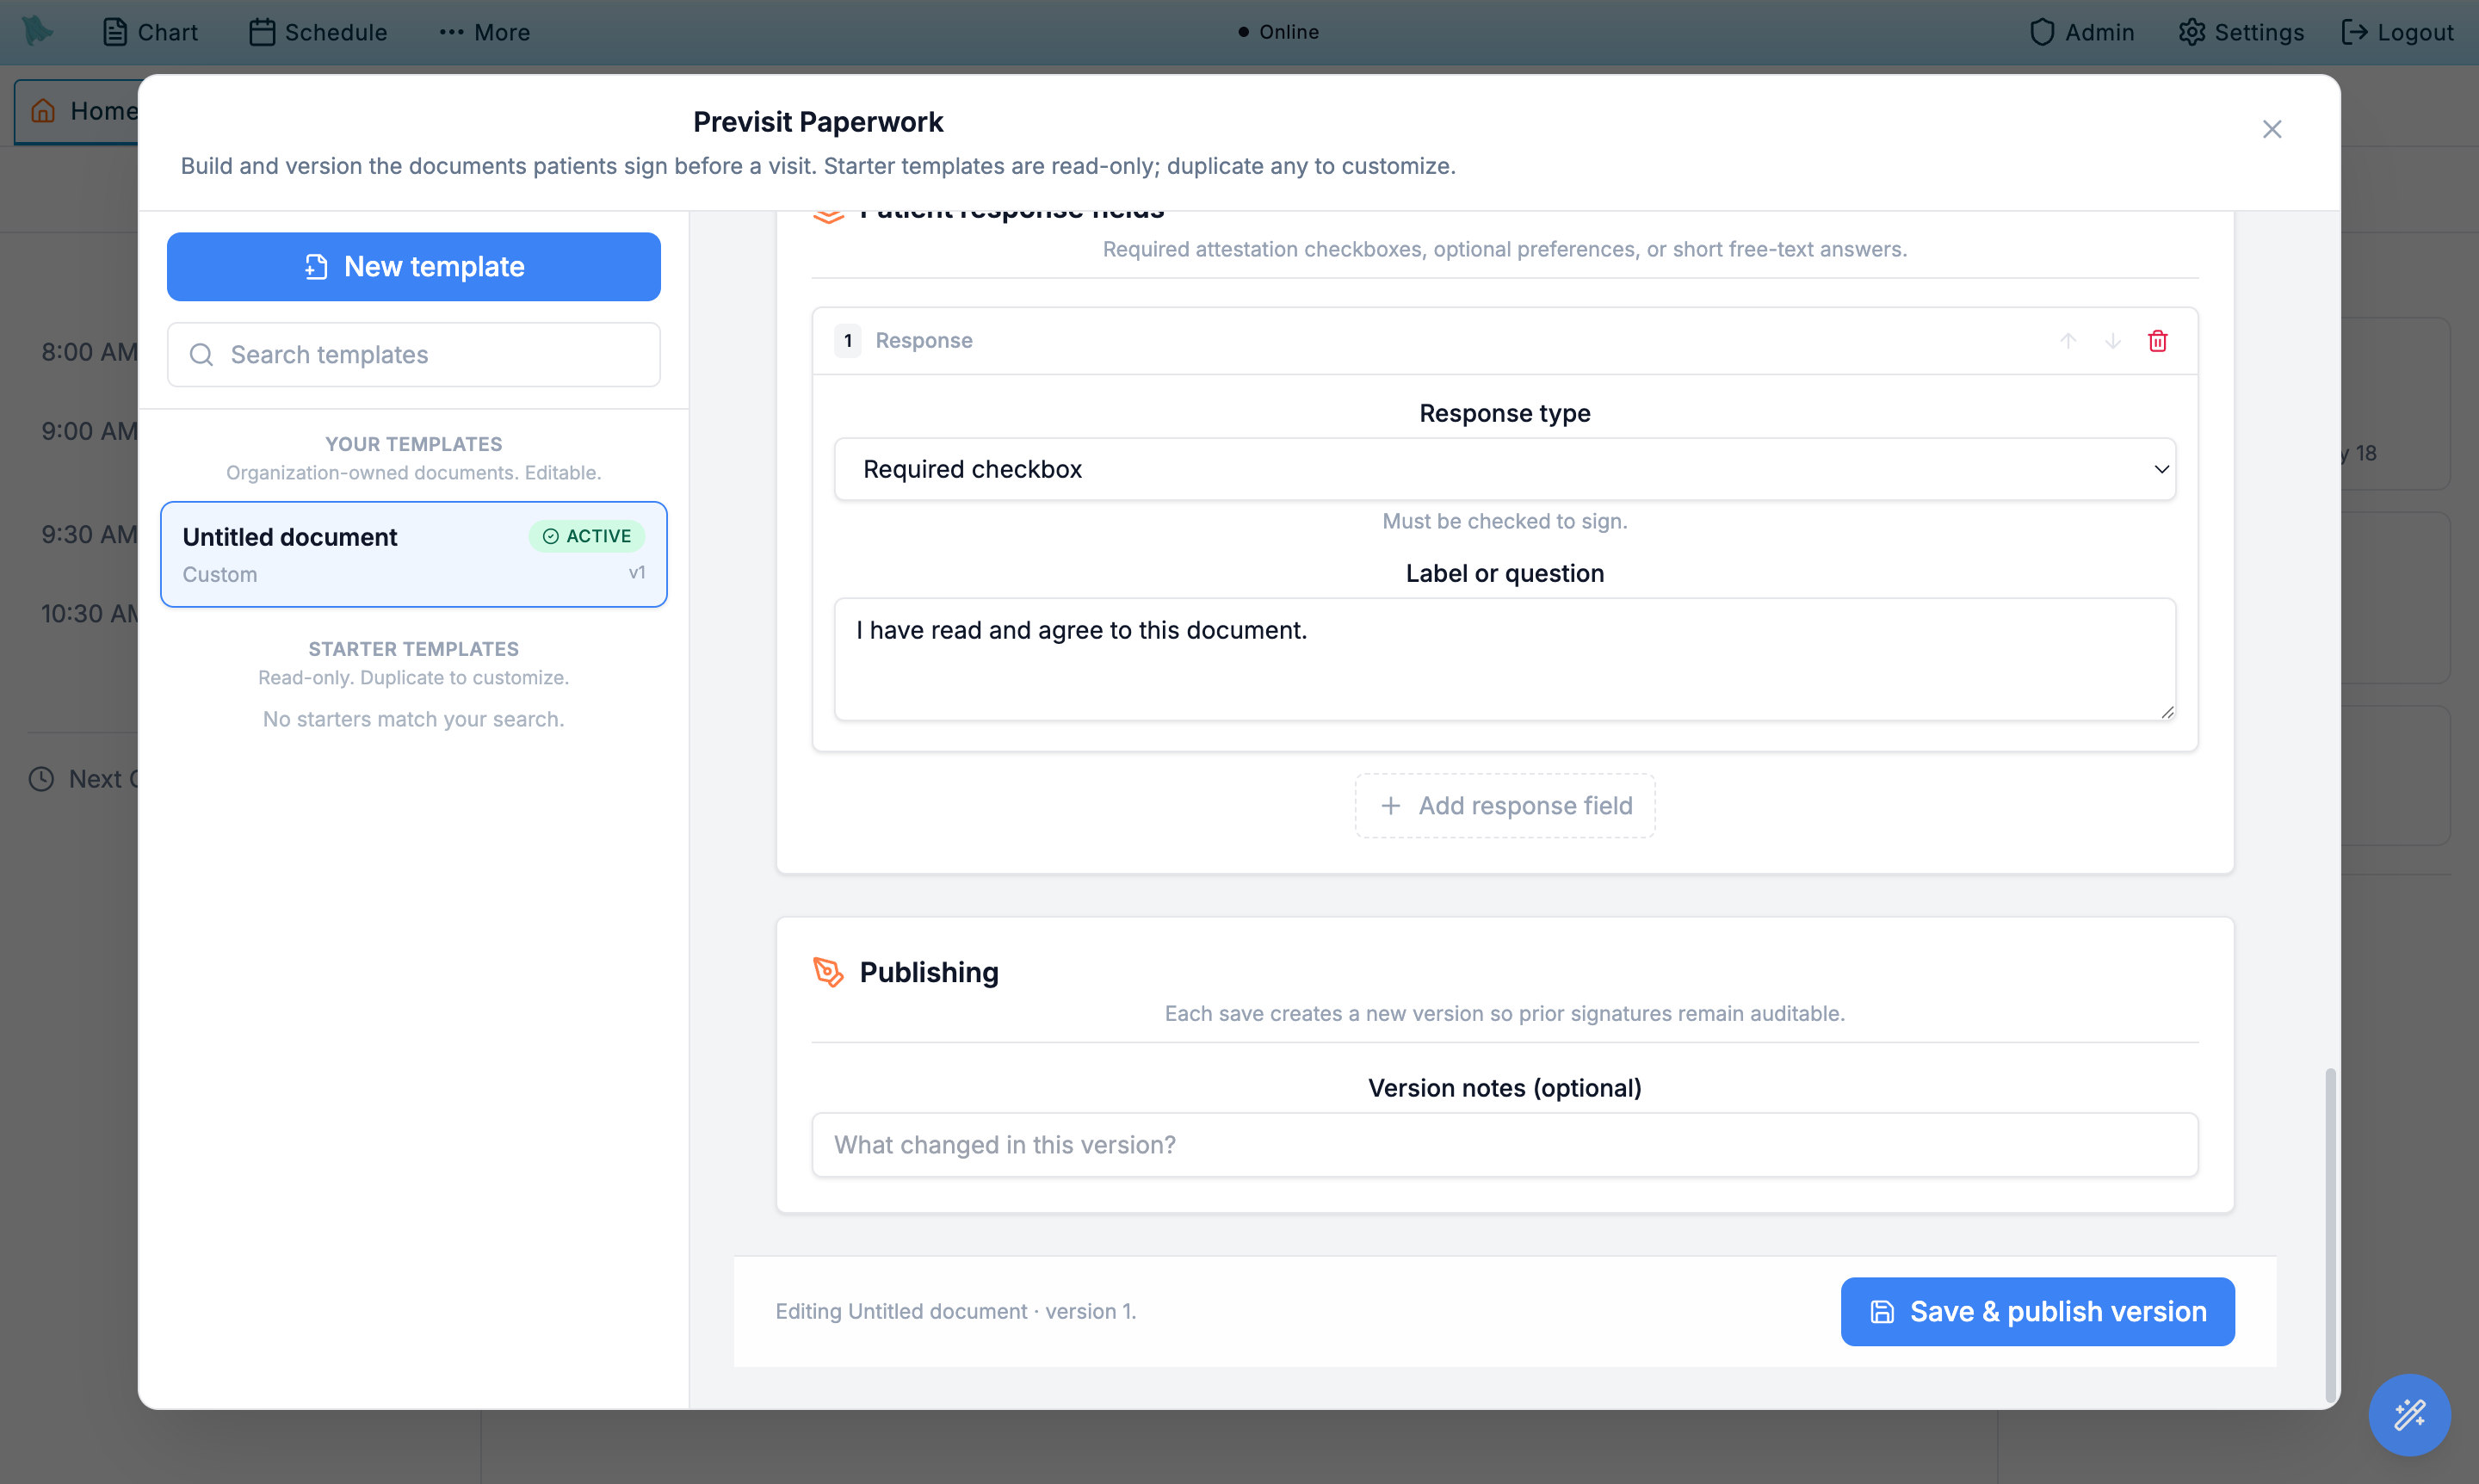
- Add Version notes in the Publishing card. Optional, but recommended — note what changed and why ("Updated HIPAA section 4 for 2026 OCR guidance"). The version note appears in the audit log next to the resulting signatures.
- Click the primary button in the sticky footer. It reads Create template on a brand-new template and Save & publish version when you are editing an existing organization template. (On a read-only starter the same slot shows Duplicate to edit instead.) The new version goes live immediately. If Re-sign cadence is set to On document change, applicable patients are asked to re-sign the next time a visit is booked or rescheduled — republishing does not add a re-sign task to an appointment already on the calendar. Only turning a template's Active toggle on backfills already-scheduled visits (§2.6).
What the patient experiences
Once both features are configured, patients see a single pre-visit checklist after they book — questionnaires and paperwork rolled together — accessible from the portal, the booking confirmation email, and the SMS reminder. Anything assigned at registration reaches them earlier than that, as standing tasks on the portal home.
Booking and the checklist
- Patient books an appointment. Hero EMR evaluates every questionnaire rule and every paperwork template against the new visit and pulls the matching items into a checklist. Rescheduling re-runs the same evaluation.
- The portal surfaces the checklist. The appointment shows its pre-visit tasks as a list with a completed-of-total progress bar; finished items drop out of the outstanding group. Anything sent without an appointment — a form pushed with Send to a patient (§2.4), and everything assigned at registration — waits on the portal home instead: forms under Forms to sign, questionnaires under Questionnaires to complete beside it.
- Reminders nudge incomplete items. When pre-visit work is still outstanding, Hero EMR sends reminders 14 days, 7 days, and 1 day before the visit, routed to the best available channel. For minors and parent-managed teens the reminder goes to the guardian, not the patient.
Completion and signing
- Questionnaires fill in like a survey. Question types render natively (Likert scales, multi-select, text). Answers are saved to the encounter and made available to the physician in the chart.
- Paperwork shows the document, initials, responses, and signature. Required initials and response fields must be completed before signing. Opt-in sections can be initialed or declined; the decline is recorded, not left blank.
- The signer block must be completed too. Submission is refused without a signer name, and a signer other than the patient (parent, legal guardian, power of attorney, other) must also state the relationship. The patient acknowledges the electronic-records consent before the signature is accepted; the signature itself is typed, drawn, or an uploaded wet-ink scan.
- Saved PDFs go to the chart. Each completed document is rendered to PDF and stored on the patient. Re-signs append; they do not overwrite.
Common questionnaires & paperwork issues
Questionnaire isn't appearing
- Confirm pre-visit intake is turned on for that visit type. Booking rules never run without it — the rule list shows a Won't send — pre-visit intake is off badge, and the visit type reads (pre-visit intake off) in the dropdown. Turning it on only affects visits booked from that point forward.
- Confirm a rule exists for that physician and visit type combination — rules are per-physician, not org-wide.
- Check for a patient-level rule on that patient. Patient rules always supersede the practice-wide rule for the same questionnaire and can suppress it outright. Look under patient header → Questionnaires tab.
- Check the optional filters. A rule with a Visit Mode of telehealth-only will never fire for in-person visits, and Days Until Visit is a maximum — a rule set to 7 skips a visit booked a month out.
- Confirm the questionnaire itself is active. Deactivated questionnaires drop out of rules silently.
- Confirm the visit type still exists on the physician's visit catalog. Renaming or removing a visit type can orphan its rule.
Nothing arrived when the patient registered
- For a questionnaire, confirm the rule's When is At patient registration. A booking rule does not fire on a registration, and a registration rule does not fire on a booking (§2.3).
- For a form, confirm Assign and send reminder at patient registration is ticked on the template. The Applies to mode on its own never sends at registration (§2.6).
- Confirm the patient actually registered after you turned it on. Registration fires once, when the portal account is first attached to the chart; existing portal patients are never back-filled.
- A Sign once form the patient has already signed is not re-sent, and a questionnaire that is already sitting in their queue is not duplicated — so a second registration event correctly produces nothing.
- No reminder goes out when nothing matched. If the patient's only registration rule filtered them out on age, sex, language, or ICD-10, there is nothing to announce.
- Check the patient's contact preferences. The reminder rides whichever channel they allow; a patient with no reachable channel is assigned the work but not messaged.
Paperwork isn't appearing
- Confirm the template's Active toggle is on. A duplicated starter arrives inactive and assigns nothing until you turn it on.
- If the Document type is Telehealth Consent, confirm the visit type is flagged as telehealth. That check runs ahead of Applies to, so the document skips in-person visits even when scoped to all patients.
- If Applies to is Manual send only, nothing is auto-assigned to a visit by design — push it with Send to a patient, or tick the registration checkbox so it goes out at sign-up.
- If scoped to Specific visit types, confirm the booked visit type is in the checklist.
- If scoped to Specific patient states, confirm the patient's address has a matching state code — this applies at registration too.
- If scoped to New patients only, confirm the patient truly has no prior visits — a no-show counts as a prior visit.
- Republishing alone does not touch appointments already on the calendar; only activating the template backfills them.
Patient says they already signed
- Check the document's Re-sign cadence. If set to On document change, a republish will ask everyone to sign again.
- Annually triggers when the last signature is more than 365 days old.
- Every visit is intentional — used for telehealth consent and controlled substance agreements where each encounter needs its own signature.
Saved a version by mistake
- Open the template again, fix the issue, and click Save & publish version. The corrected version becomes current.
- Patients who already signed the bad version stay attached to it — the audit log keeps both rows.
- For HIPAA NPP and similar regulated documents, document the correction in Version notes so the audit trail explains why two versions exist.
Need help? Email support@heroemr.com.